Central component – replacing a bicycle bottom bracket
The inner bearing – also known as the bottom bracket – is a central component on a bicycle. Here, the axle of the pedal cranks rotates in the frame, which in turn set the chainrings in motion and drive the bike. Depending on the driving style, it has to withstand over a hundred revolutions per minute. If it is worn or damaged, you should replace it to maintain or restore the safe functioning of the drive. But how does damage show itself and what points should you consider for a replacement?
1. How do you recognise a defect?
If your bike cracks and creaks every time you pedal, the reason is most likely a worn or defective bottom bracket. But there are also other indications that allow you to recognise a broken inner bearing: In addition to noise, for example, stiffness or lateral play of the cranks. You can check if the bearing is running smoothly by removing the chain from the chainring and turning the cranks by hand. Lateral play is also best checked manually. To do so, hold both pedals in your hands and try to move the cranks forward and backward in a sideways direction. If you notice one or more of these defects, you should check and replace your inner bearing.
2. What types of bearings are there?
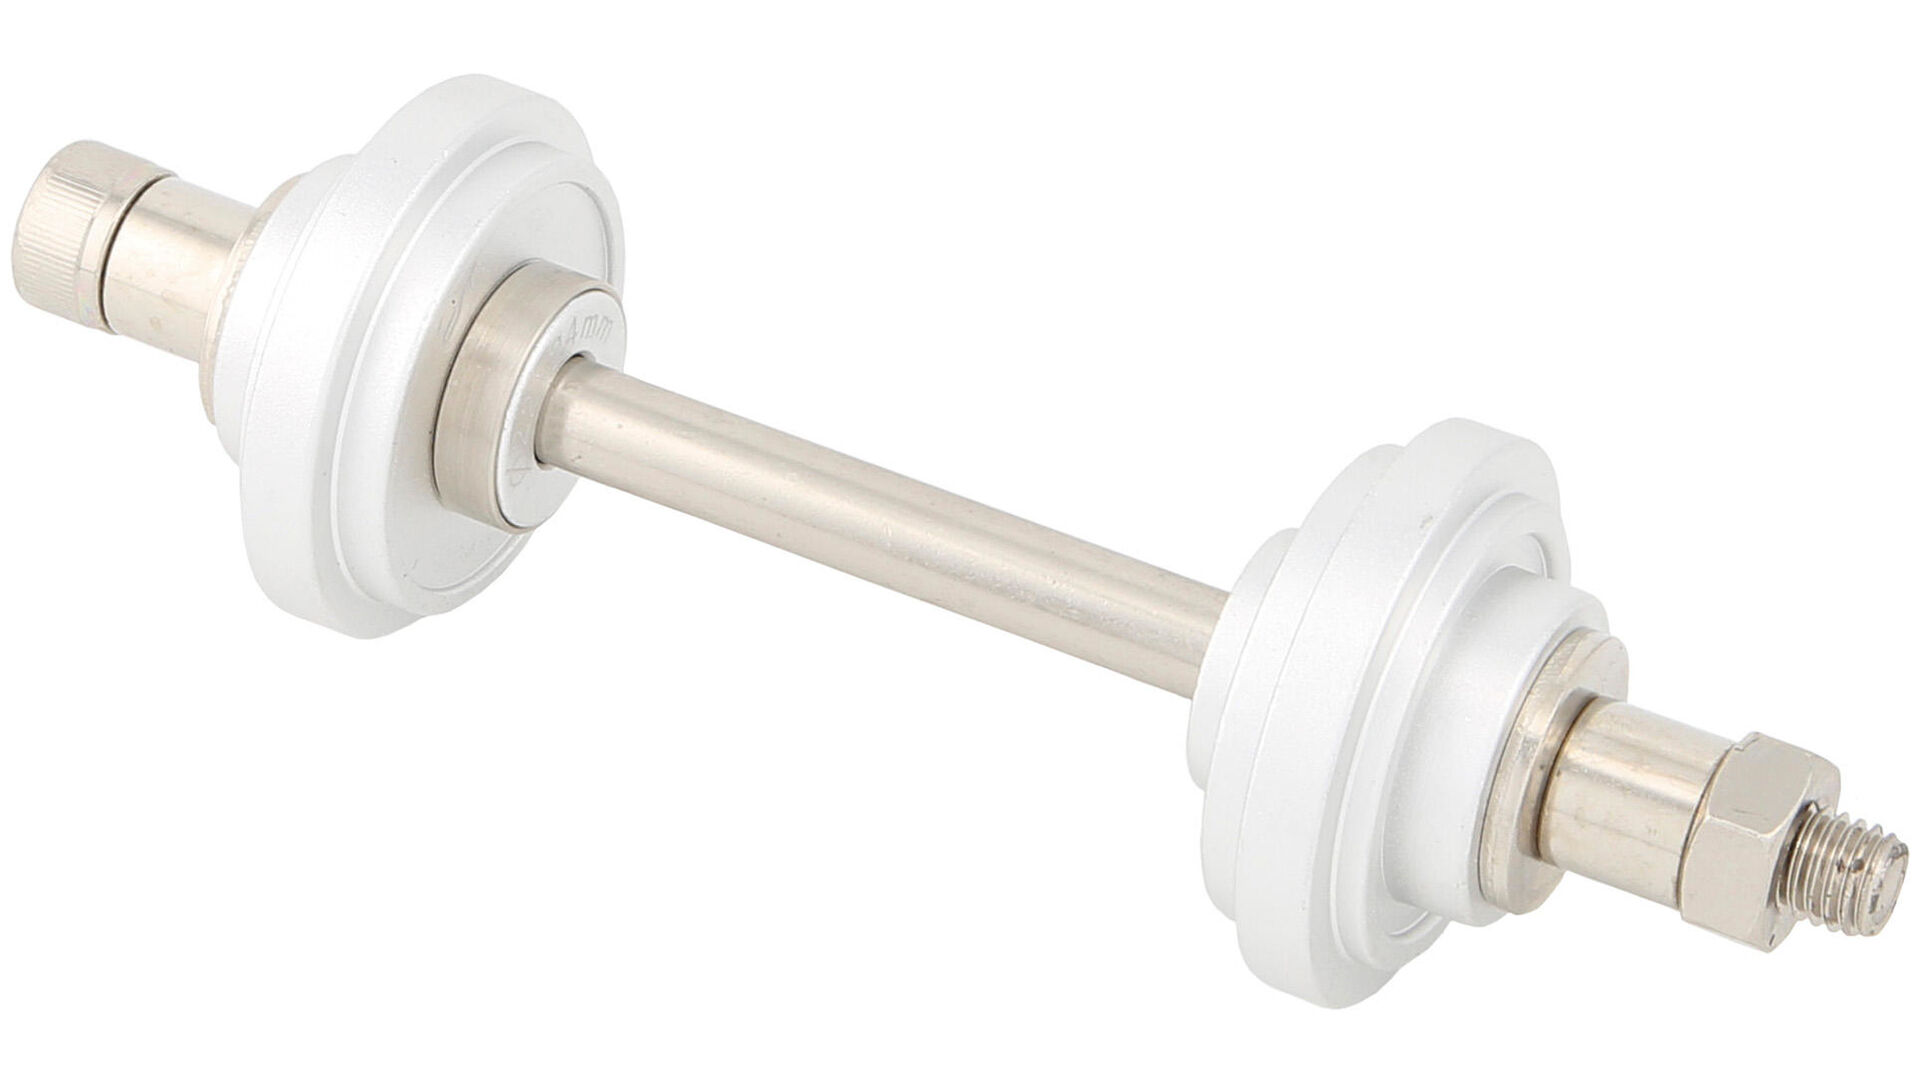
Inner bearings are available in different designs and dimensions. The most common designs are cartridge bearings, threaded bearings and pressfit bearings. There are also different axle types and lengths. It is important that you buy exactly the right replacement bearing.
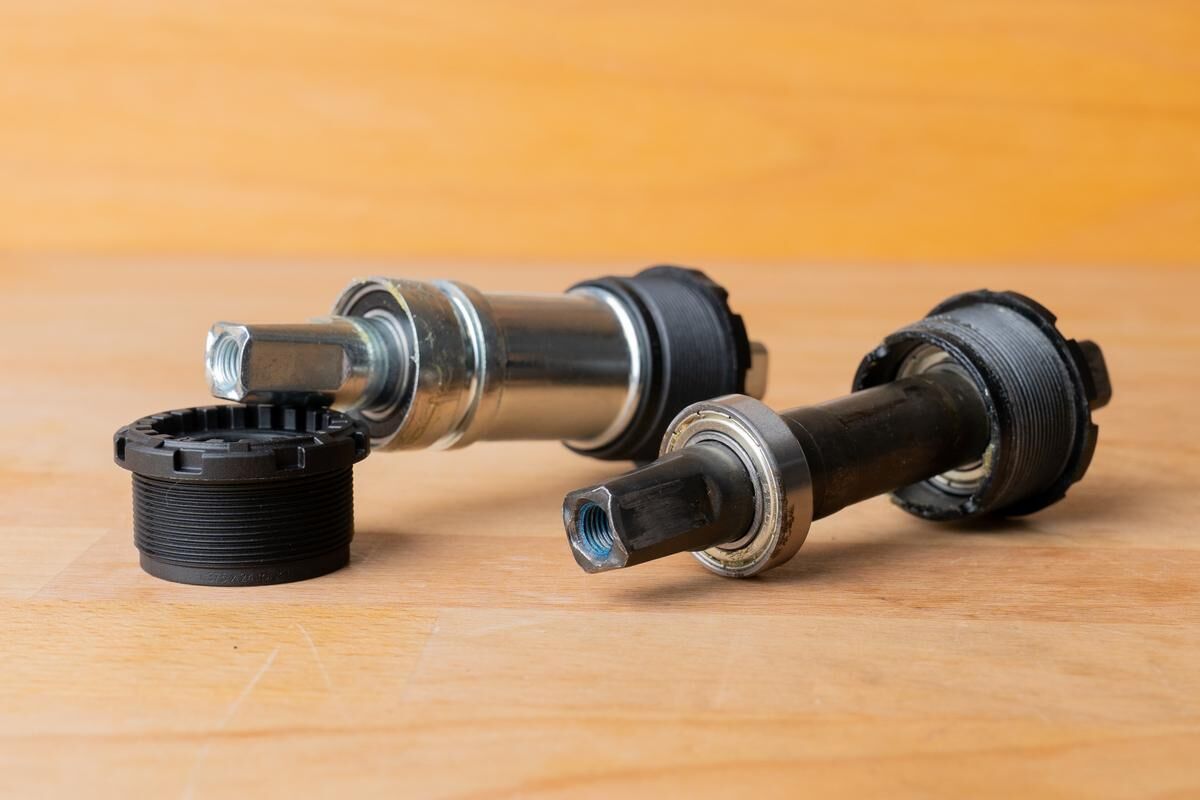
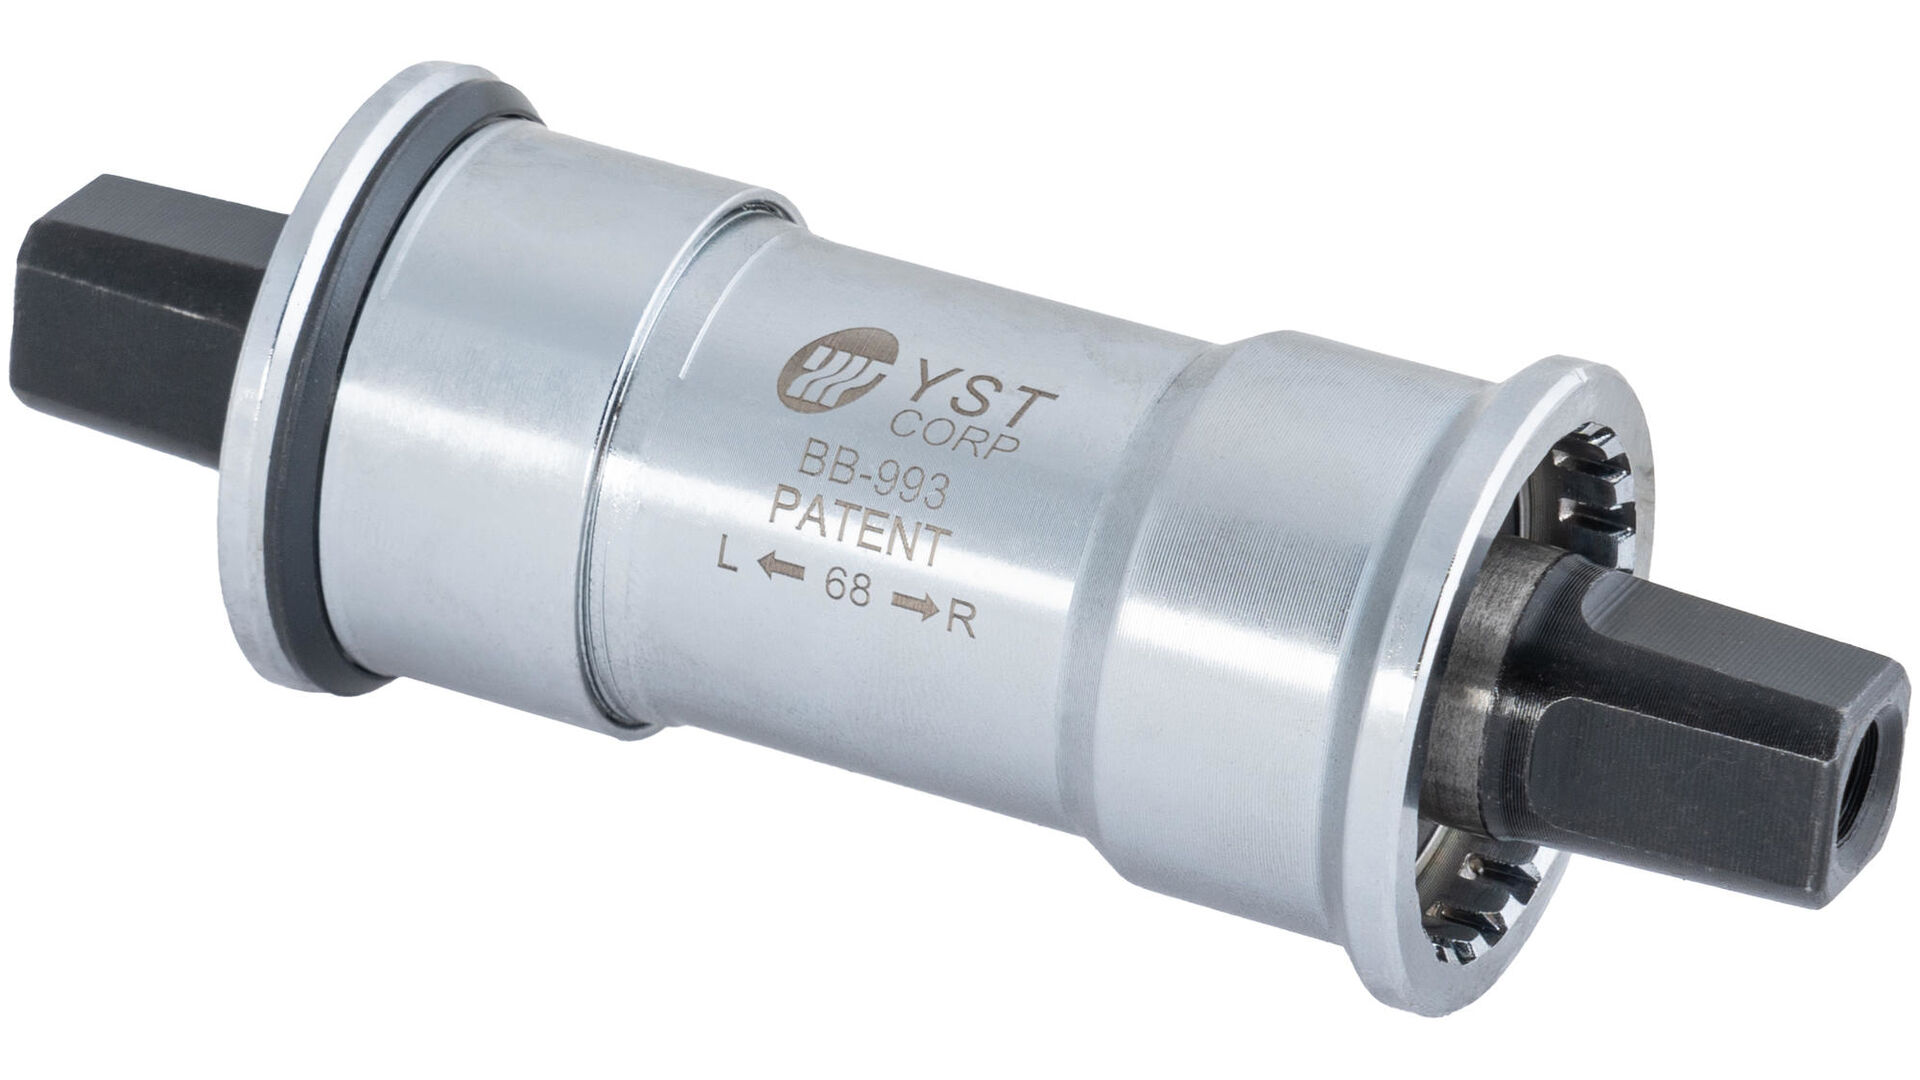
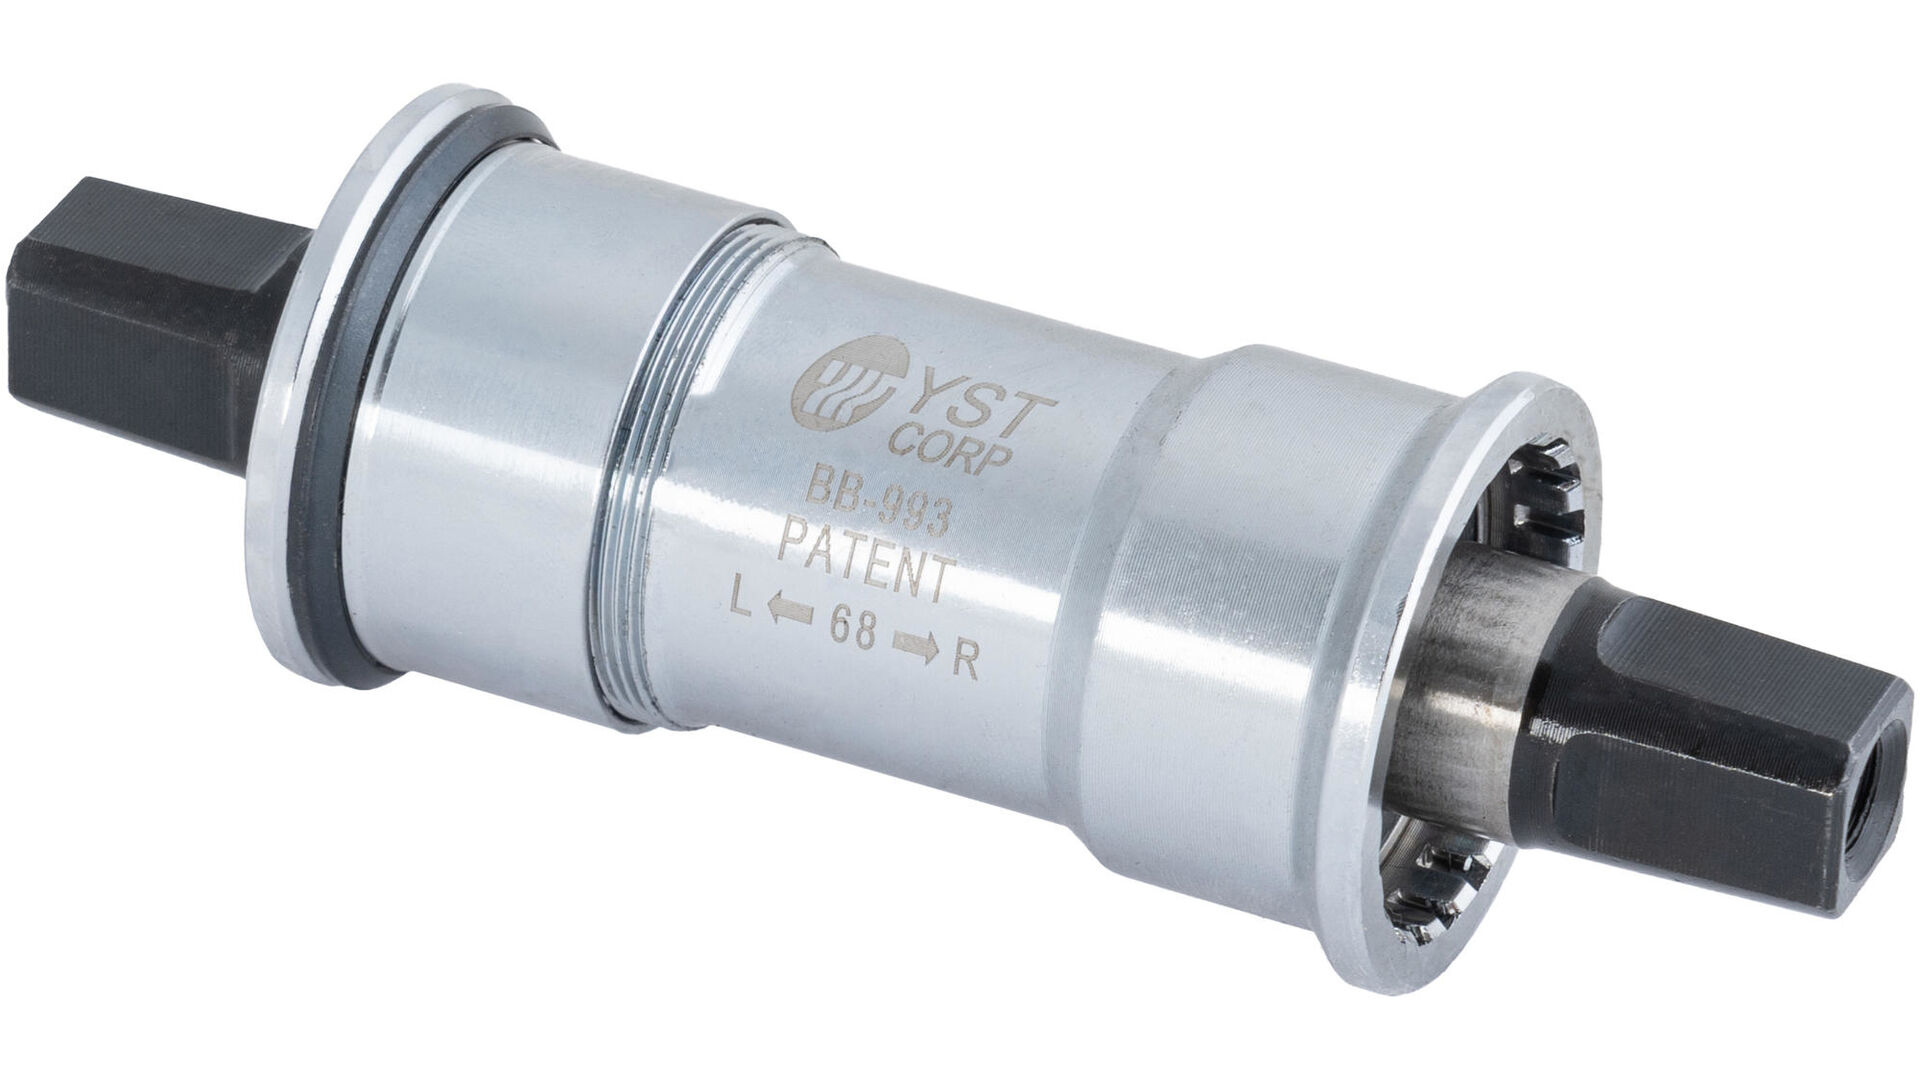
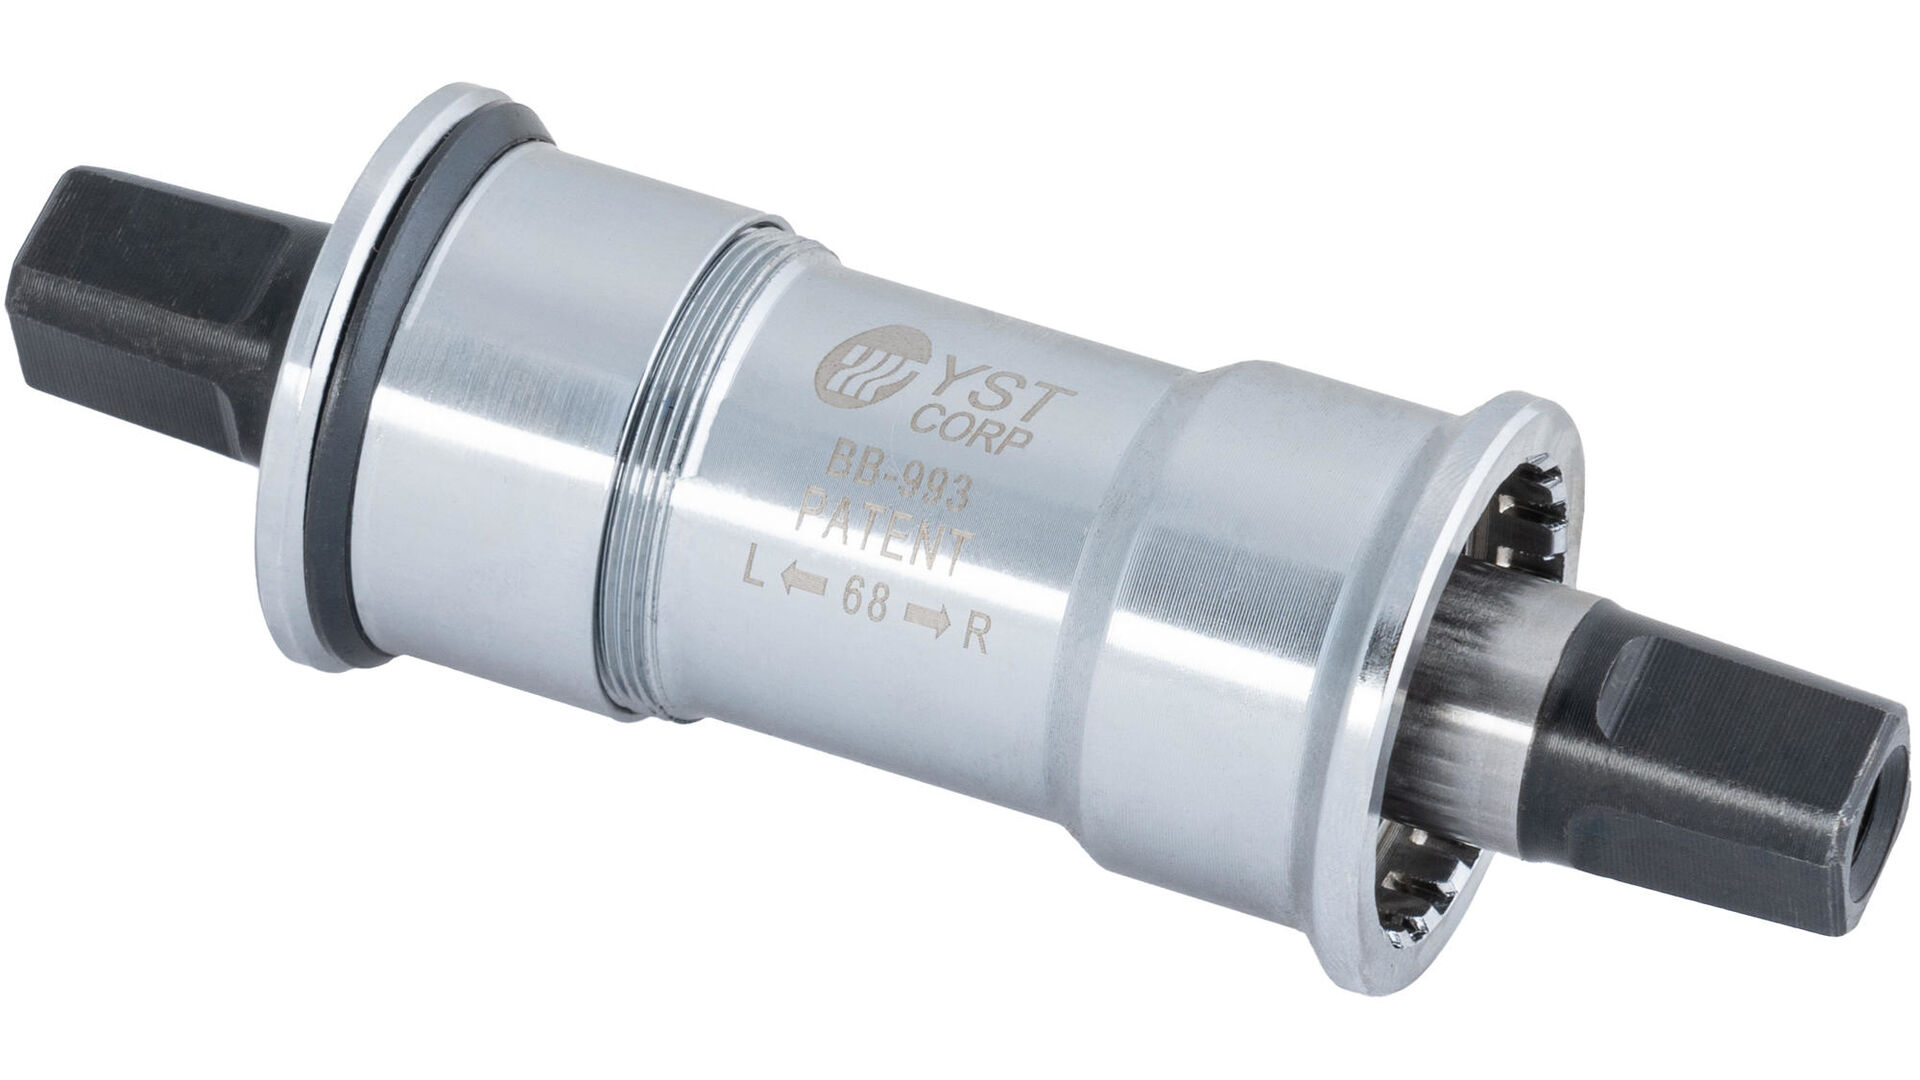
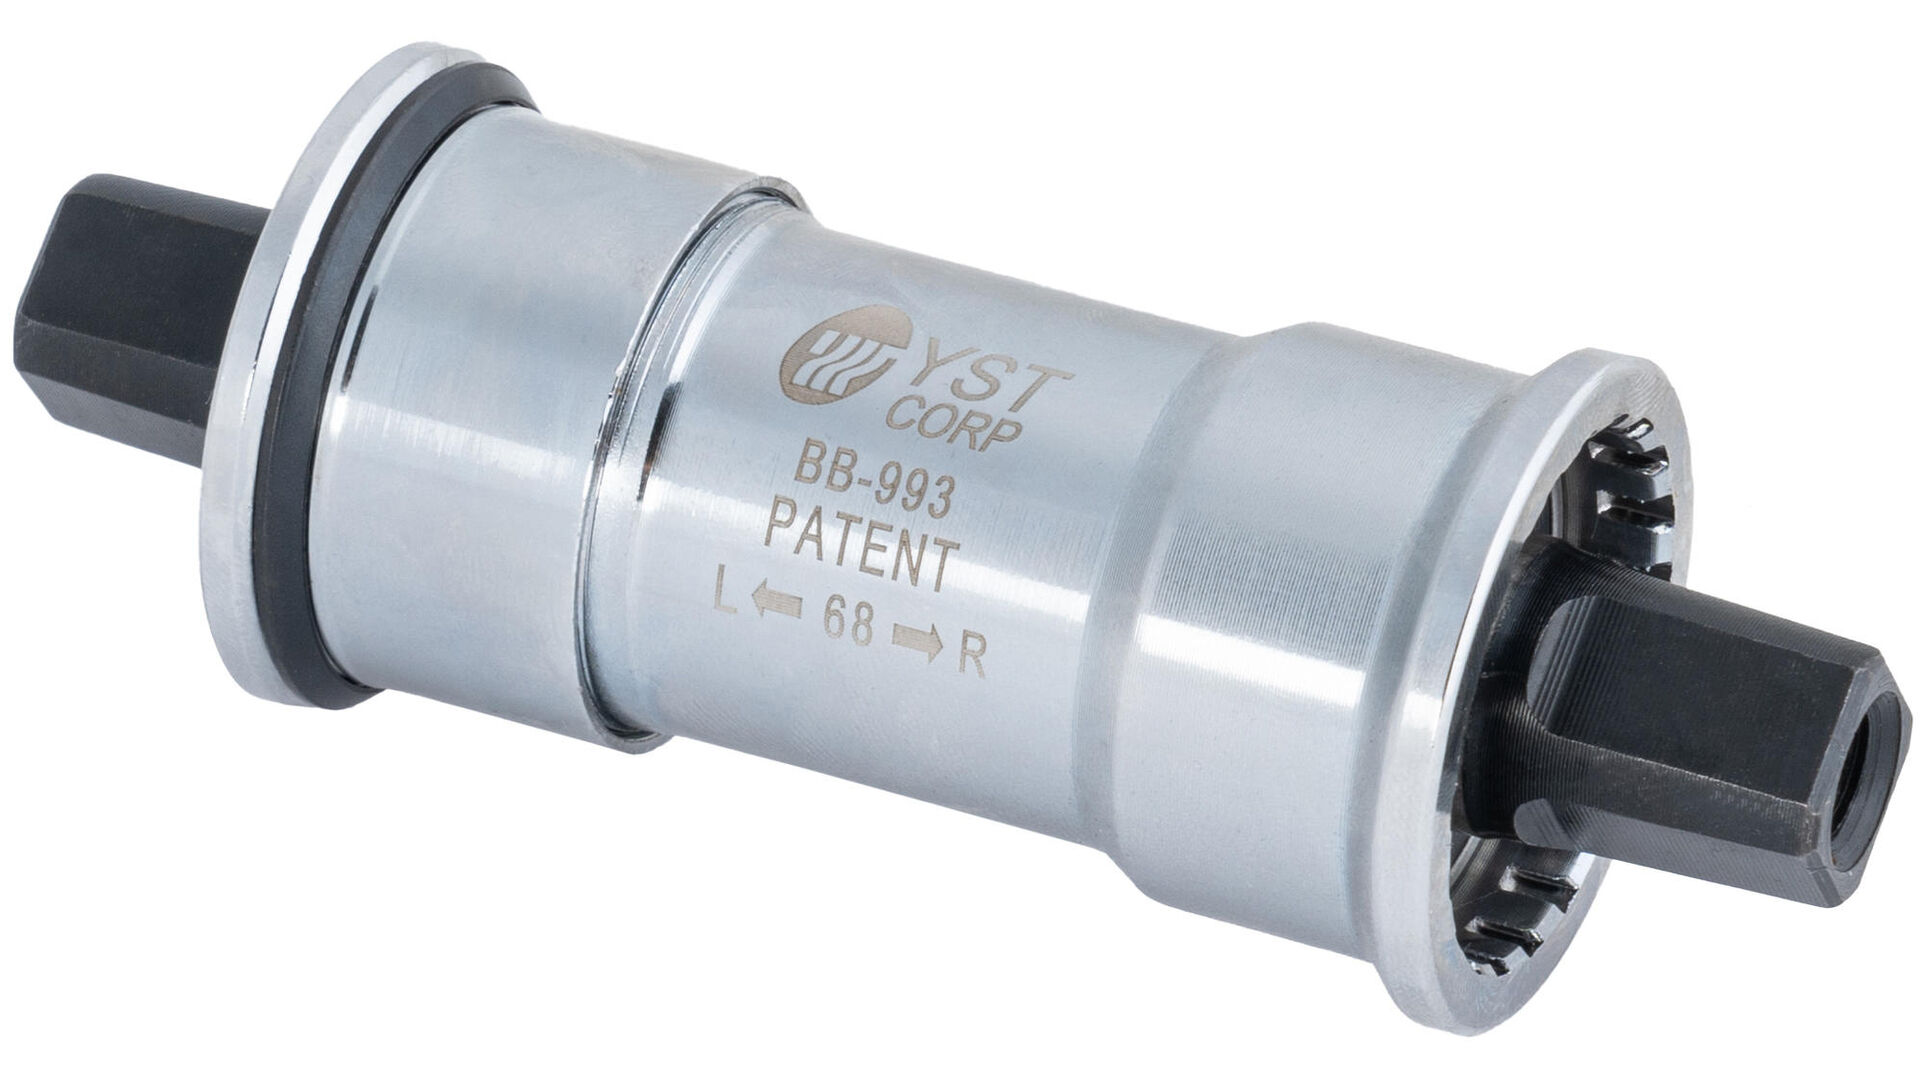
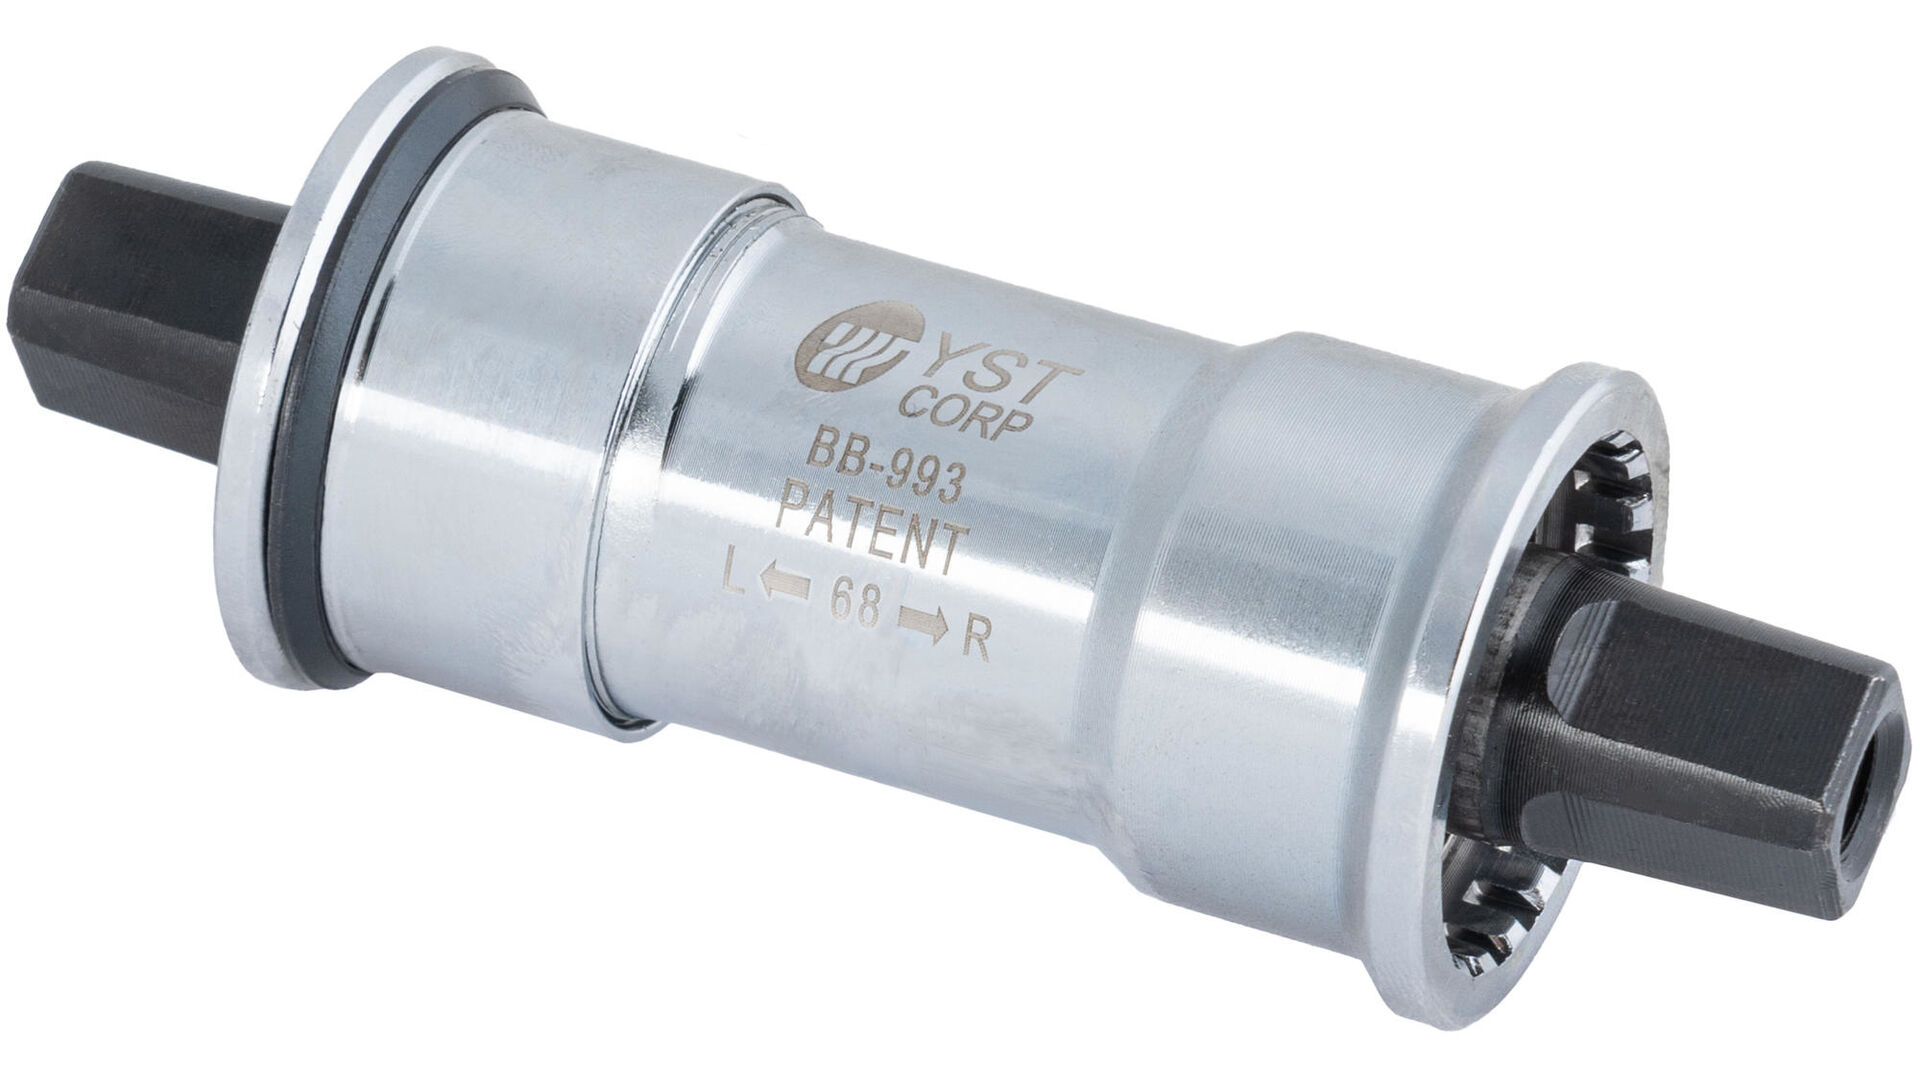
With cartridge bearings, the rolling bearings are assembled, adjusted and pressed into a cylinder together with the bottom bracket shaft. This cylinder is also called a cartridge – hence the name of the bearing type. Cartridge bearings are screwed into the bottom bracket housing of the frame.
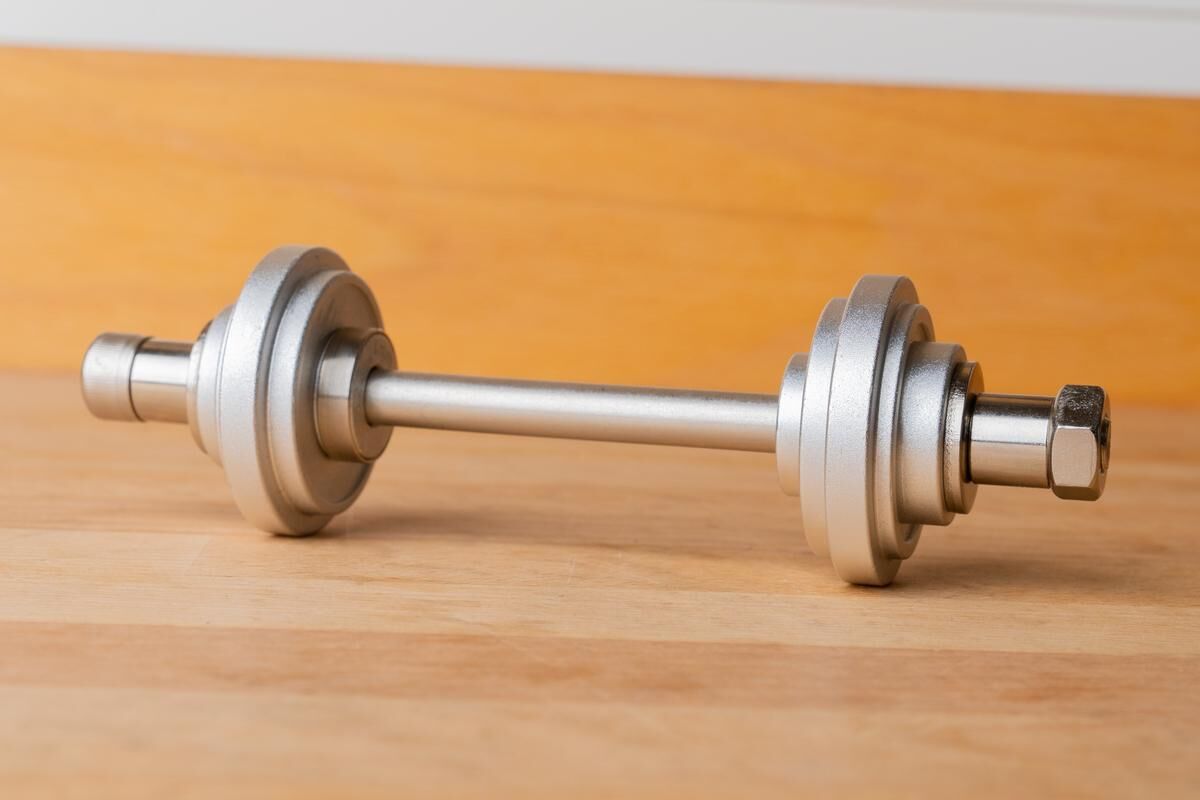
Threaded bearings are also screwed into the bottom bracket housing of the frame. Here, the bottom bracket housing has a corresponding thread on each side, which accommodates the assembly of the bearing shells. In today's standard designs, the actual bearings are located outside the frame. In this design, the bearing shaft is firmly connected to a crank and is pushed through after the bearings are assembled.

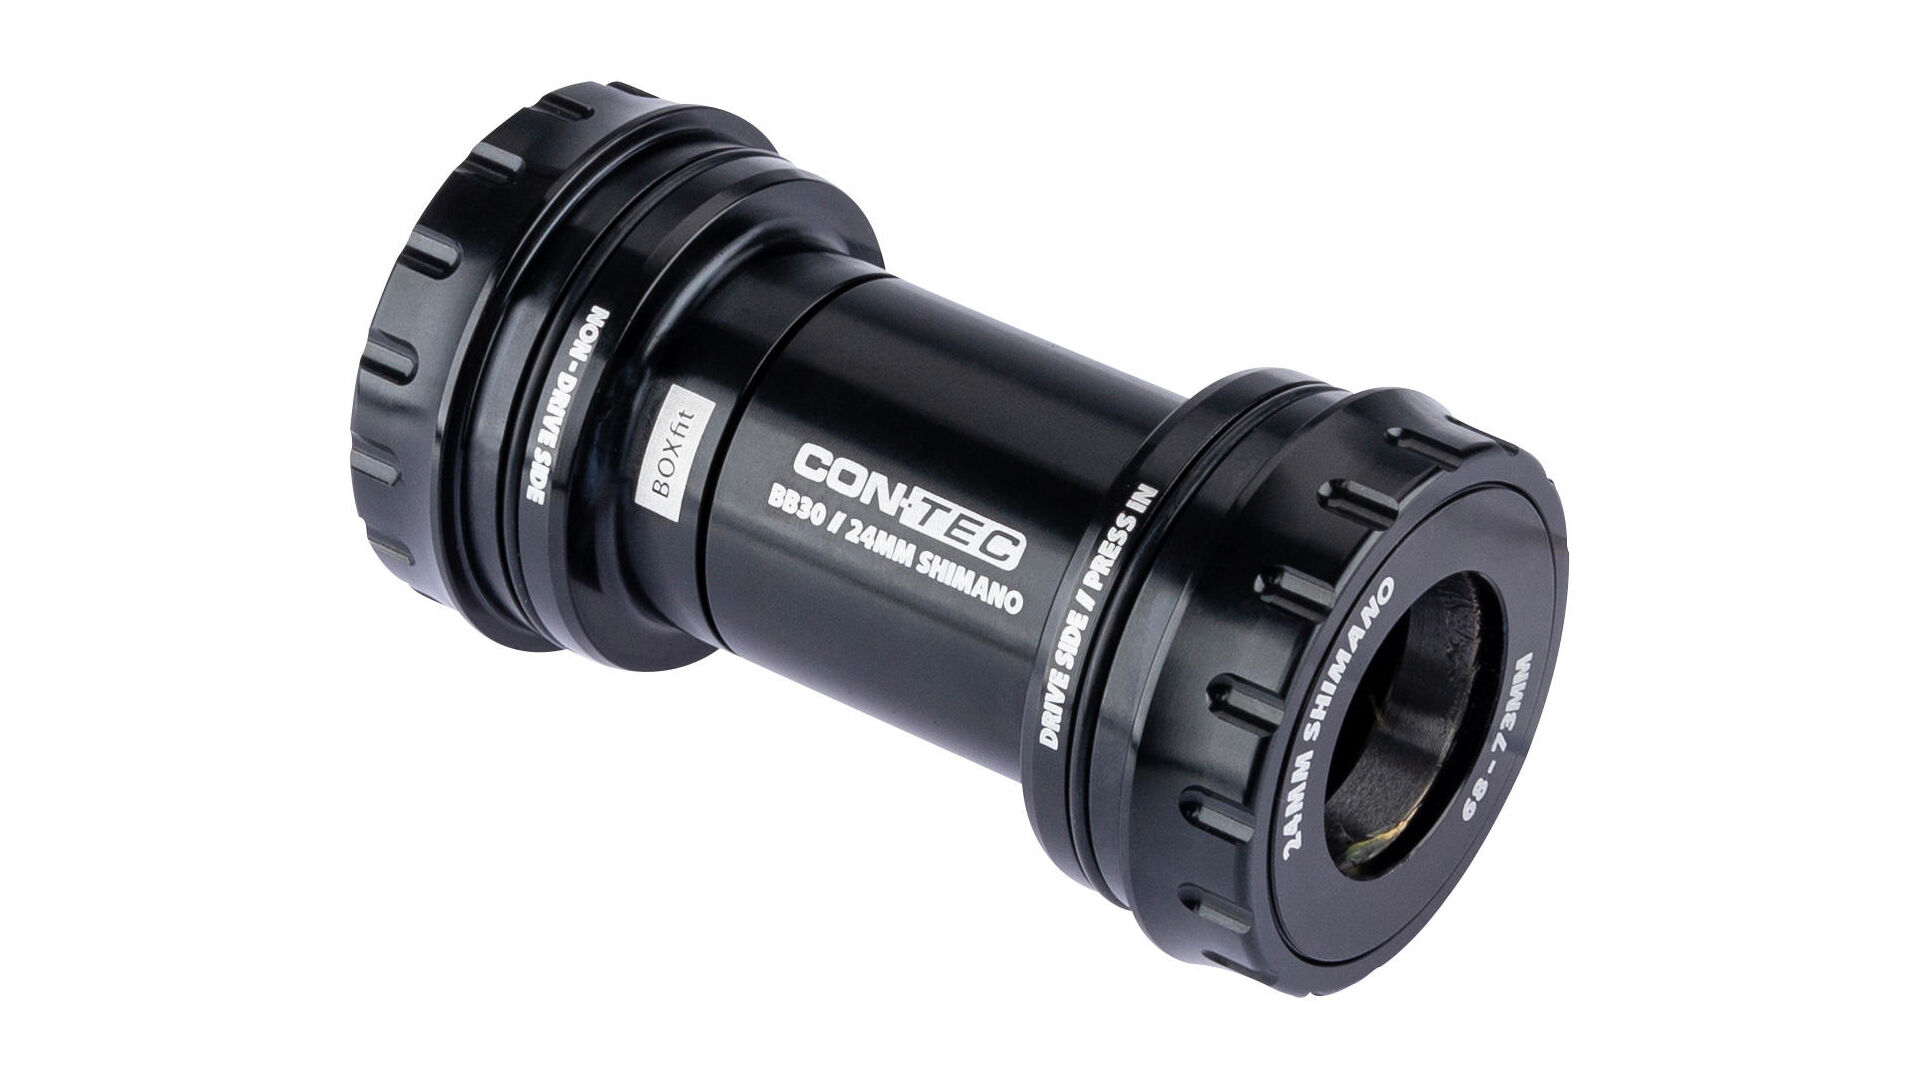
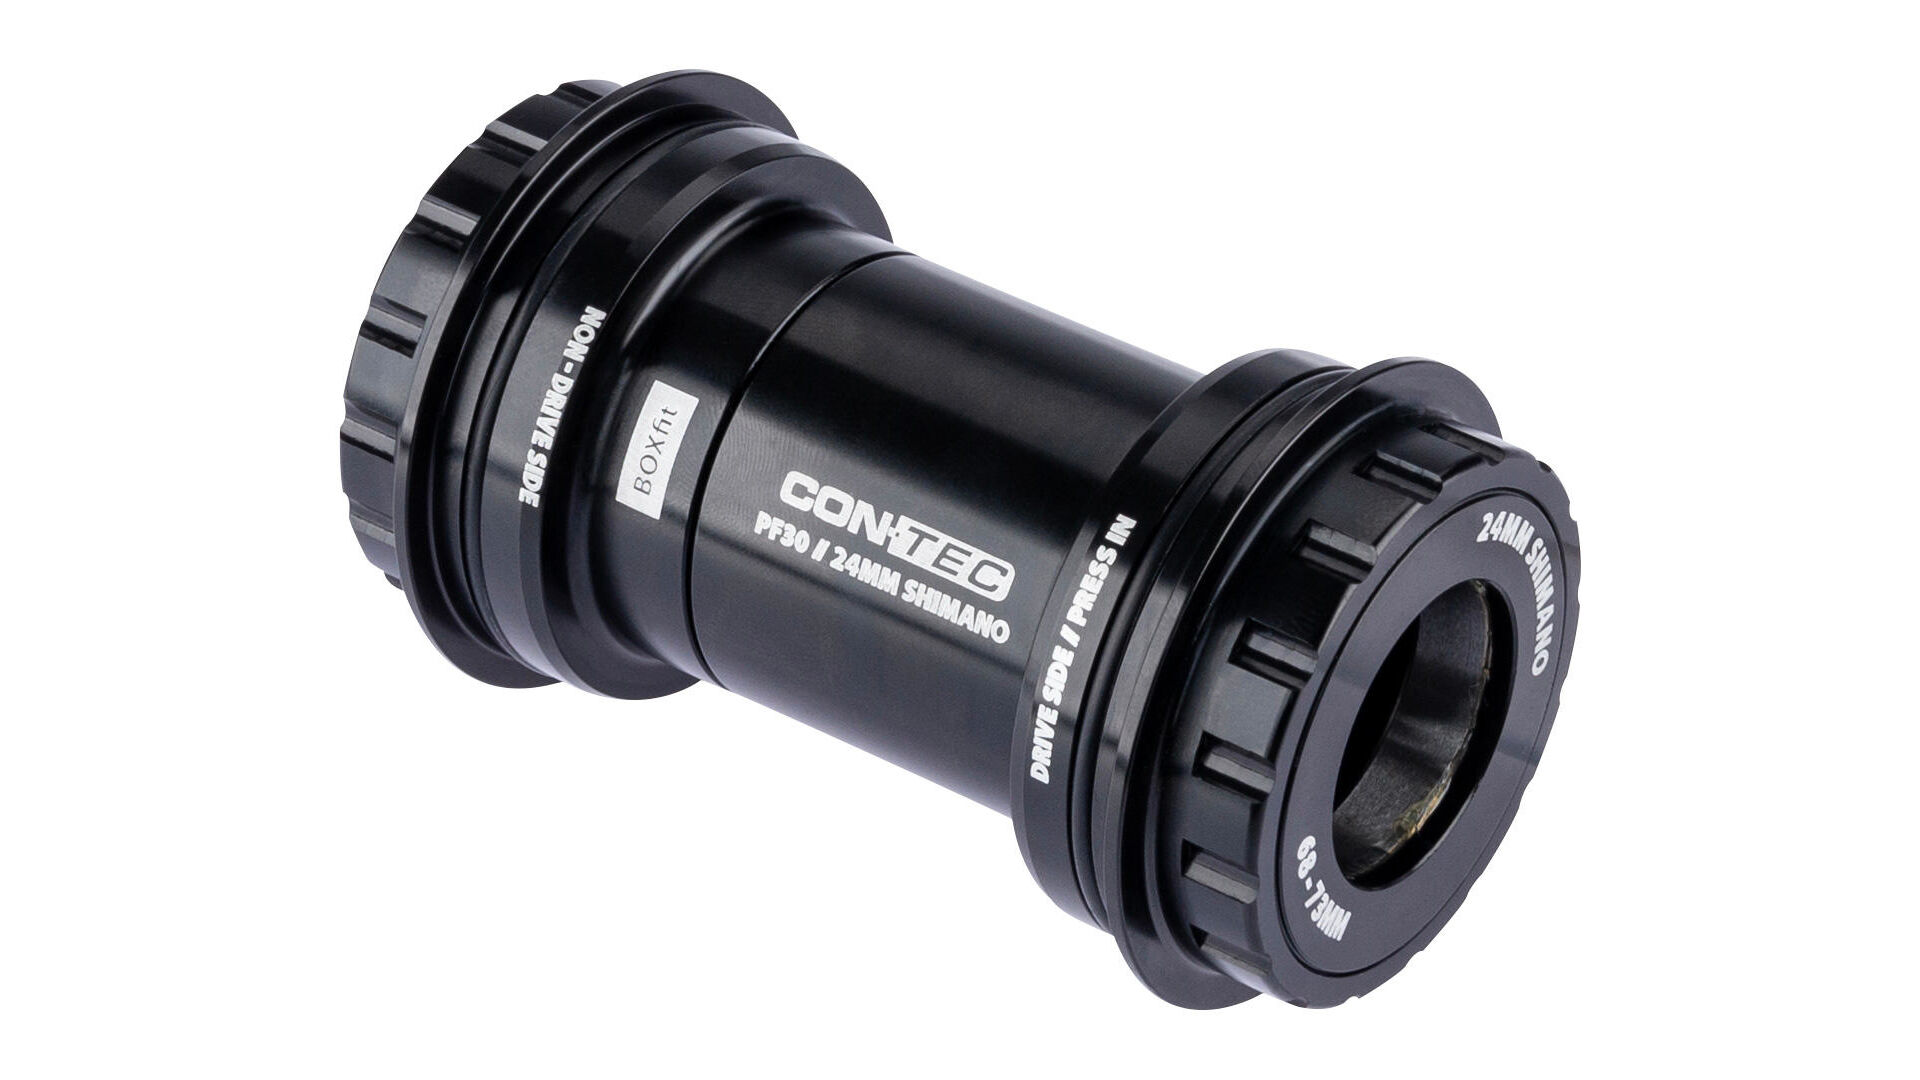
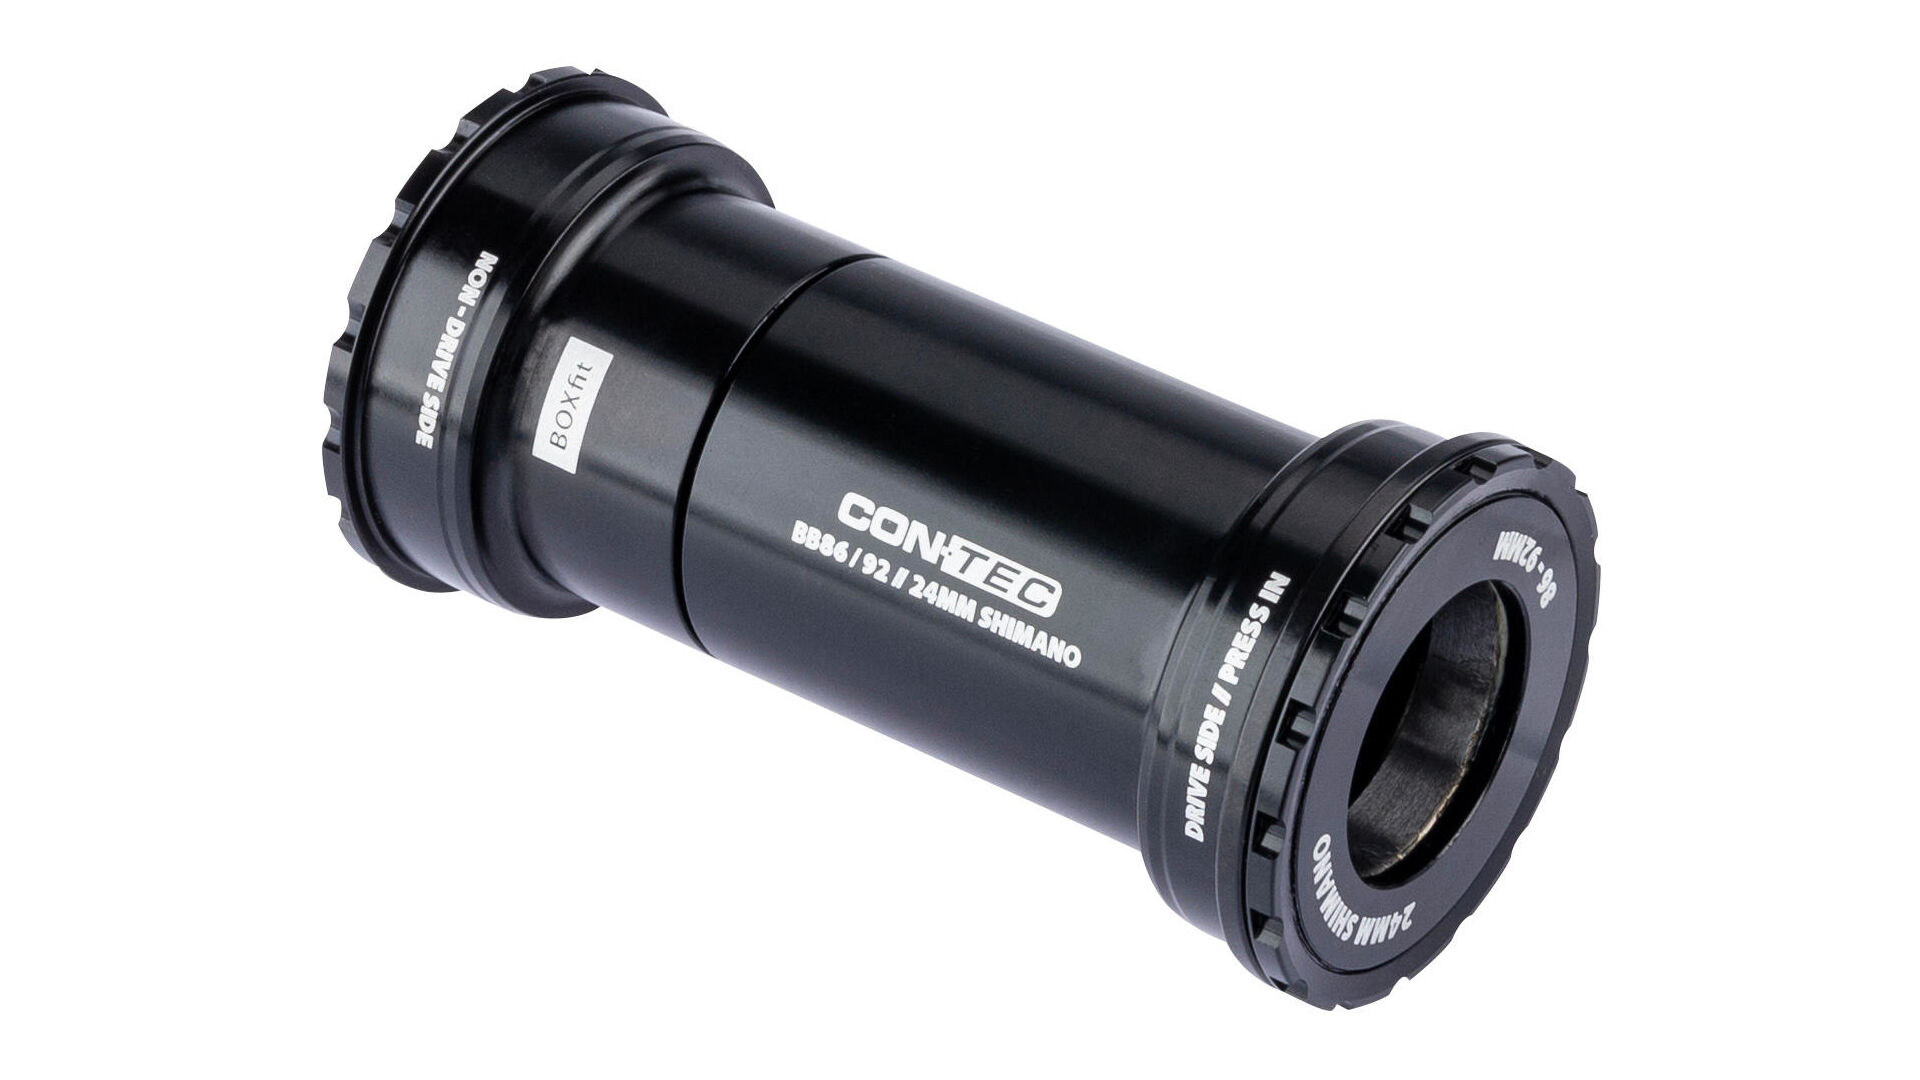
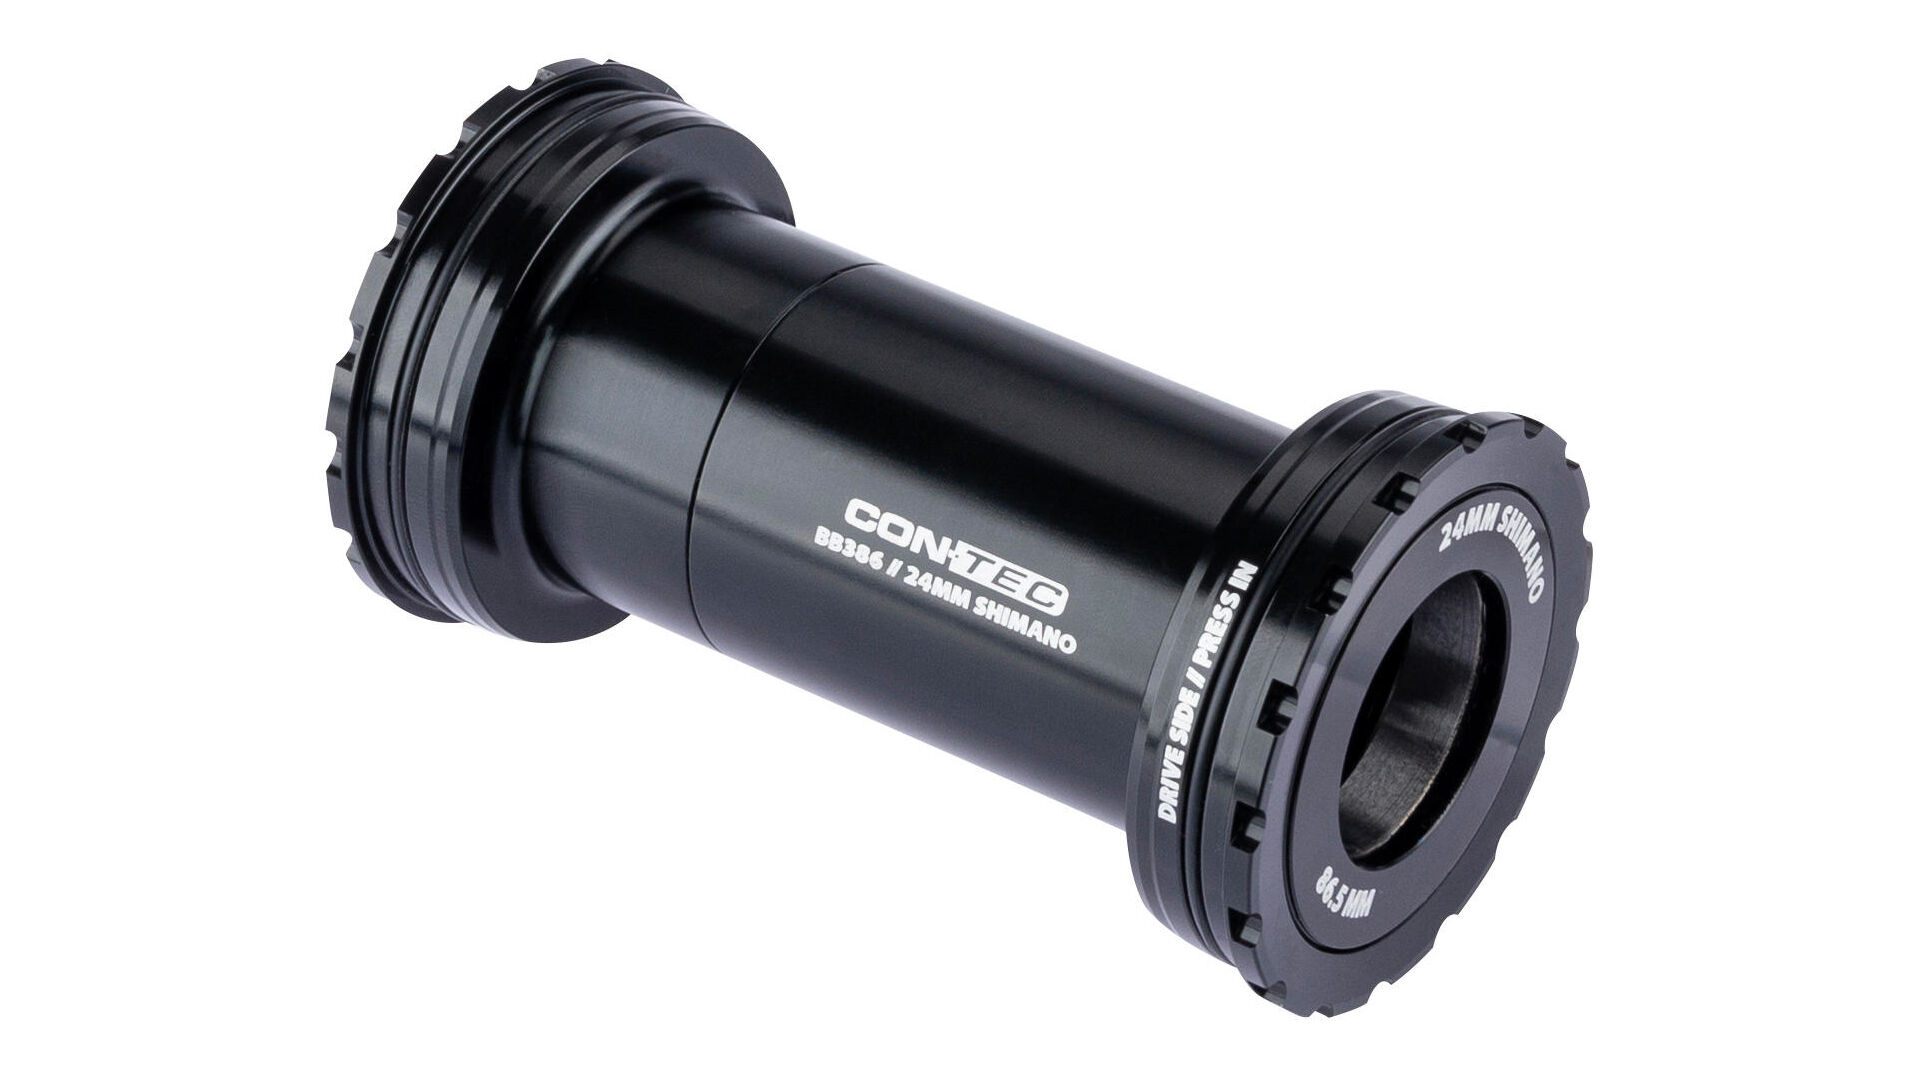
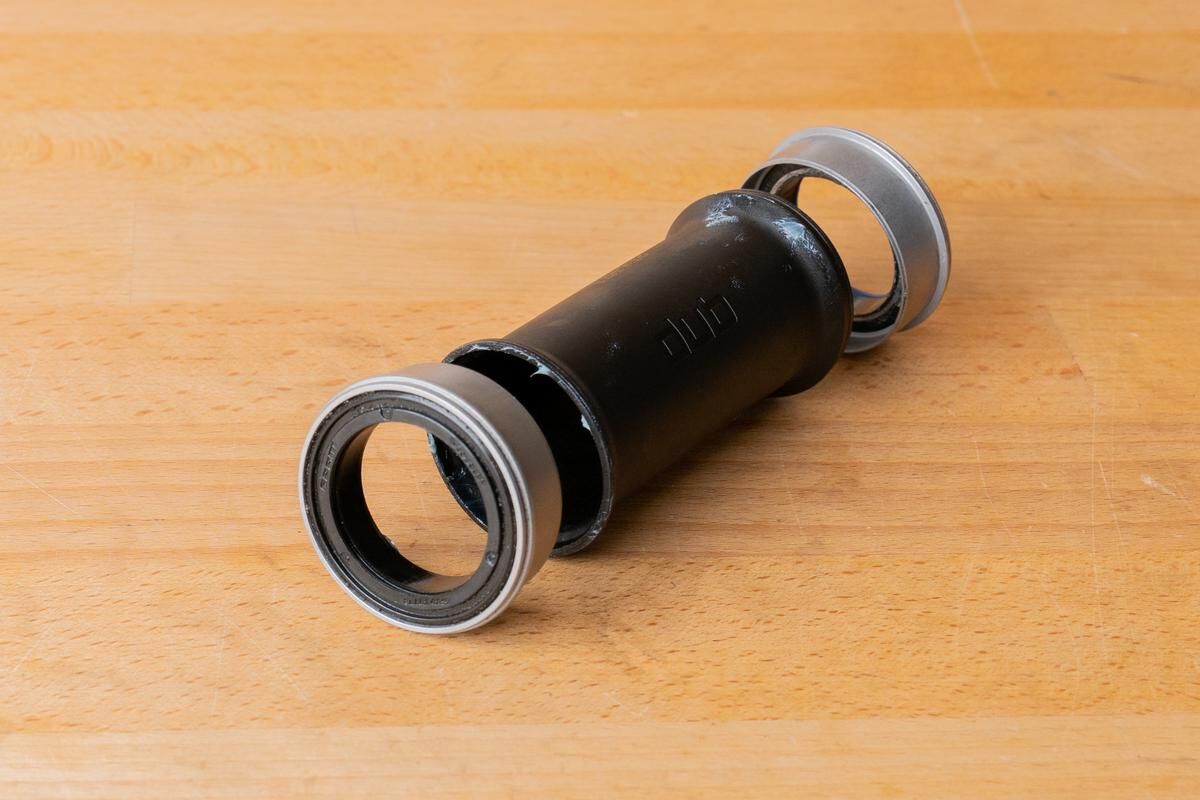
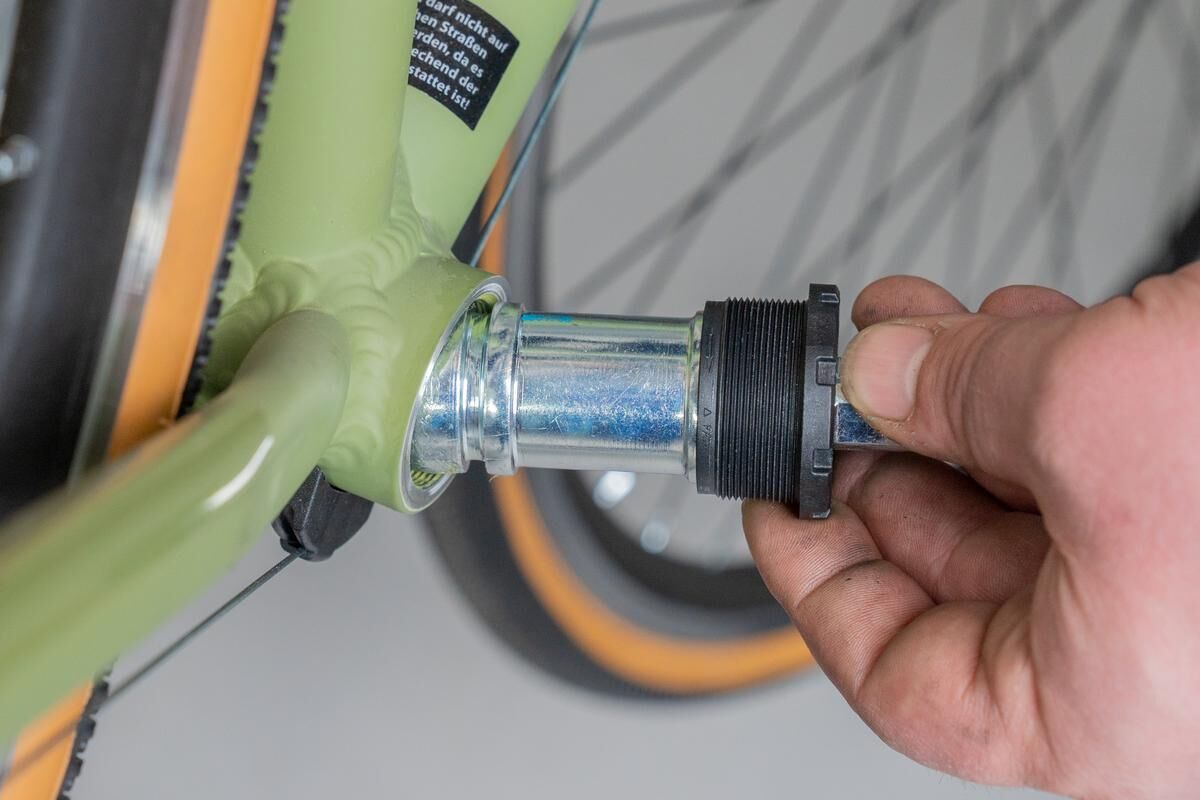
Pressfit bearings are pressed directly into the bottom bracket housing of the frame. There are many different designs, where the bearings either sit directly in the frame or can also be located outside the frame. In this design, the axle is also firmly connected to a crank and is pushed through the bearing shells.
Cartridge bearings
Threaded bearings
Pressfit inner bearings
3. Correct dismantling of bottom brackets
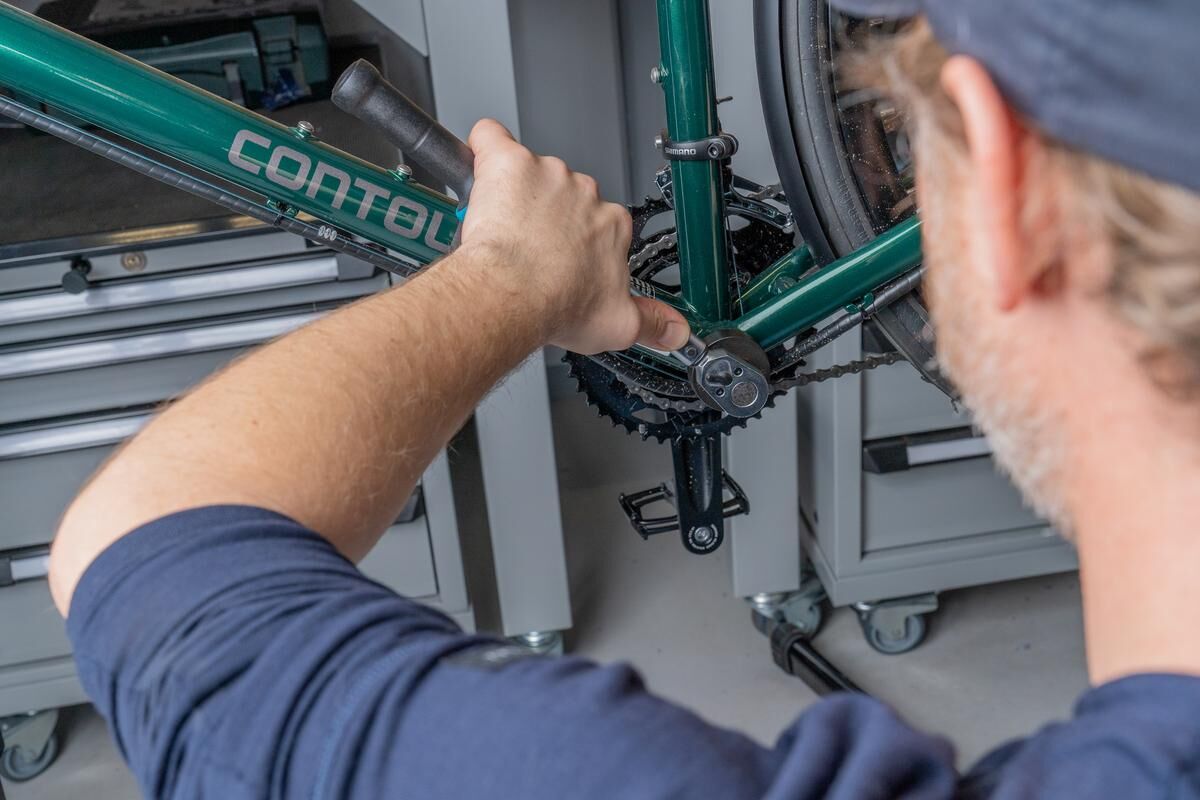
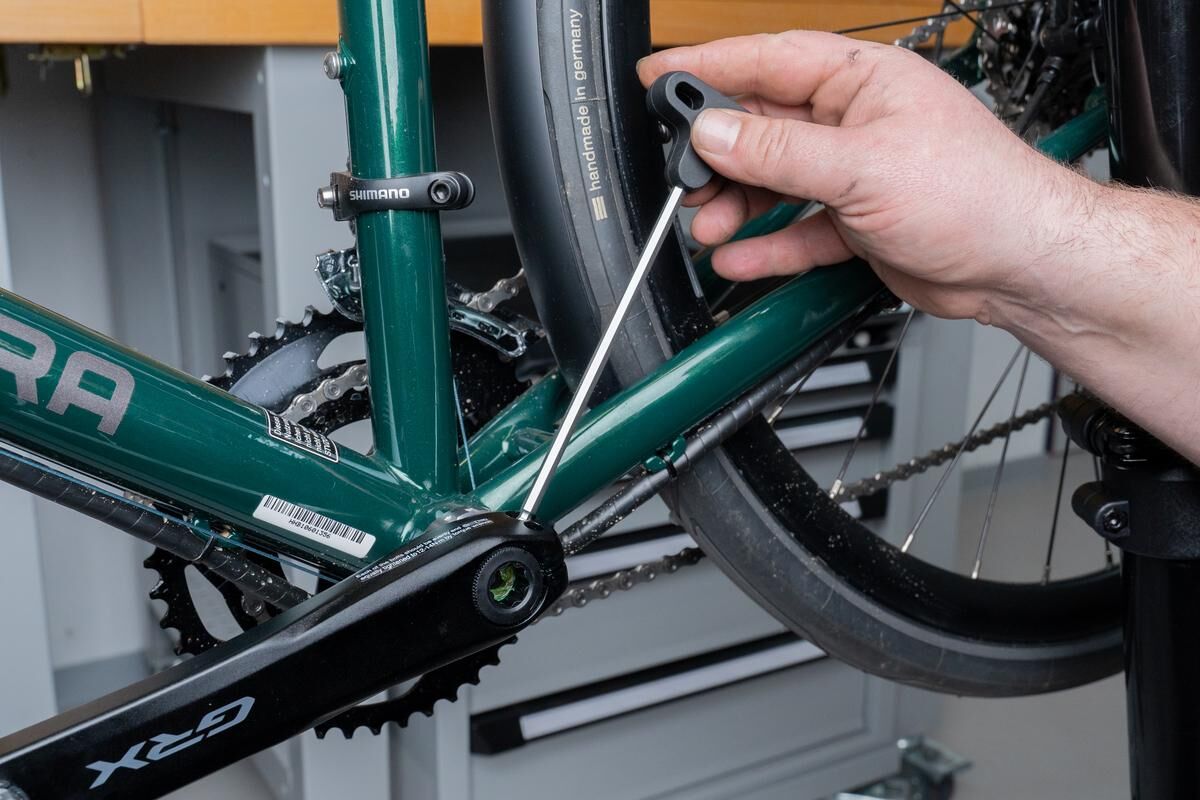
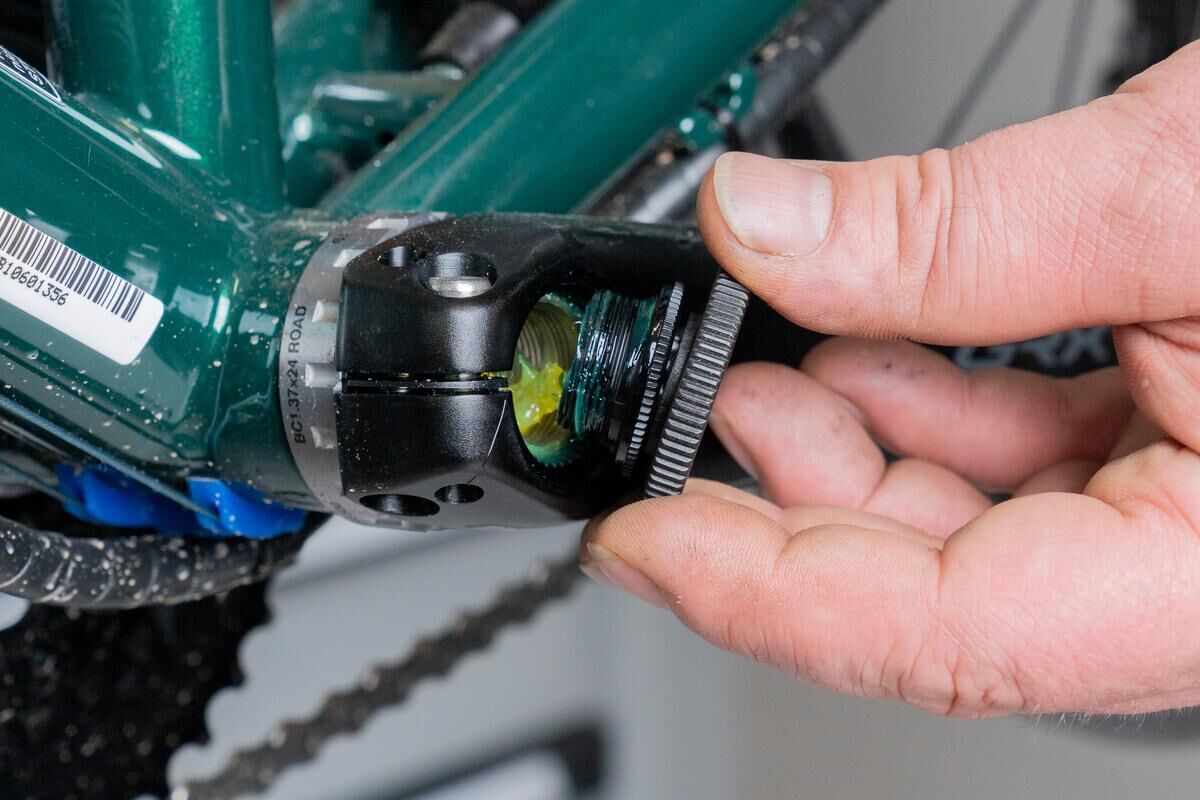
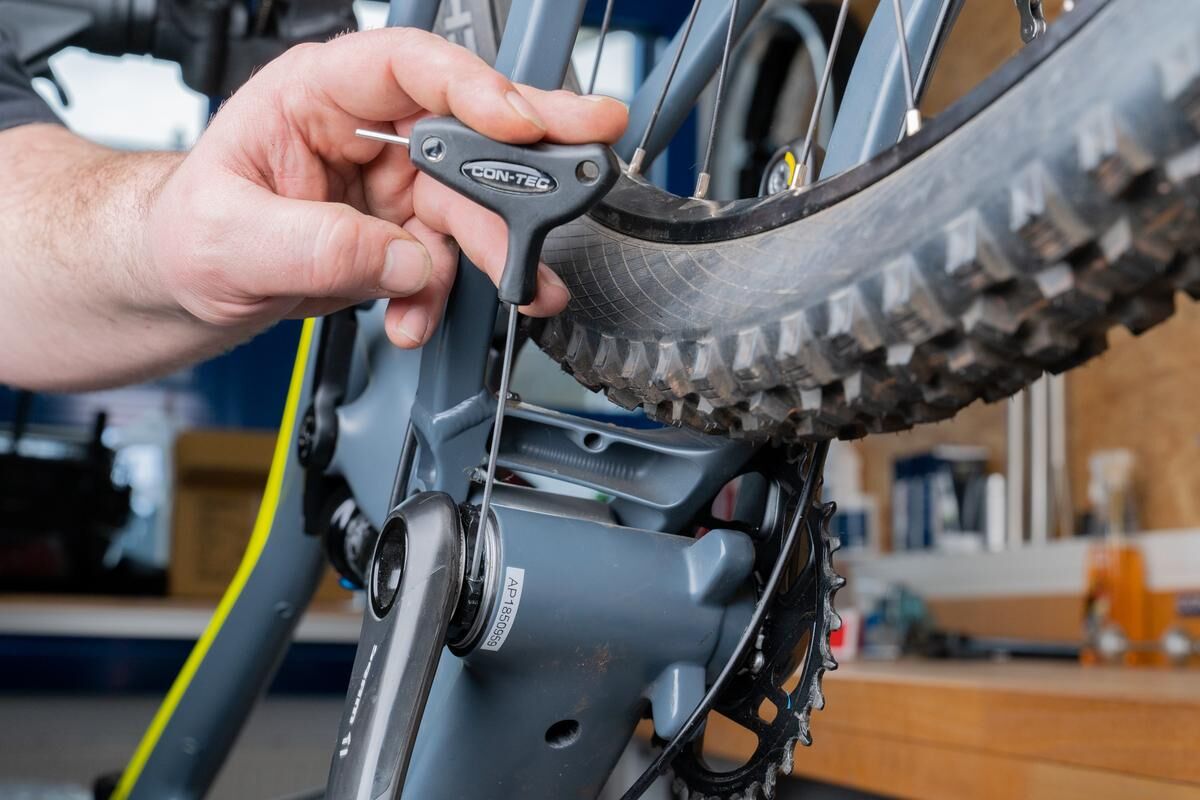
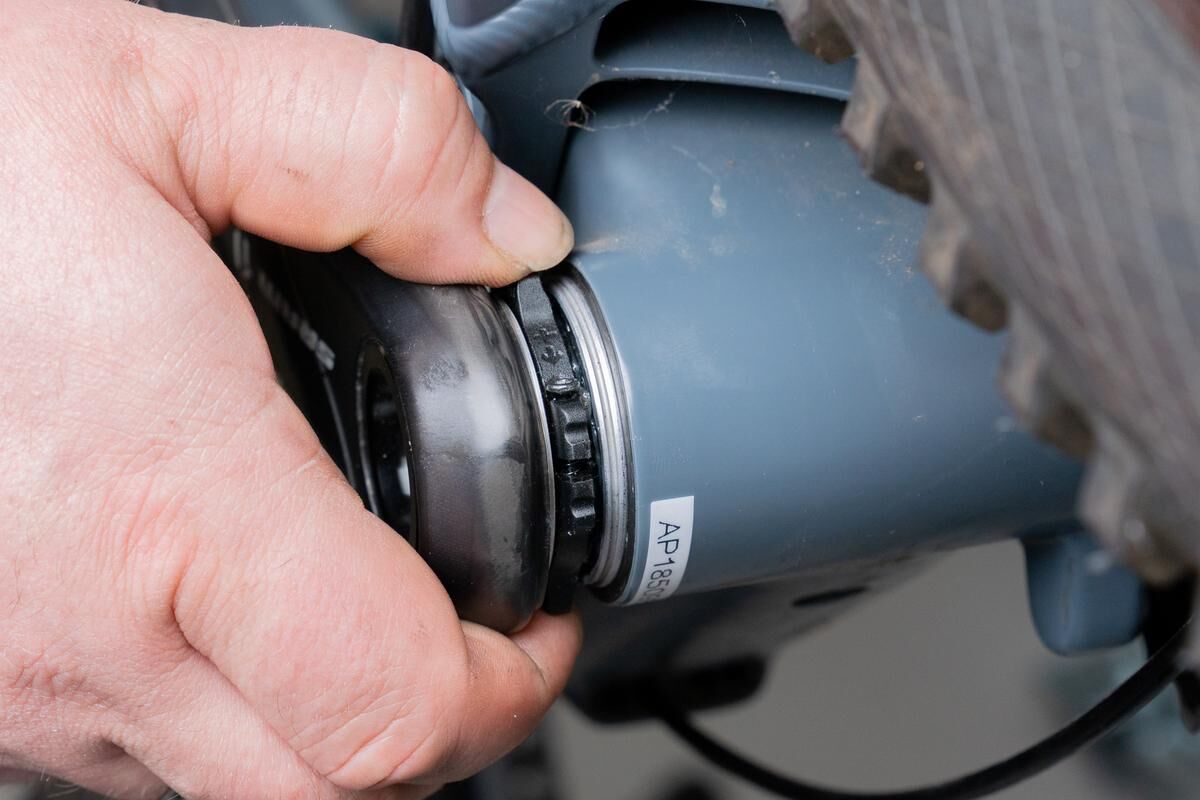
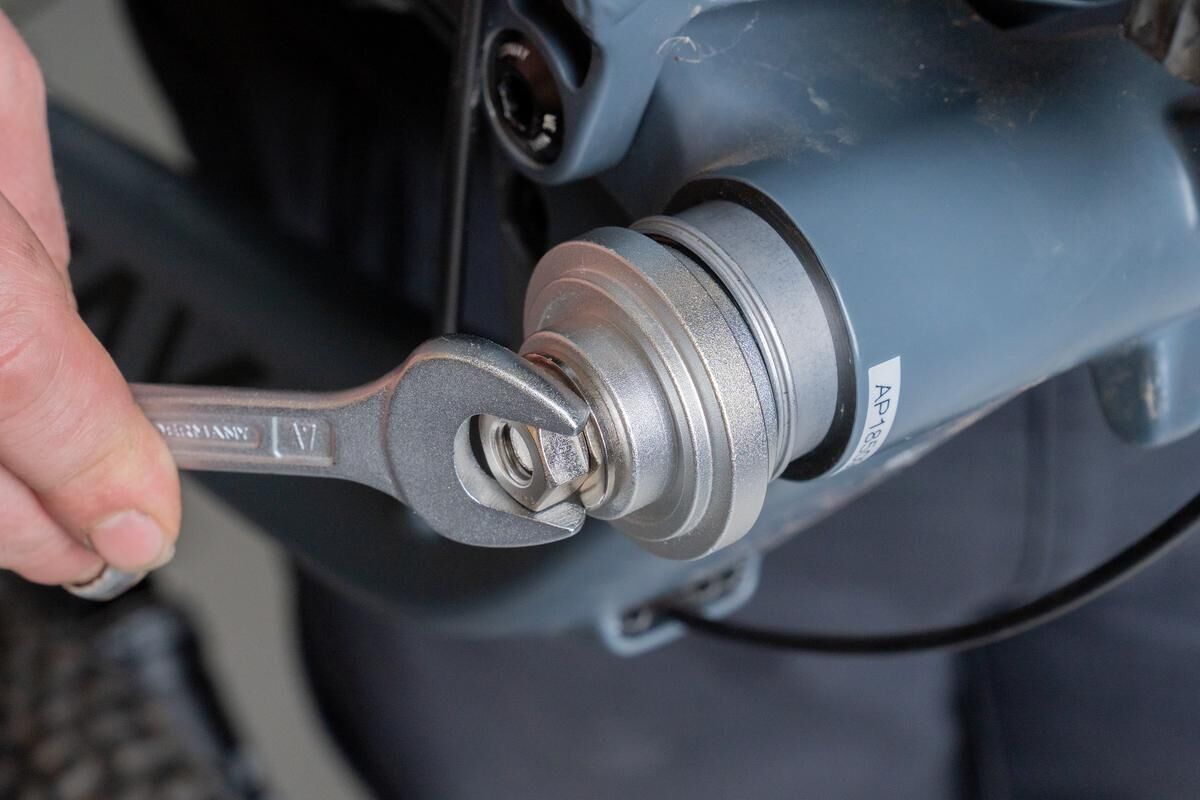
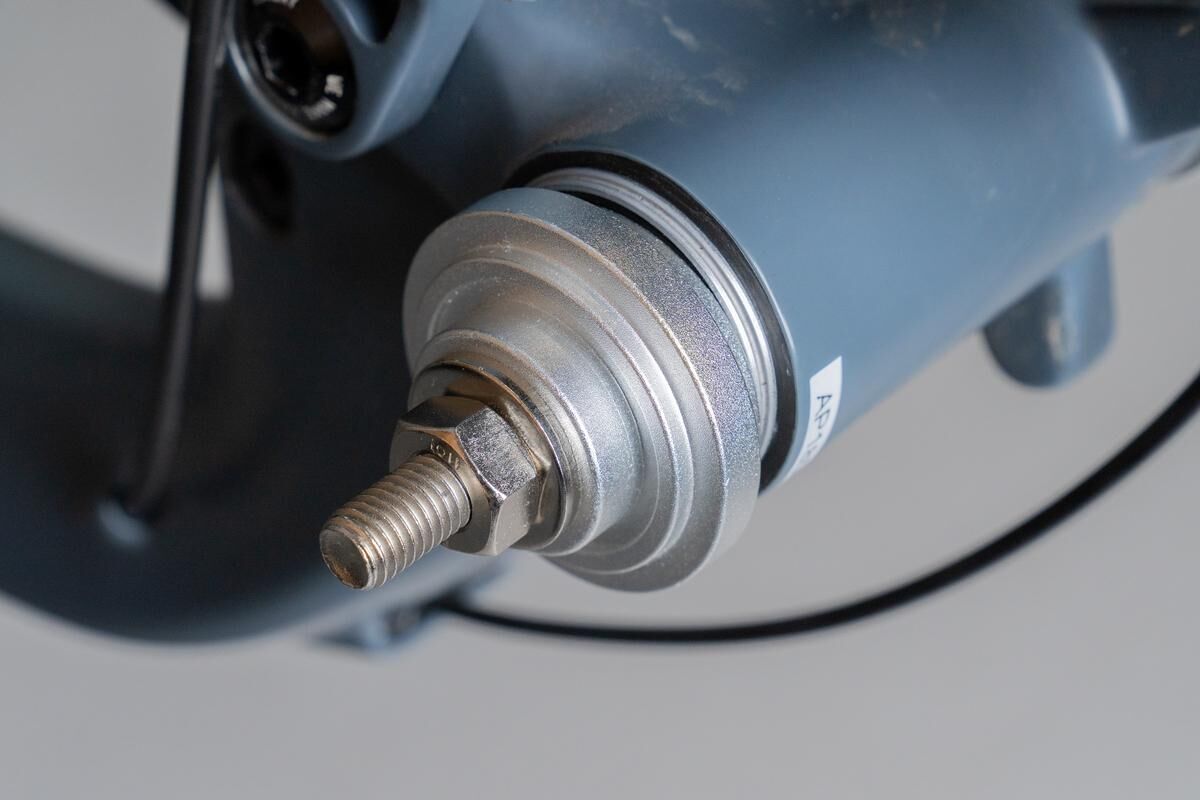
Before you can dismantle the bottom bracket of your bike, you need to remove the cranks. With threaded and pressfit bearings, you loosen the clamping of the left crank, which generally consists of two hexagon socket screws. You can then remove the crank by hand or with the help of a puller. Many cranks have a small locking plate in the clamping slot on the side facing the drive. This locking plate has to be pushed up first, away from the bottom bracket. Afterwards, pull the right crank out of the bearing, including the chainrings and axle. But make sure to remove the chain first. You can now access the bearing shells.

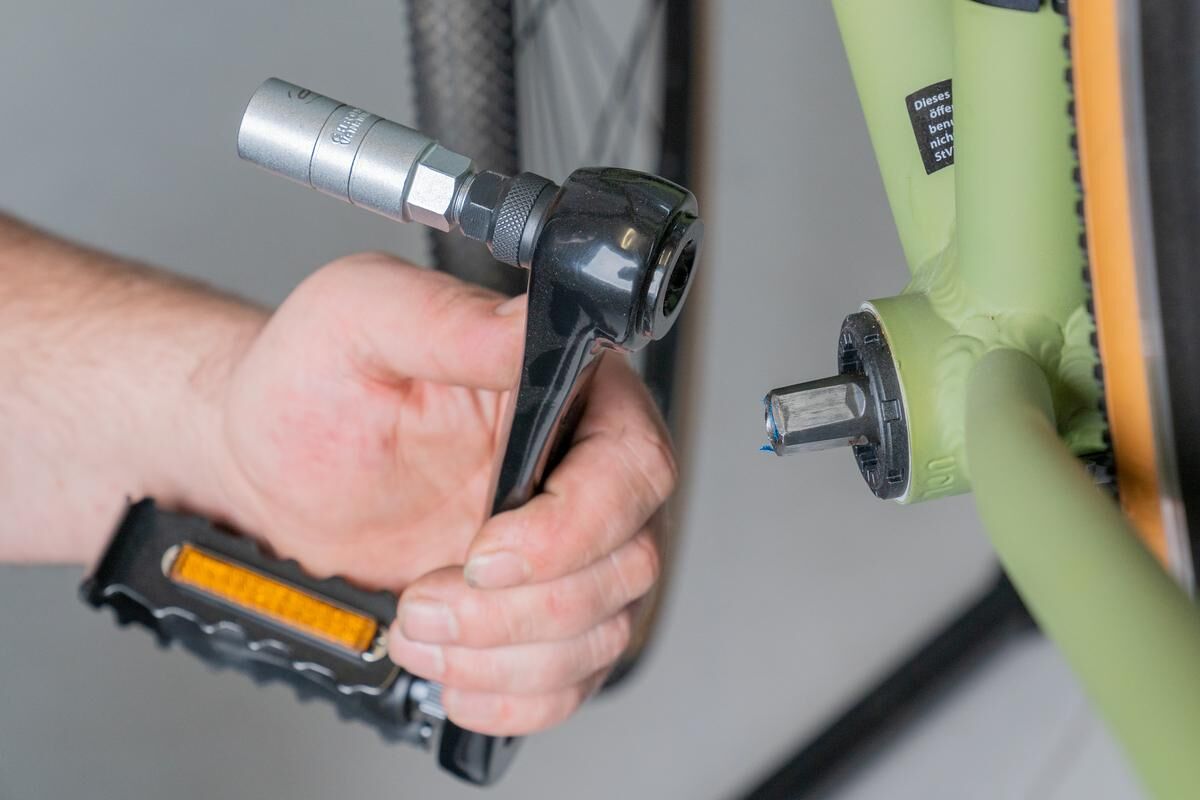


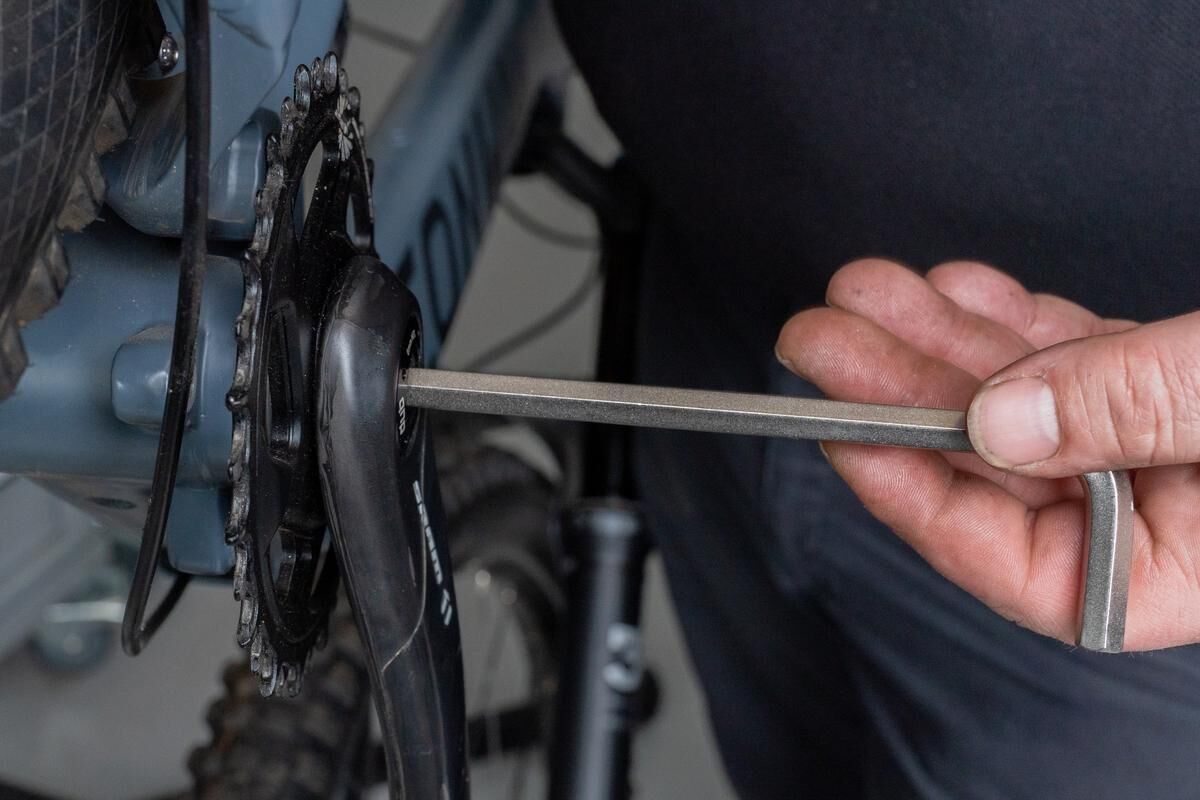
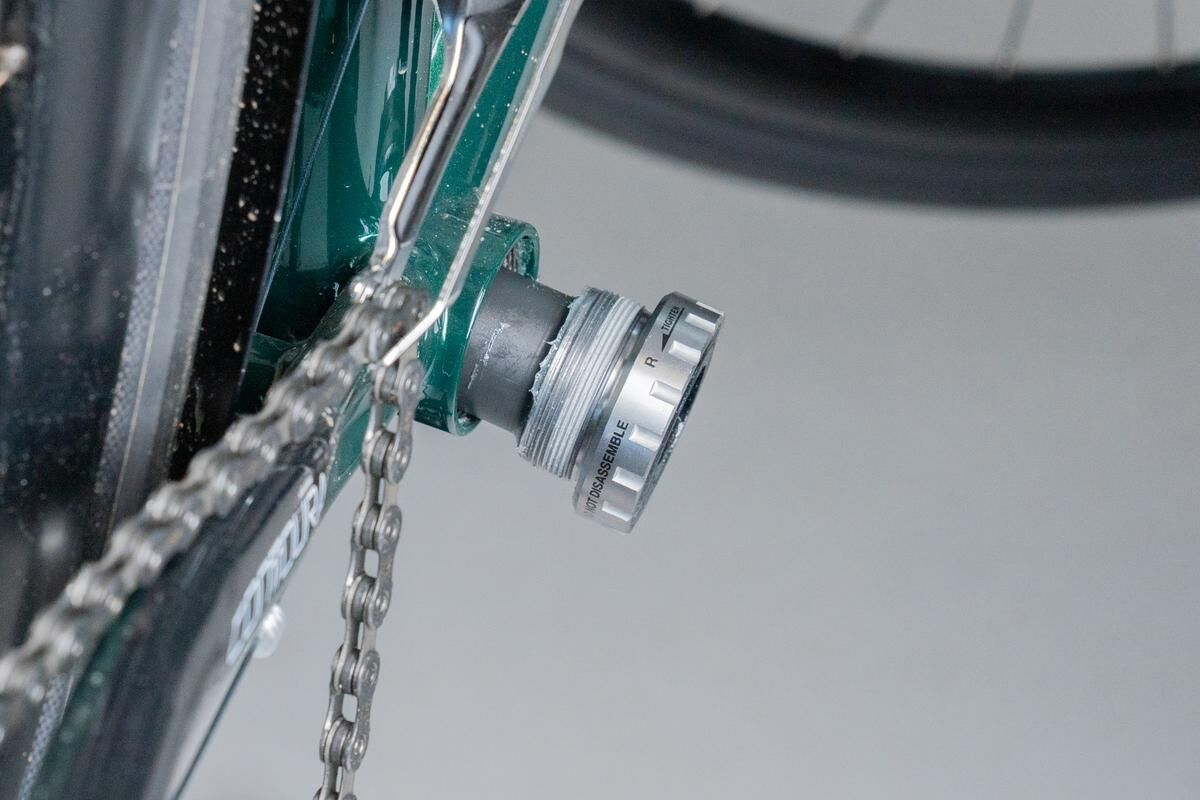
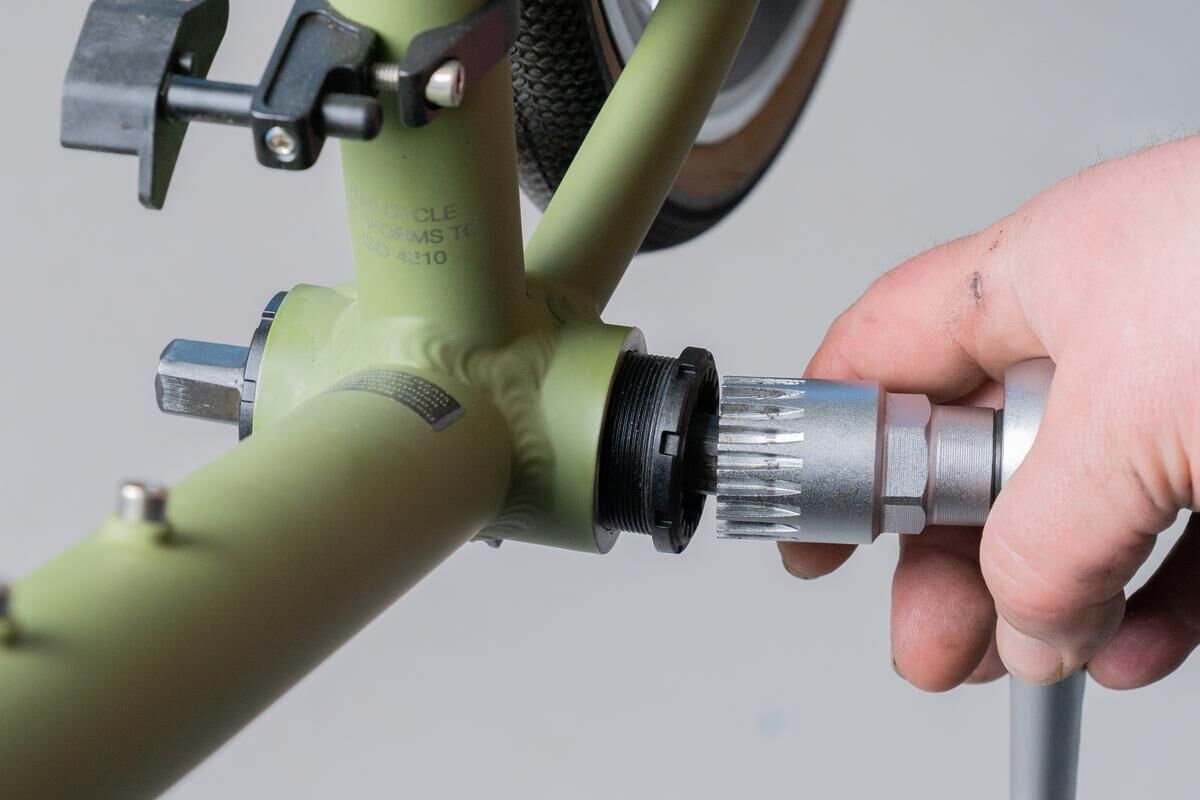
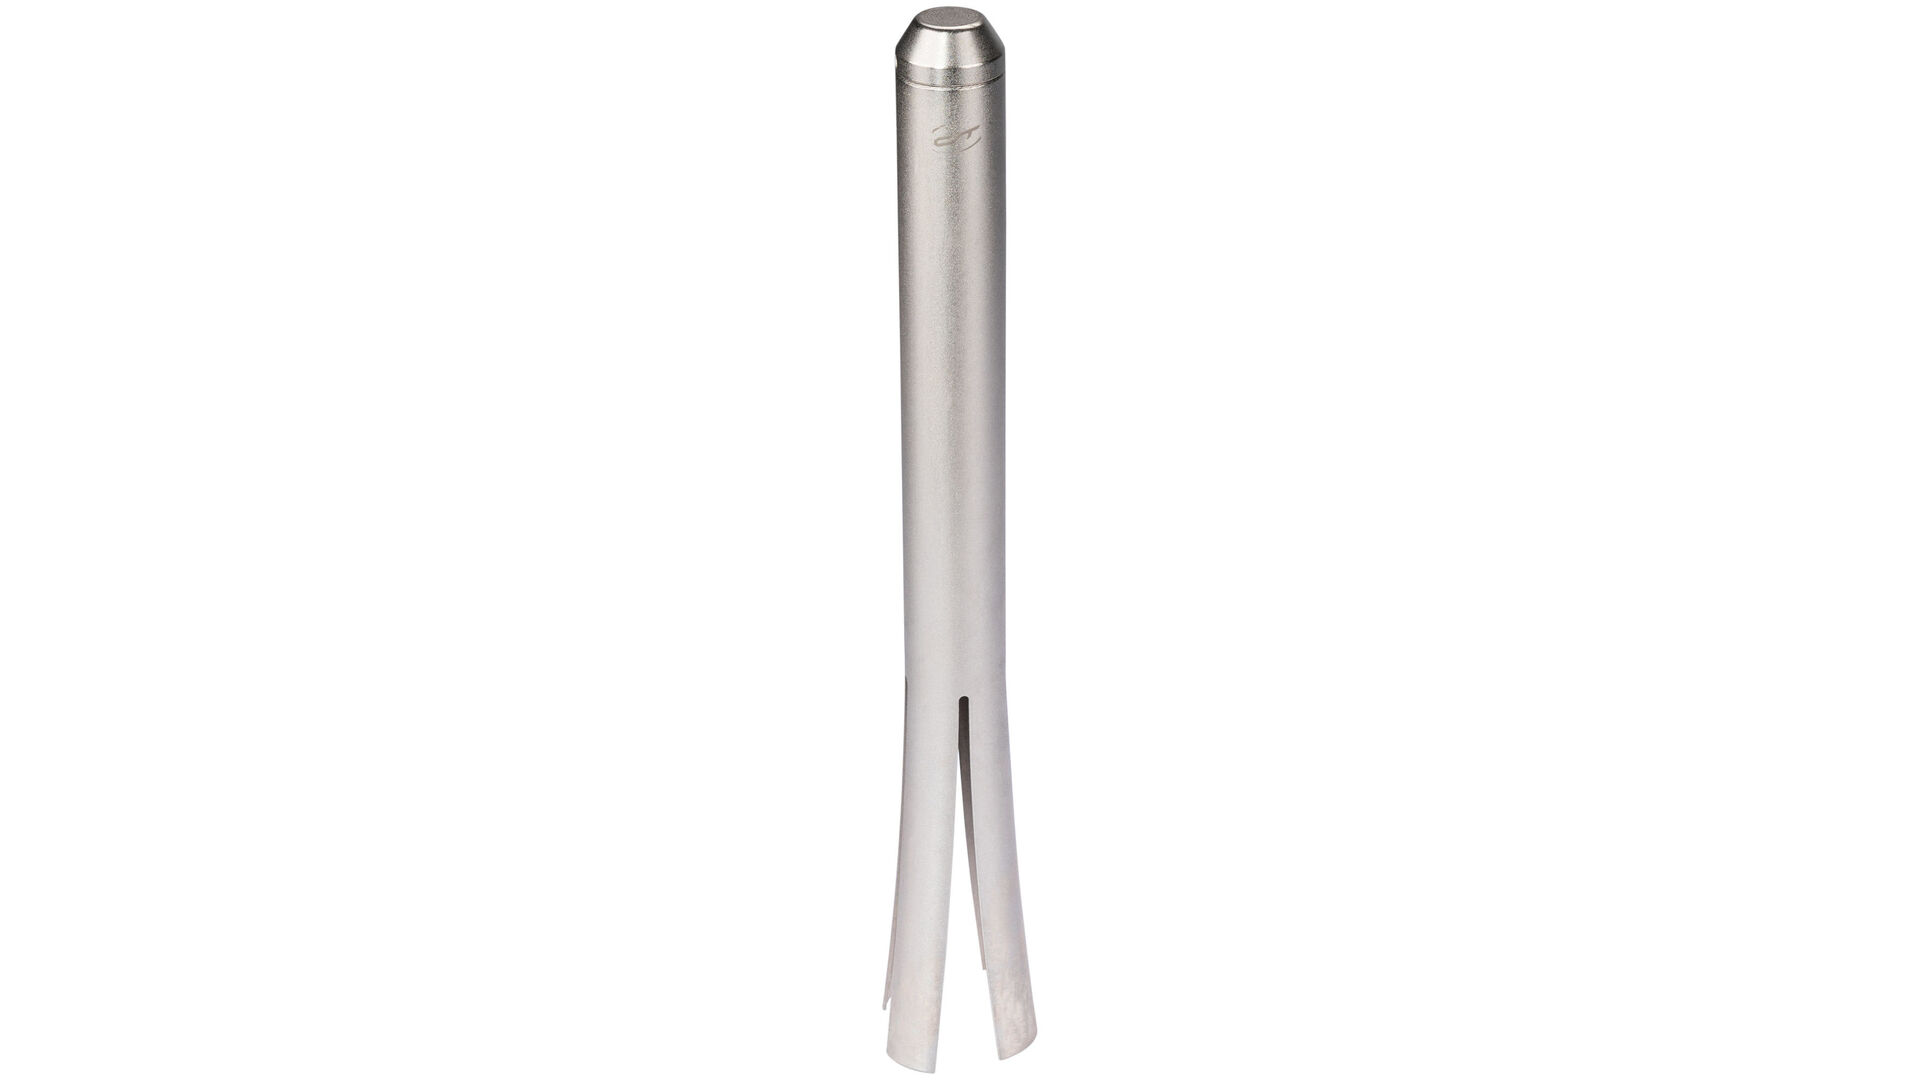
With cartridge bearings, both cranks are removed with the help of a special tool – the crank puller. Prior to this, you have to loosen the screws that fix the crank to the axle. To dismantle your cartridge bearing, you also need a special tool, usually a spline key, which is applied to the inside of the bearing shell. Cartridge bearings are usually equipped with a BSA thread – the left shell has a right-hand thread and is loosened counter-clockwise. The right shell has a left-hand thread and is loosened clockwise. Italian threads, where both bearing shells are loosened counter-clockwise, are less common.

The bearing shells attached on the outside next to the bottom bracket housing are also loosened with the help of a special tool. The left shell is unscrewed counter-clockwise, the right one clockwise.


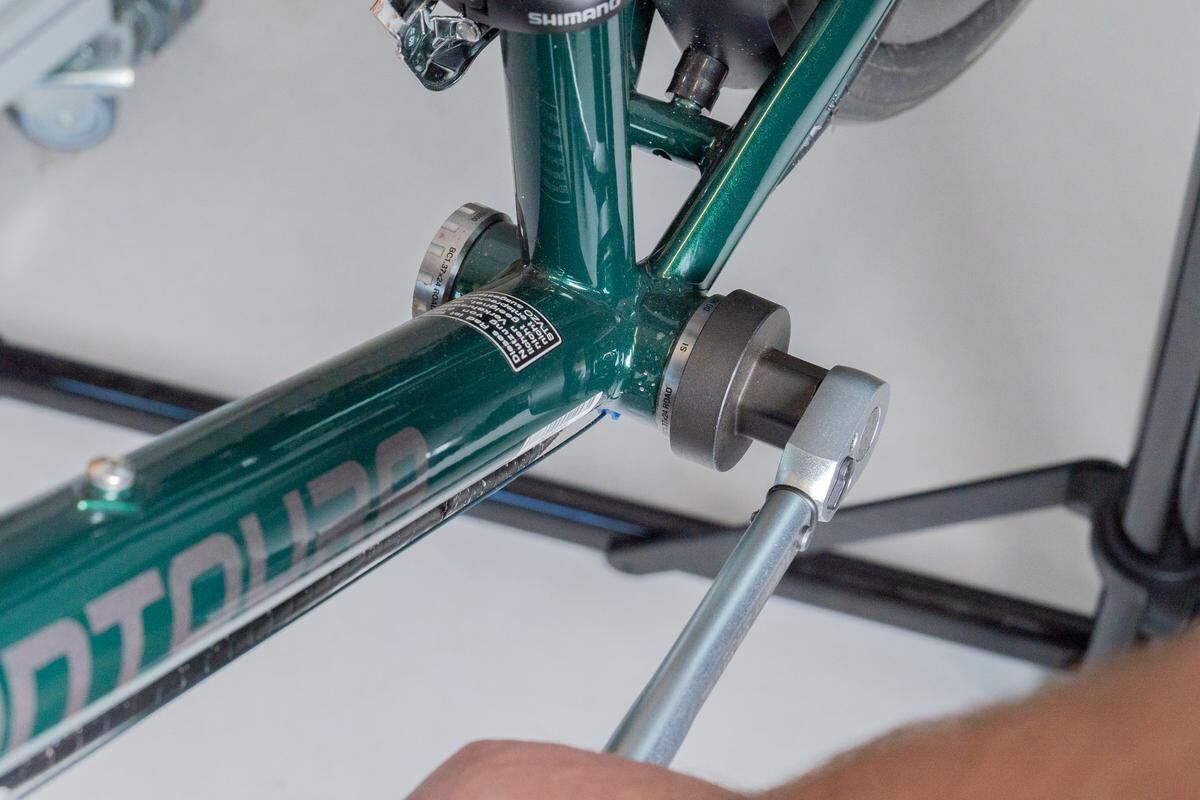
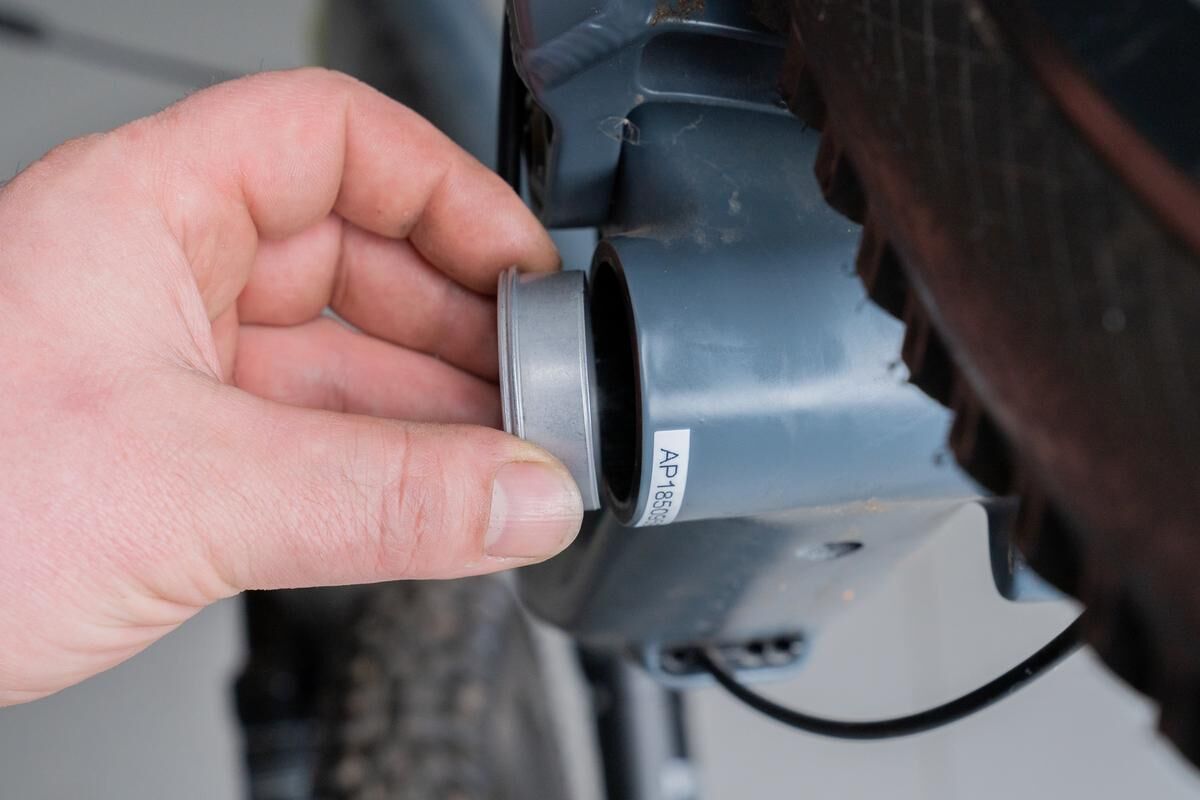
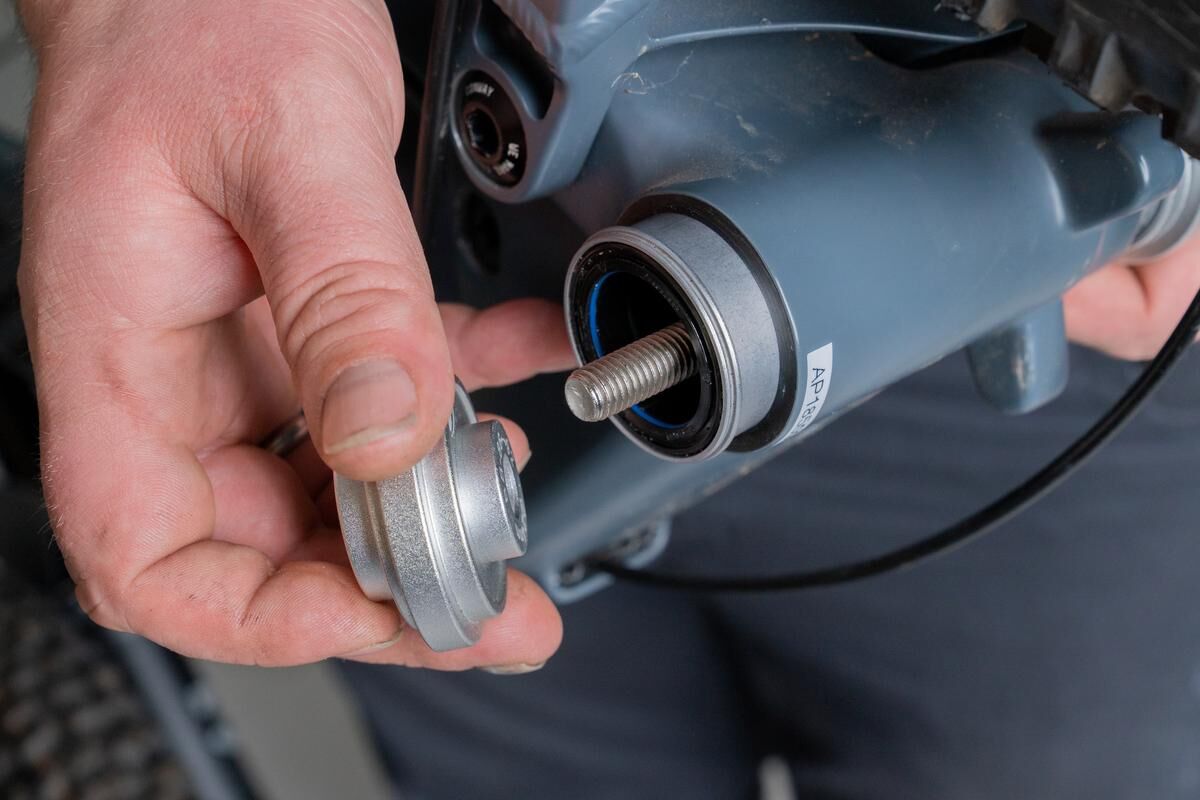
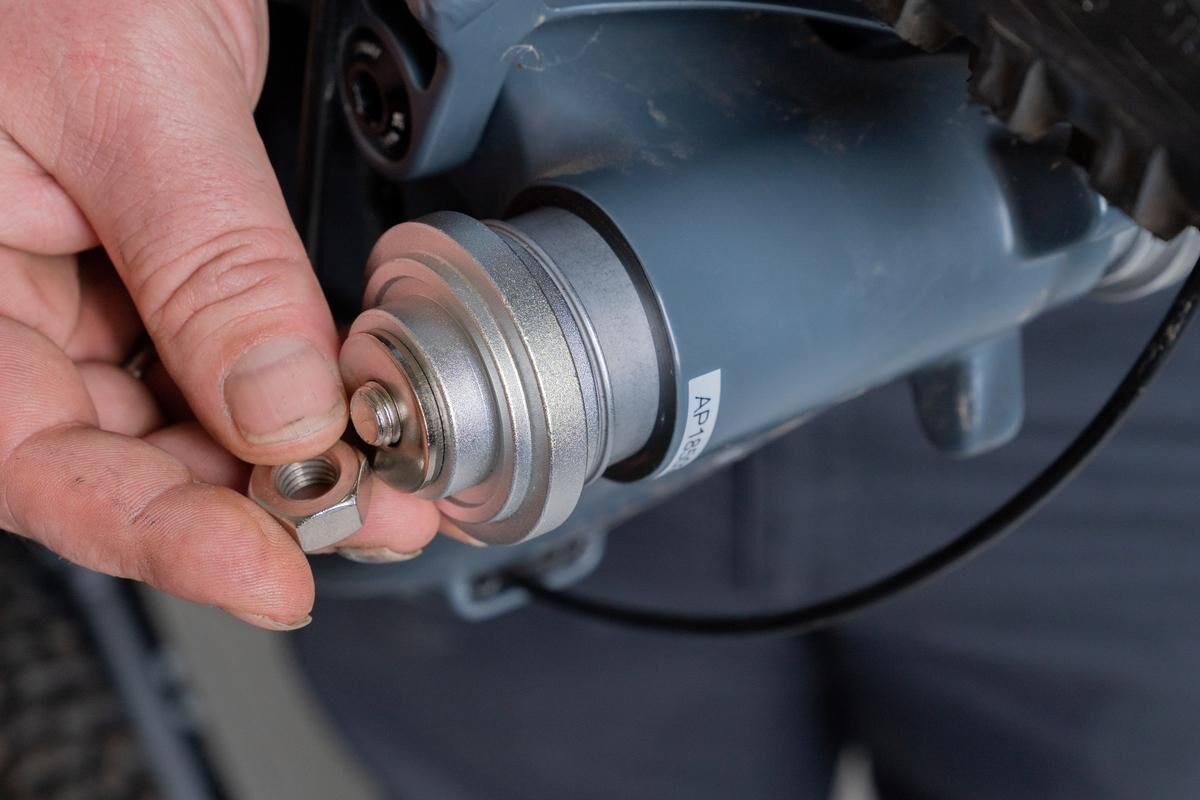
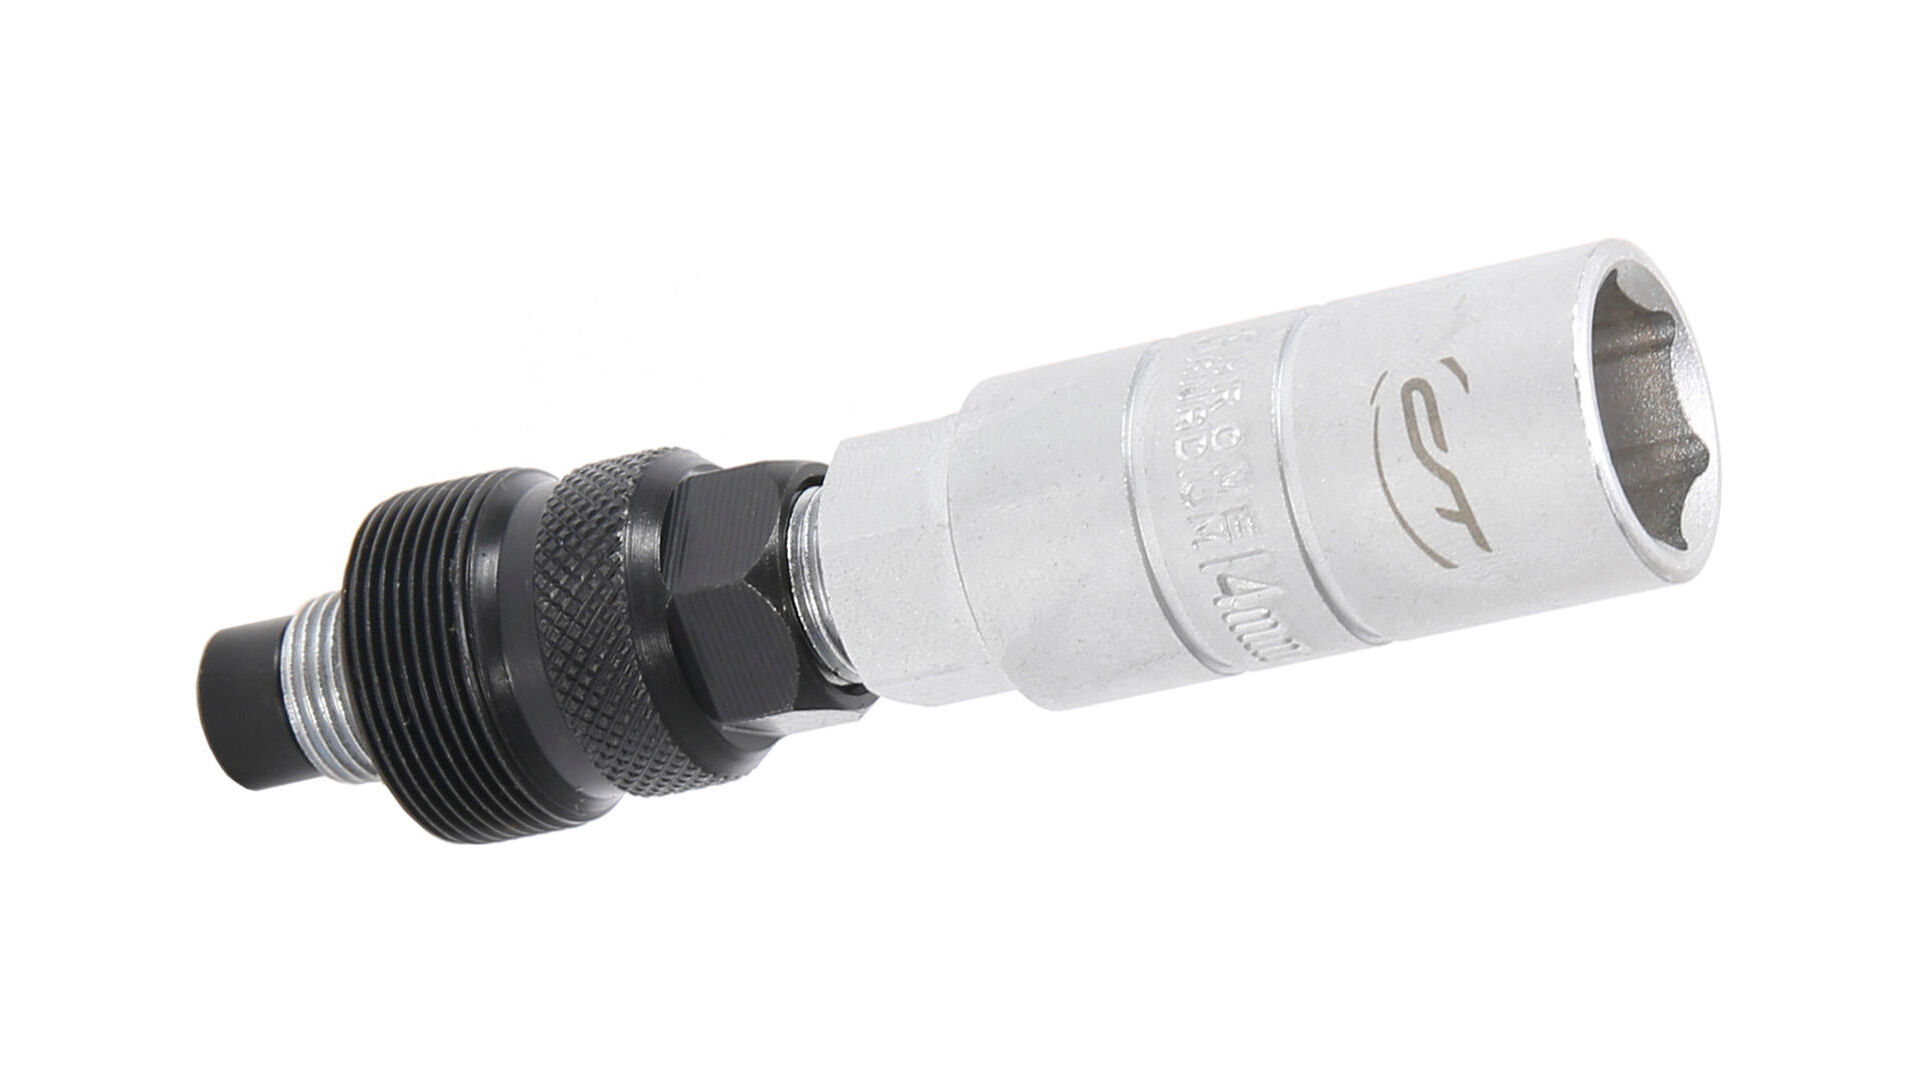
The pressfit inner bearings which are pressed into the bottom bracket housing are driven out. A special extraction tool is needed for this. You insert this into the bottom bracket housing on the side facing the bearing shell to be removed. There it expands and you can drive out the bearing shell by carefully tapping it with a rubber hammer.
4. Correct installation of the bottom bracket
Prior to assembly, make sure that your new bottom bracket fits your frame (cartridge bearings, pressfit or external bearings) and has the right crank holder (square or multiple spline) and/or the correct axle diameter and length. Information on this can be found before buying, either from the bike manufacturer or from the label on the old (dismantled) bottom bracket.
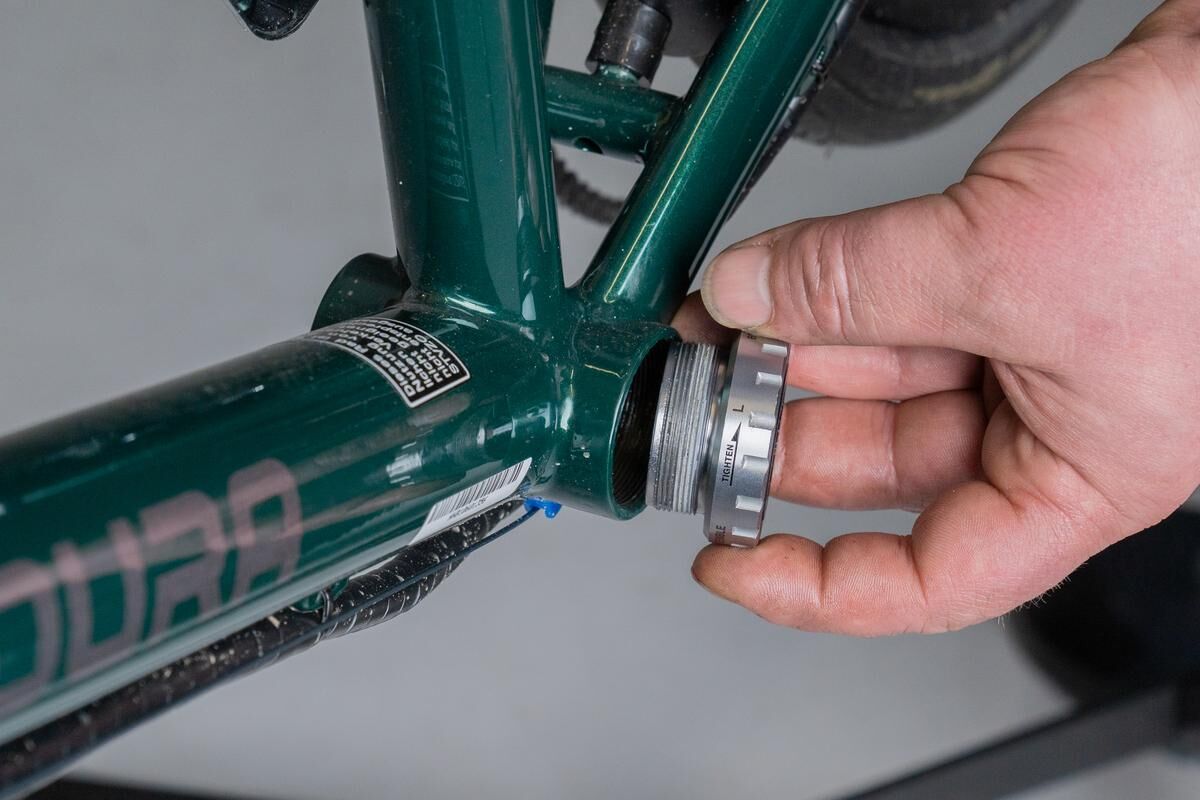
Assembly of a cartridge bearing
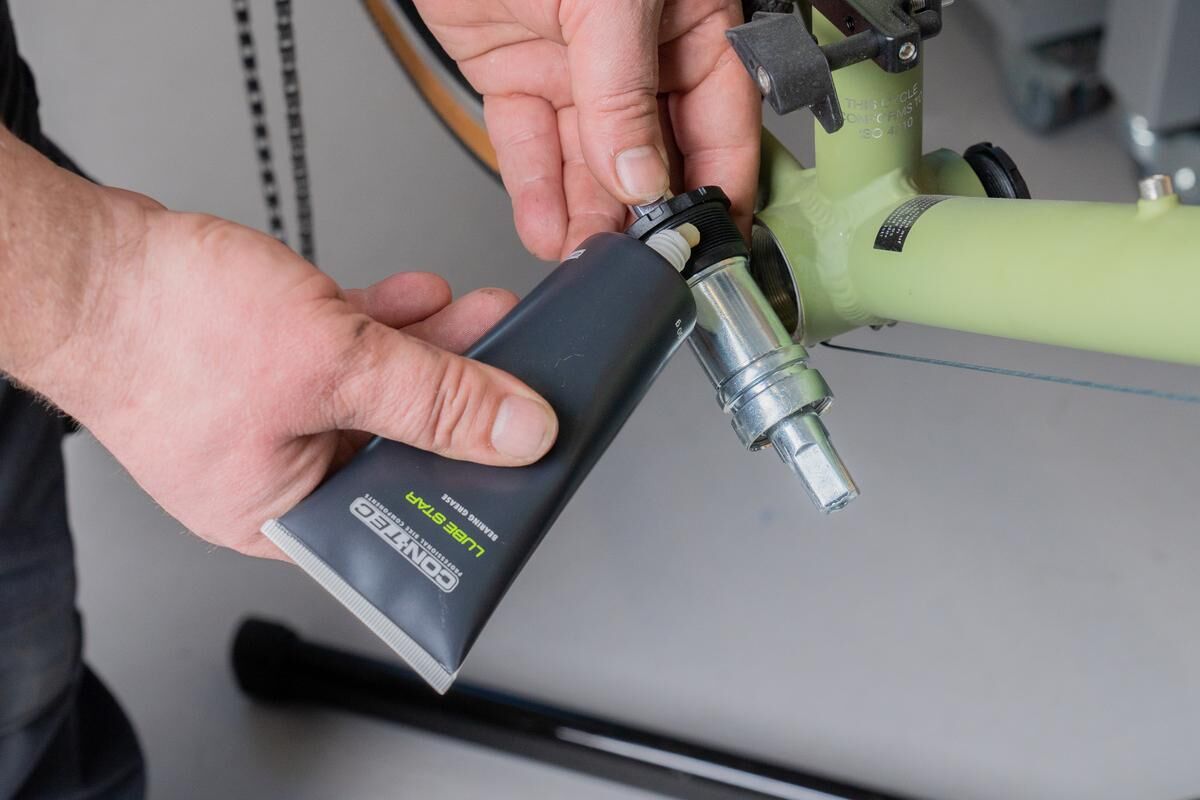
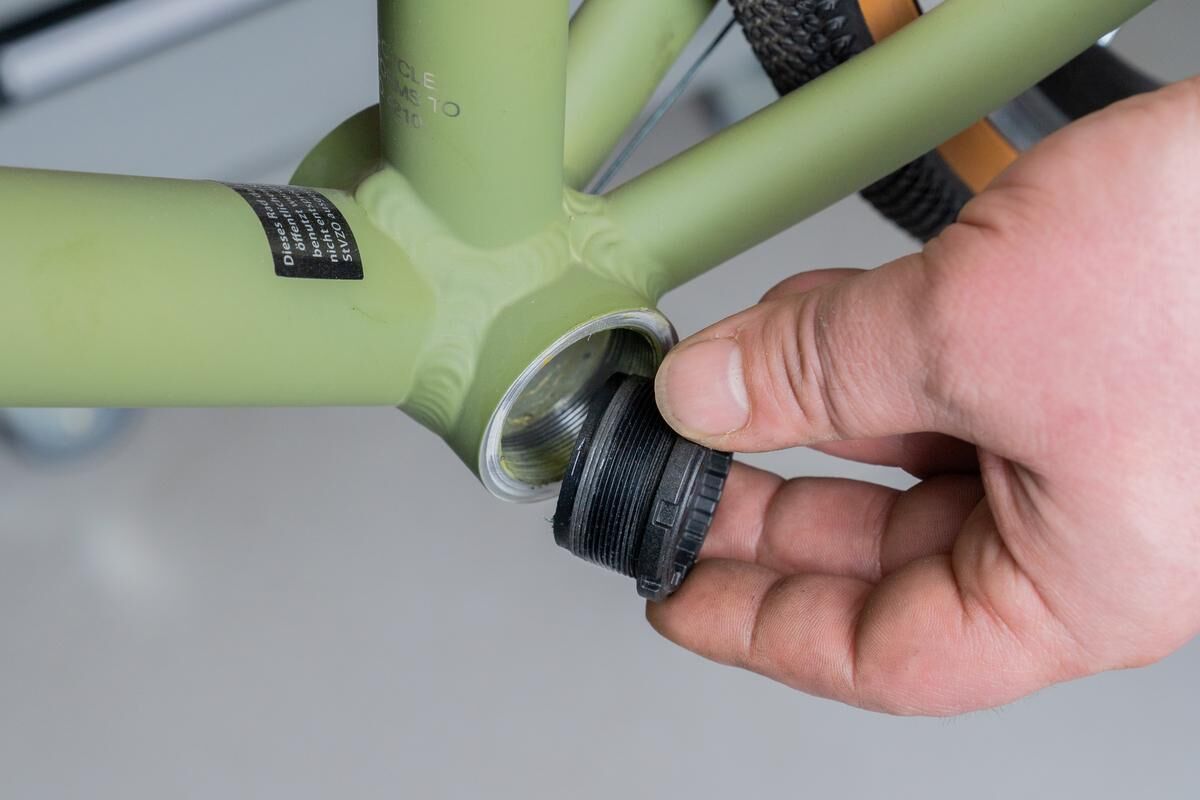
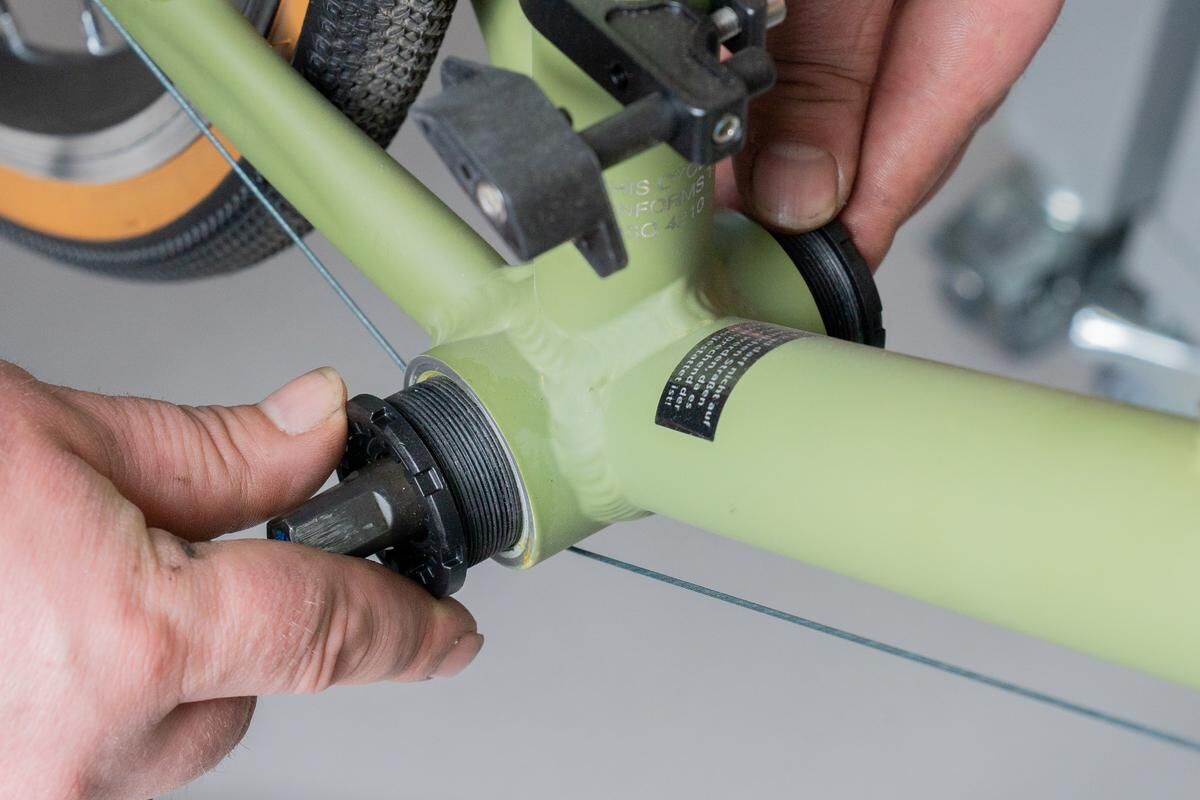
Before assembling the cartridge bearing, you should grease the threads of the bearing shells and the frame or coat them with mounting paste. The bearing shells are different for each side, so pay attention to the location where you screw in which bearing shell. In cartridge bearings, the drive and non-drive sides of the bearing shells are usually labelled. The right thread is often integrated into the cartridge. First you screw the left bearing shell into the frame, then the cartridge is screwed in from the right. Afterwards, reassemble the cranks.
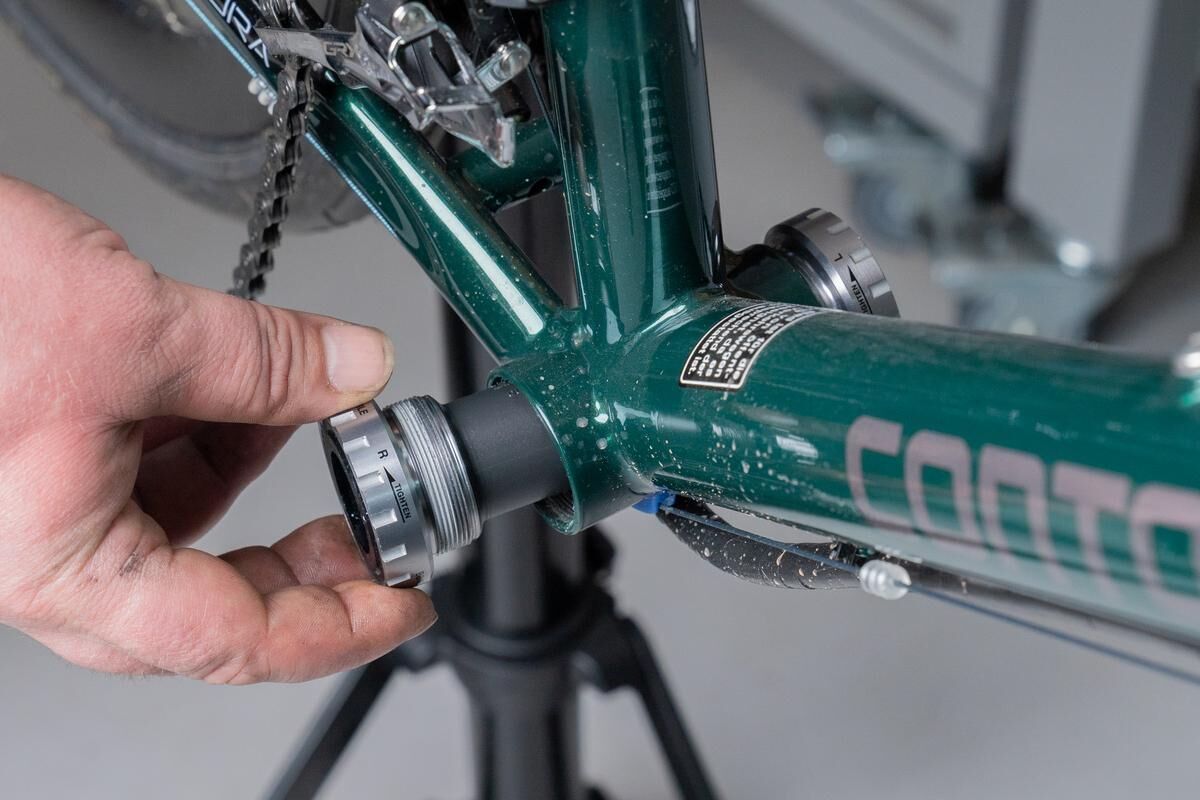
Assembly of a threaded bearing
The bearing shells of threaded bearings are also greased and screwed in. When screwing in the new bearing, pay attention to the important spacers mentioned above. Then you insert the axle which is firmly connected to one crank and put on the other crank. Using the crank cap tool, you can now pull the crank onto the axle until the bearing is free of play. Then push on the crank, push down the locking plate and tighten the clamping screws of the crank arm again. With cartridge bearings, the crank screw in the axle holds the crank arms in place. It is not necessary to tighten additional clamping screws.
Pressing in a pressfit bottom bracket
You can assemble a pressfit bottom bracket with a special pressfit tool. If necessary, you can build this yourself with a threaded rod, nuts and washers. Grease the bearing shells or coat them with assembly paste. If there is an inner sleeve, place it on the right bearing shell and insert both into the bottom bracket housing. Now press in the right bearing shell with the tool and remove the tool again. When pressing it in, make sure that the bearing shell does not get jammed. You can now place the left bearing shell on the bearing housing. This is also pressed in with the tool. Once both bearing shells are flush on the bottom bracket housing, you insert the axle which is firmly connected to a crank and assemble the second crank. Finally, you set the bearing clearance with the spreader ring under the crank.
Is the thread in the frame defective? No need to despair!
Tip: Sometimes the thread in the bottom bracket housing is so badly damaged that it is no longer possible to screw in a cartridge bearing. The Contec CBB bottom bracket with square shaft offers the perfect solution. It is simply pressed in and can replace all common threads. Its conical bearing shells are screwed together in the bottom bracket housing.

Working on your bike using a repair stand
Do you have trouble keeping your bike upright when you are working on it and you both your hands are never free? A repair stand holds your bike and makes it easier to work on it.
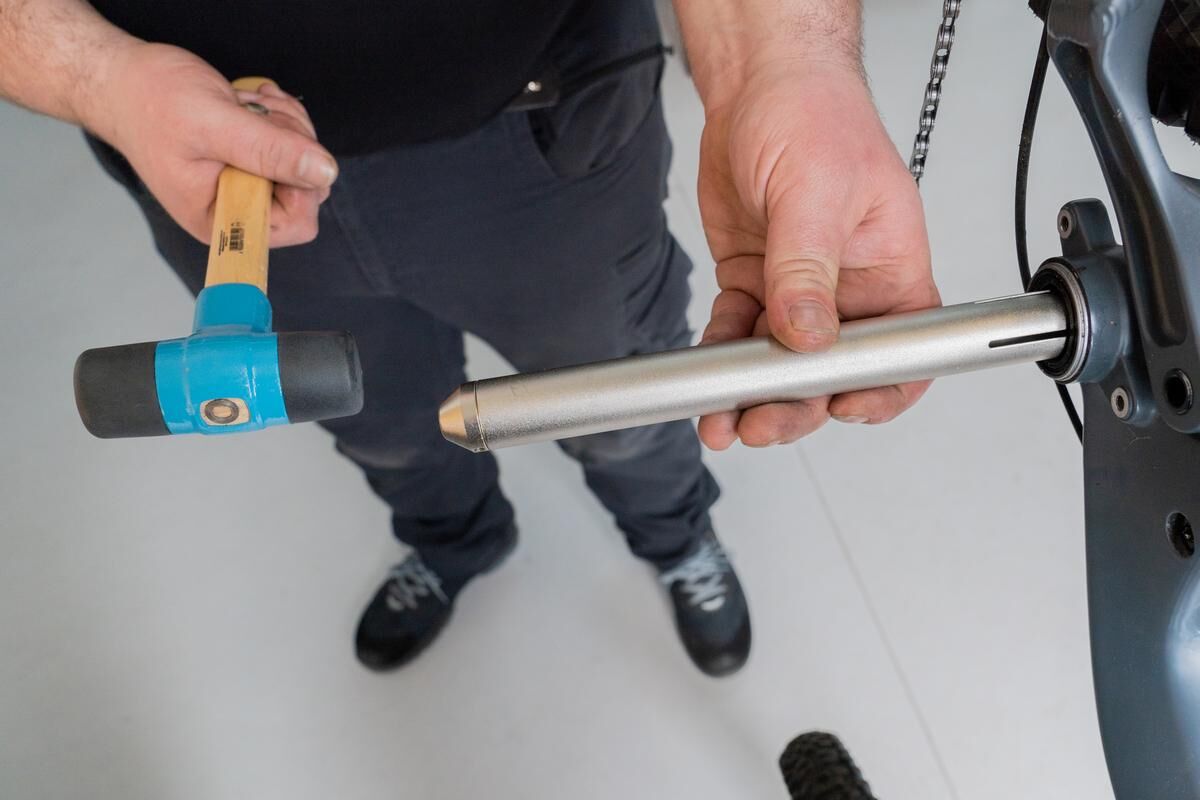
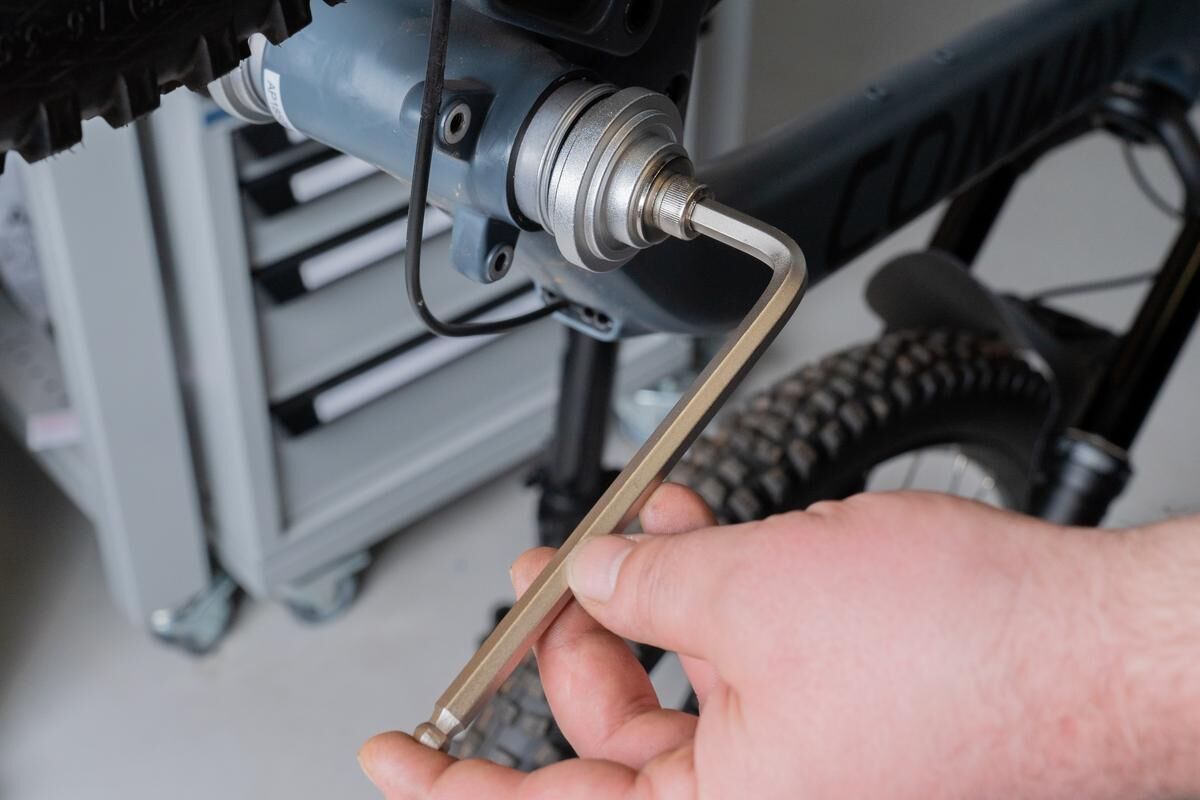
The removal of the bearing is illustrated using a Shimano bottom bracket and matching crank. Even though some brand-specific work steps are shown here, the basic procedure is the same for other crank manufacturers. Check the exact details for crank removal and installation with the manufacturer of your drive.

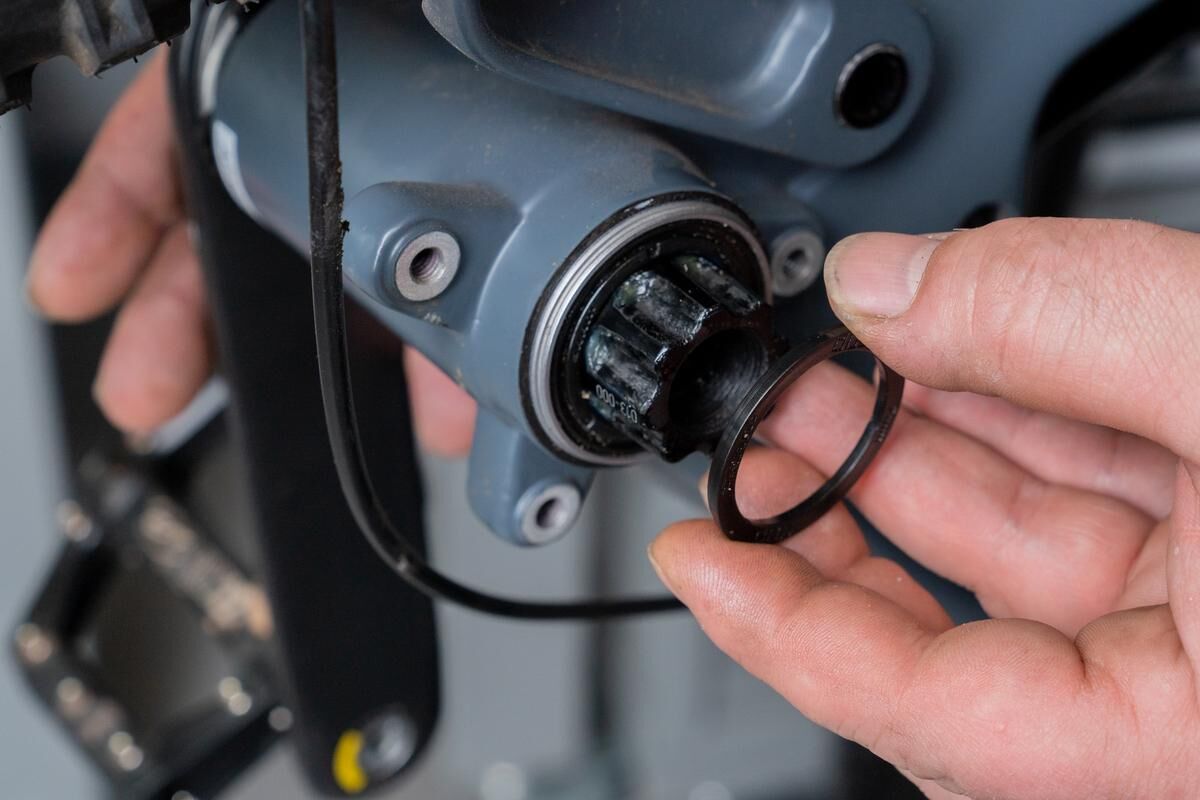
With pressfit bearings, check whether and where a spacer is mounted so that you can reattach it correctly when assembling the new bearing.
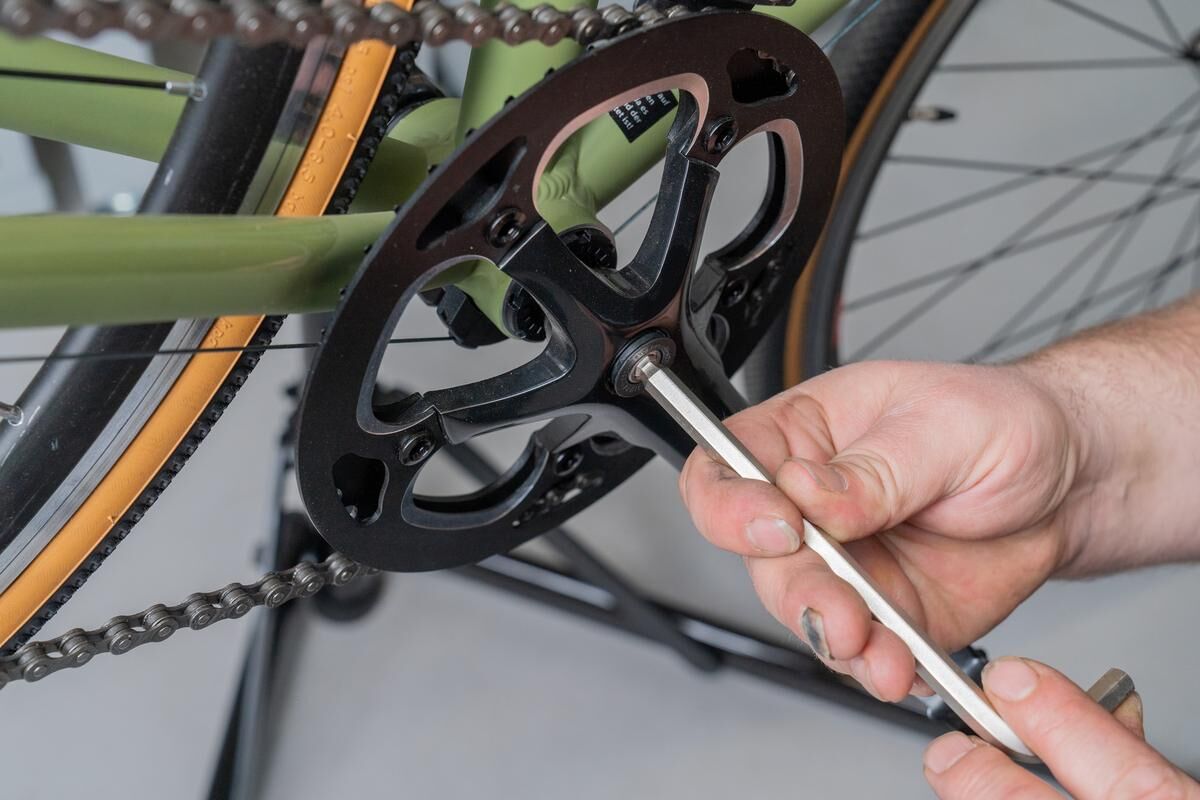
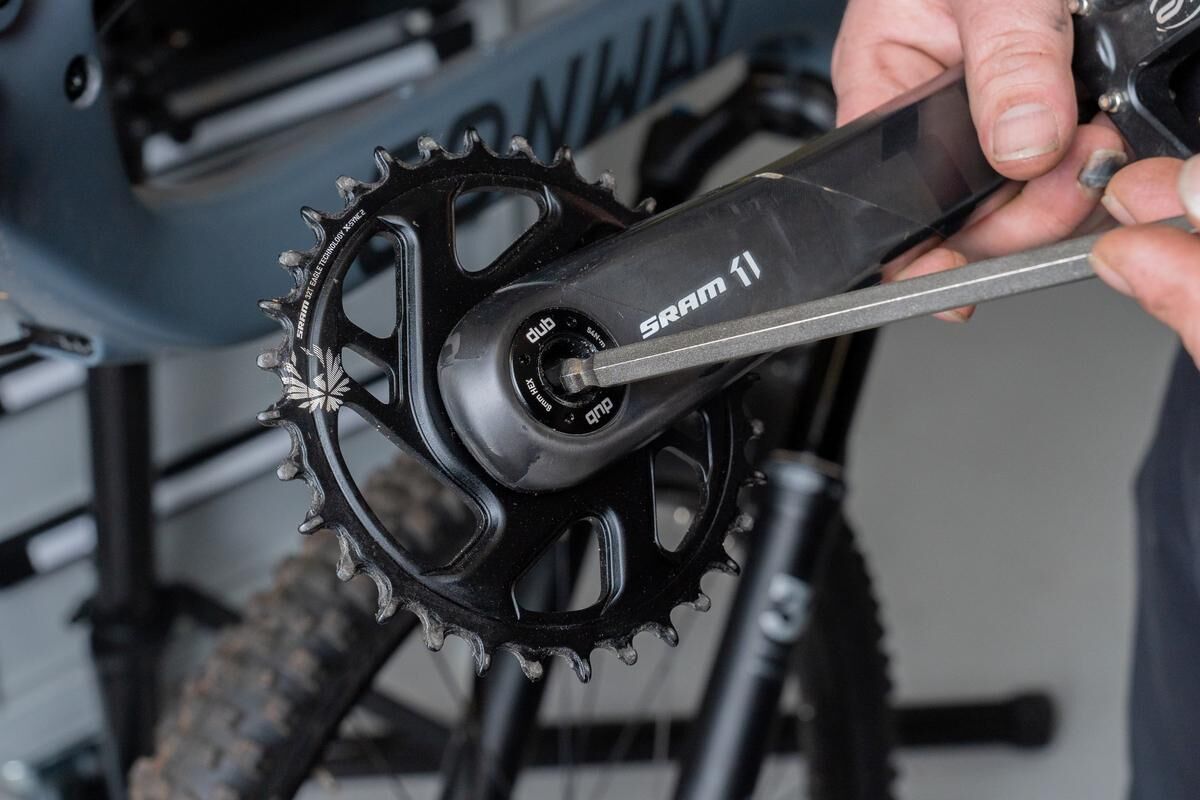
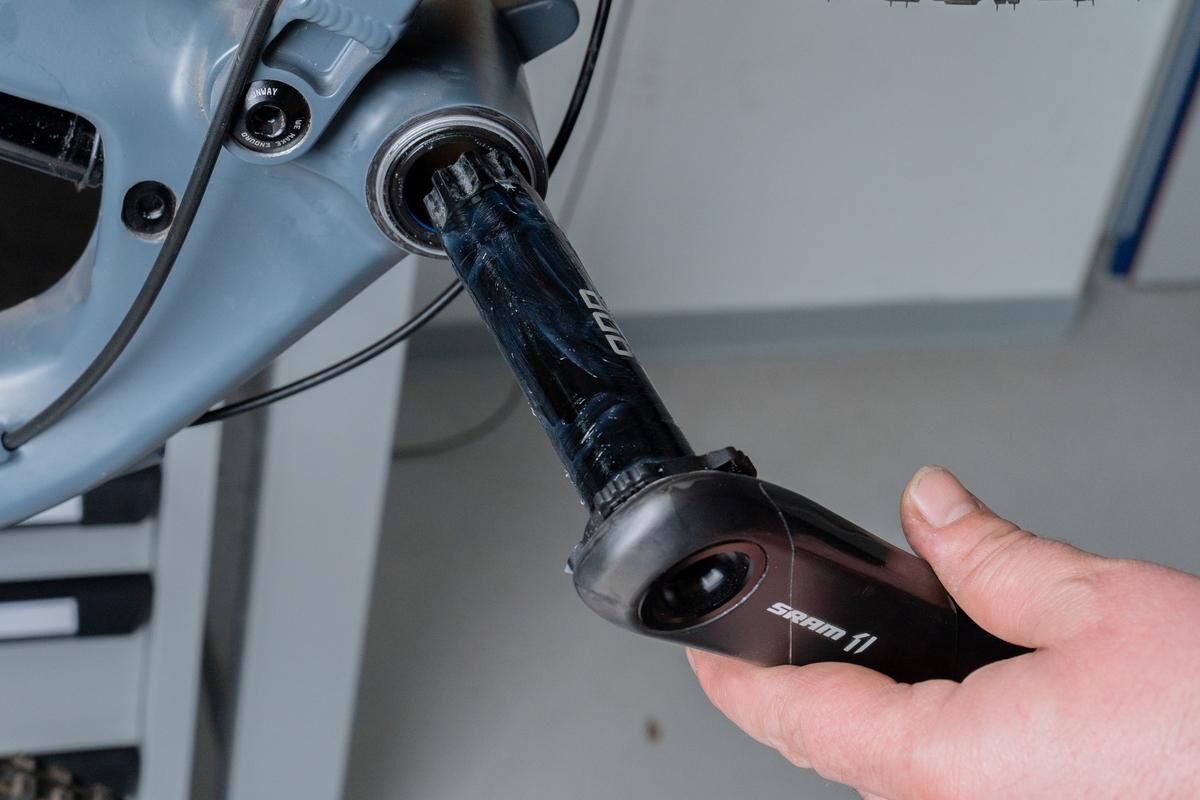
The dismantling of a pressfit bottom bracket is shown using the example of an SRAM bottom bracket or an SRAM crank. Here too, there are manufacturer-specific assembly steps, but the basic principle can be transferred to other manufacturers. But first, check with the manufacturer of your drive.


BOX.fit Innenlager of CONTEC - mounting a Pressfit bearing without special tools
Our new BOX.fit bottom bracket for Pressfit allow you a quiet, smooth and easy running of the crank and your drive through their special lock-on design, which compensates for uneven surfaces in the frame and ball bearings that are always positioned parallel and centric to each other.