
Bicycle pannier rack: Easily retrofit a pannier rack
The classic, functional pannier rack remains a useful piece of kit. Despite all the technical advances on city and trekking bikes, such as randonneurs, or new trends, such as gravel bikes, there is hardly a better method to securely transport heavy cargo. And it’s no wonder: a rear pannier rack with correspondingly sized panniers can easily carry up to 25 kilograms. Accordingly, the timeless pannier rack is equally useful for carrying your shopping as it is on a multi-day trekking tour with friends, during which it can be used to carry plenty of provisions and numerous travel utensils by bike. What’s more, a pannier rack allows you to ride long distances in comfort, while sparing your back the load of a heavy backpack. We show you how you can easily retrofit a pannier rack to your bike.
Necessary tools

- Metal saw or pipe cutter
- File
- Vice
- Cloth
- Allen key (usually: 4 or 5 mm)
- Torque wrench
- Thick felt pen
Step 2: Provisionally tighten the screws at the dropout
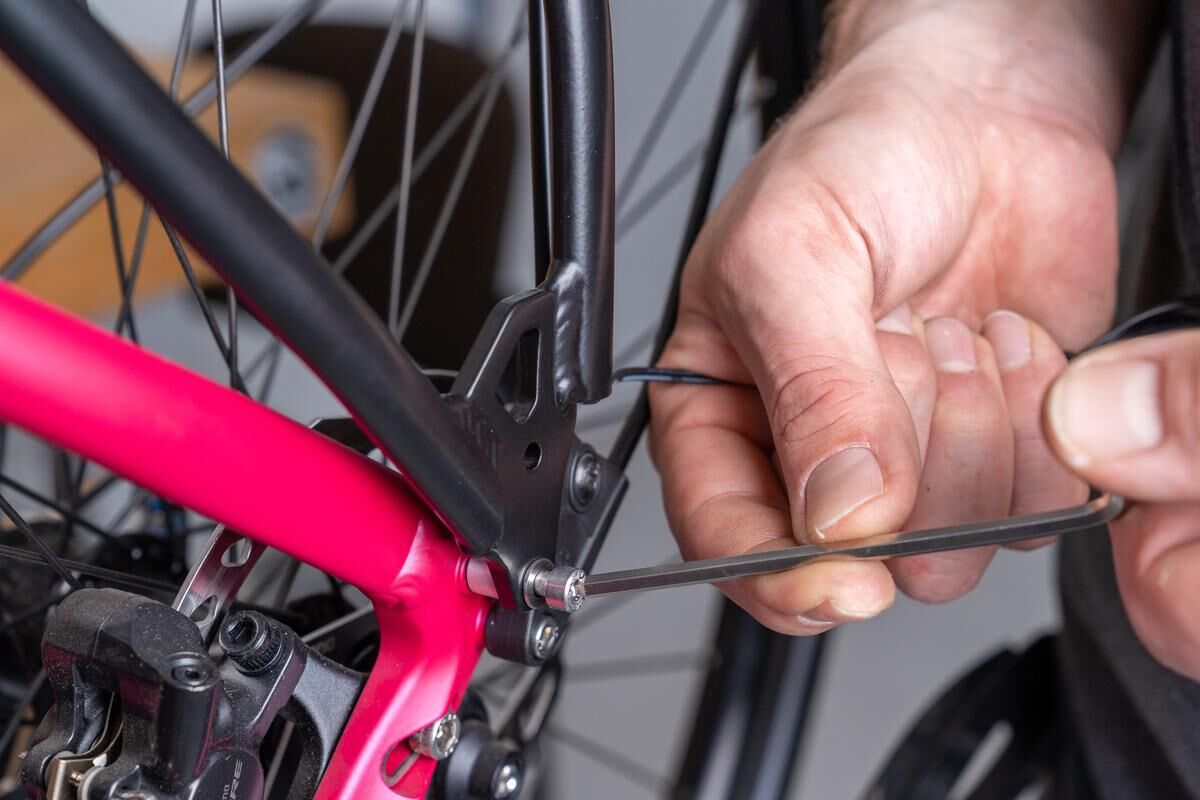
Once you have correctly aligned the rack at both dropouts using the washers, you can tighten the socket screws slightly. Leave enough slack for the rack to move, so that you can effortlessly level it out later.
Step 4: Installing the stay bolts and shortening the pannier rack stays
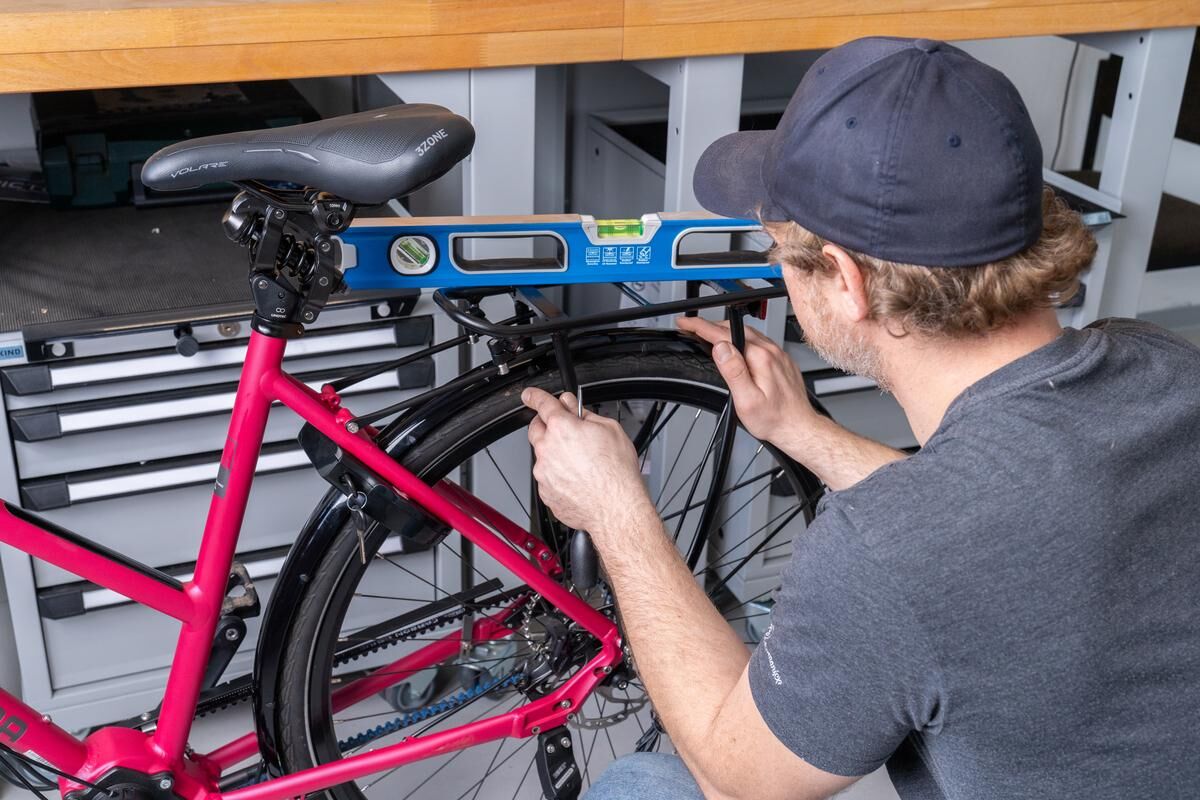
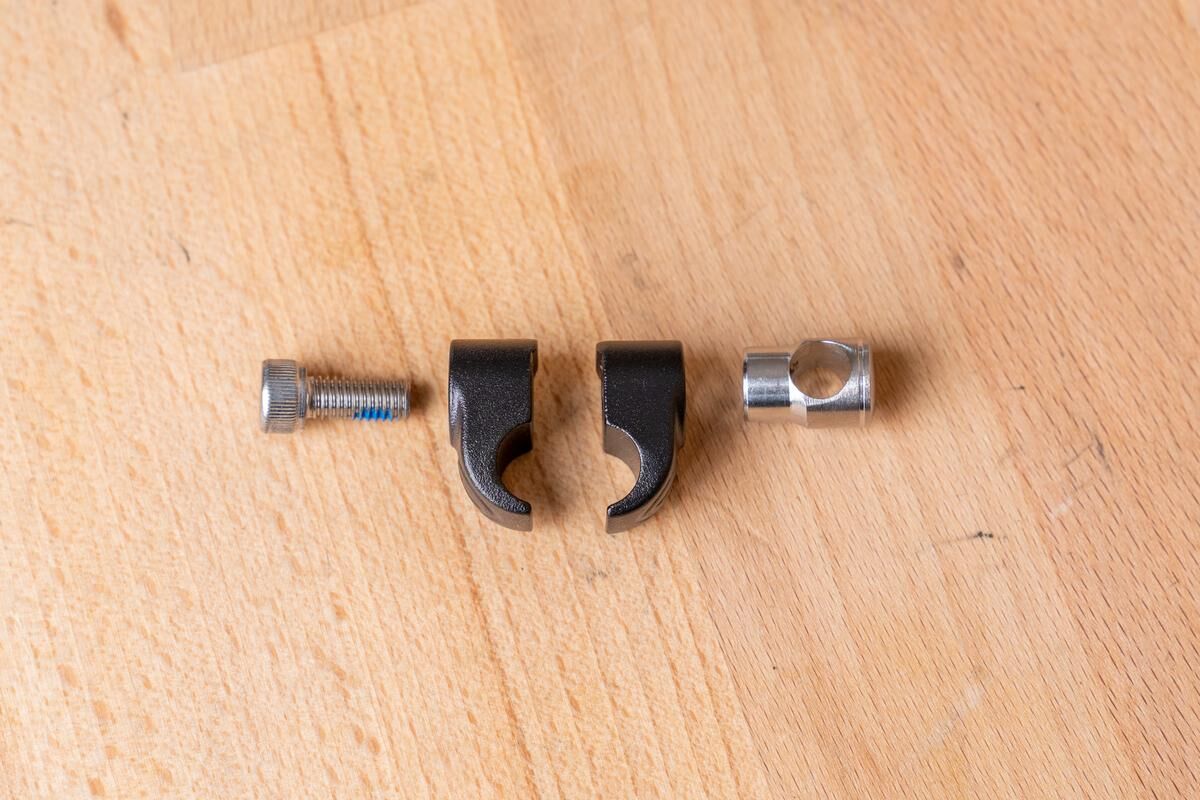
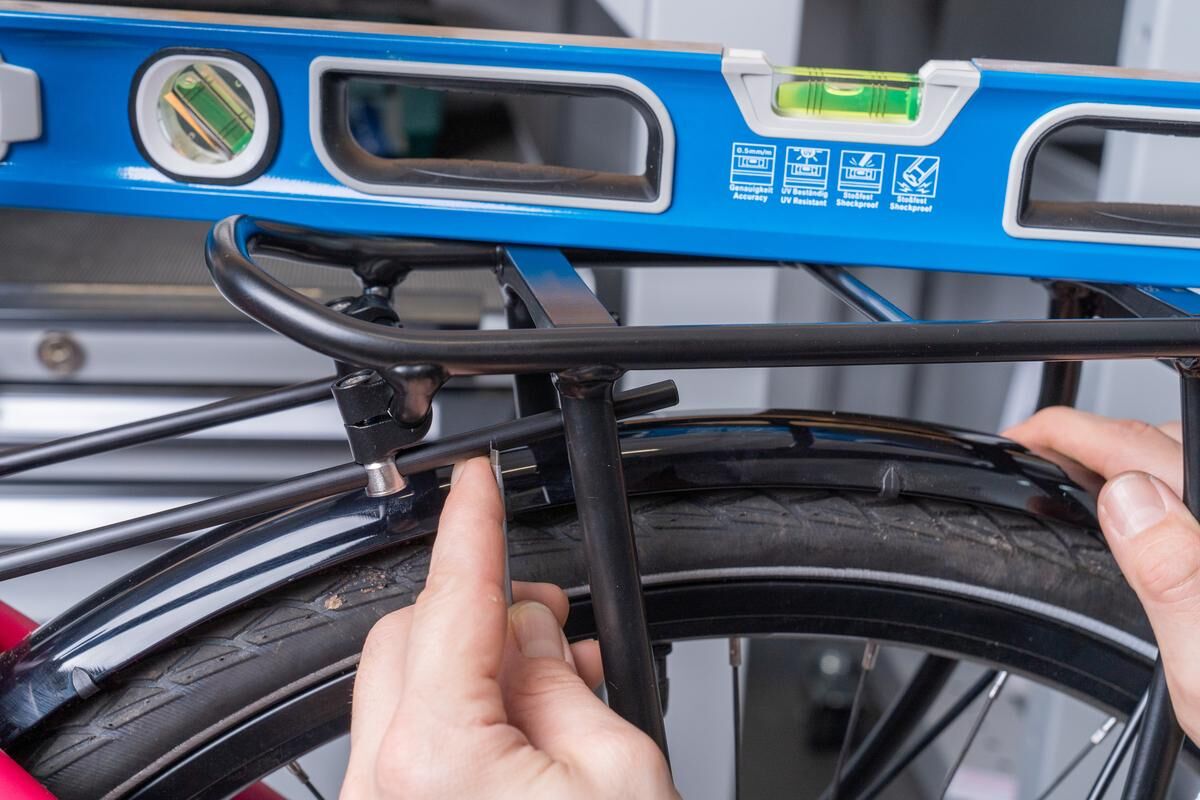
Next, you will install the accompanying stay bolts on the pannier rack. They are used to fix the upper pannier rack stays in place, which connect the rack to the seat stays. Once the stay bolts are fixed in place provisionally (the screws are tightened fully at the end), you can align the loading surface horizontally – either visually or using a spirit level. Now, mount the stays on the bolts, allow an overlap of at least 1 cm at the rear, and mark the length at which you will shorten them using a felt pen or screwdriver.

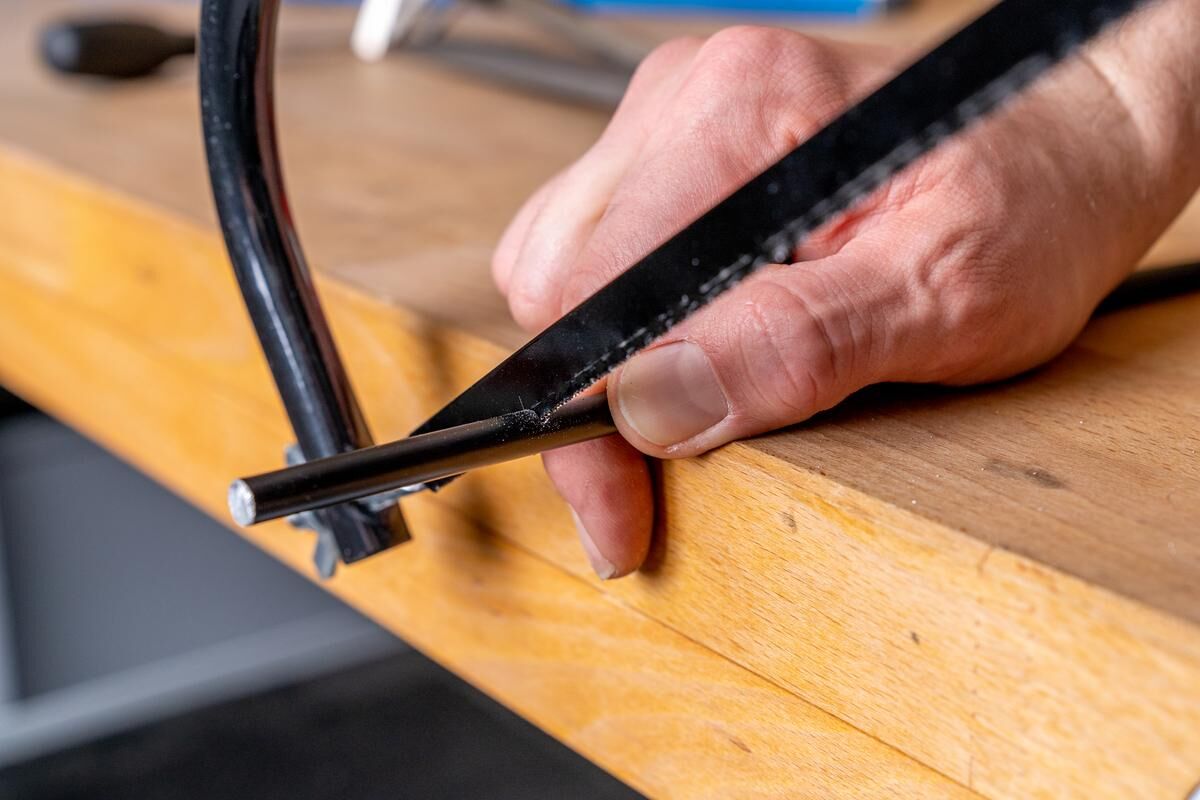
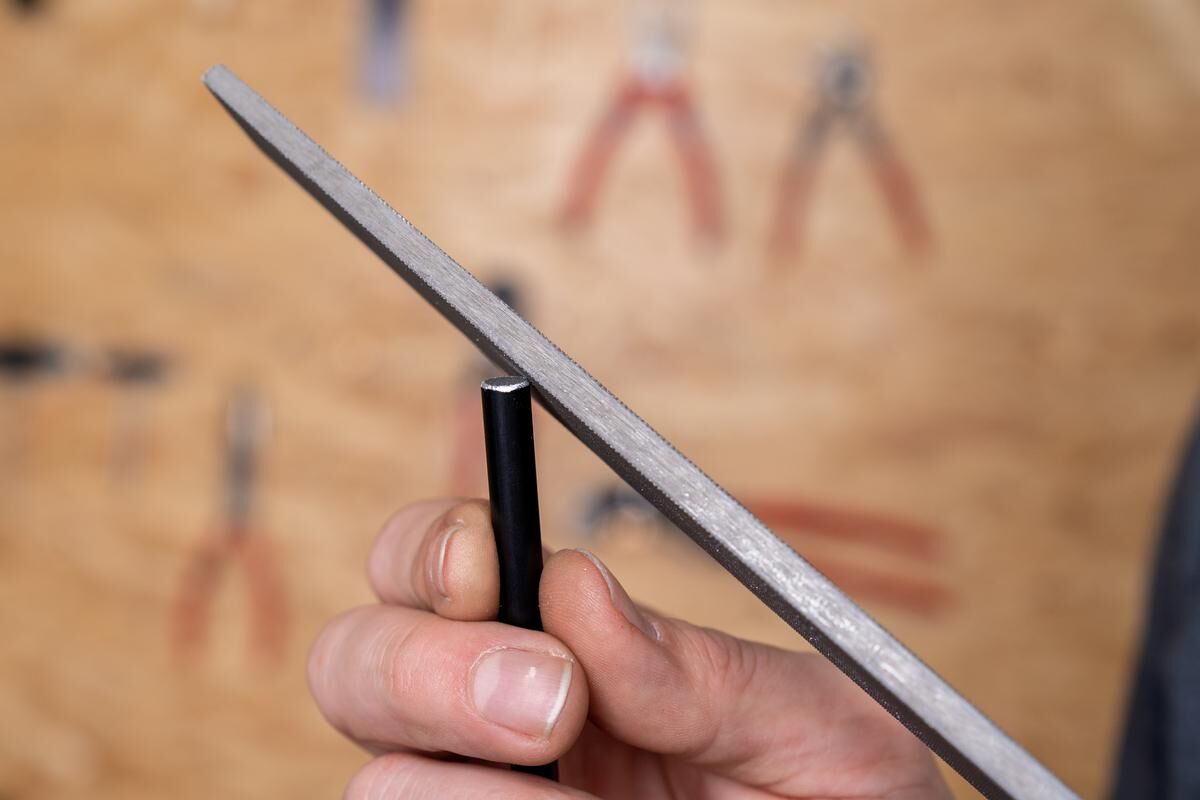
Now, wrapped in a cloth to protect them against unsightly scratches, clamp the stays in the vice one by one, and cut them at the marked location using a metal saw. Alternatively, you can use a pipe cutter. Once both stays have been cut, deburr the cut edge using a file.


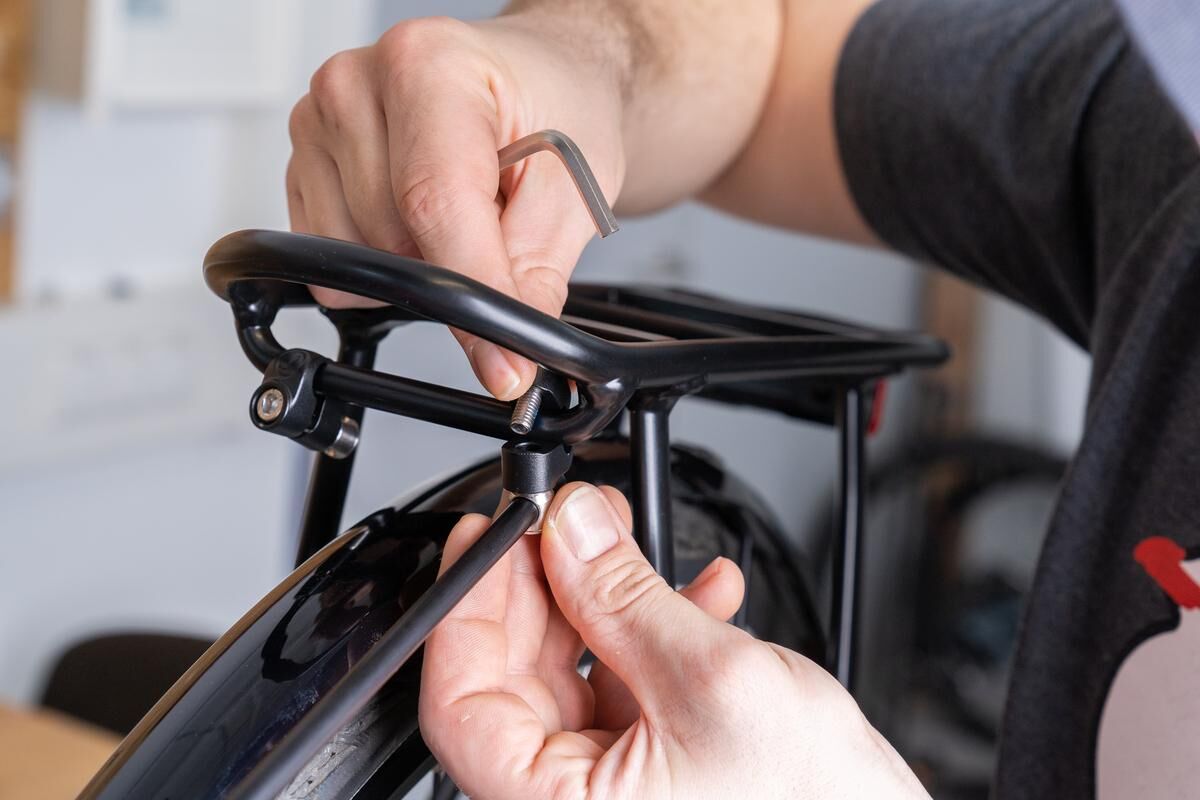
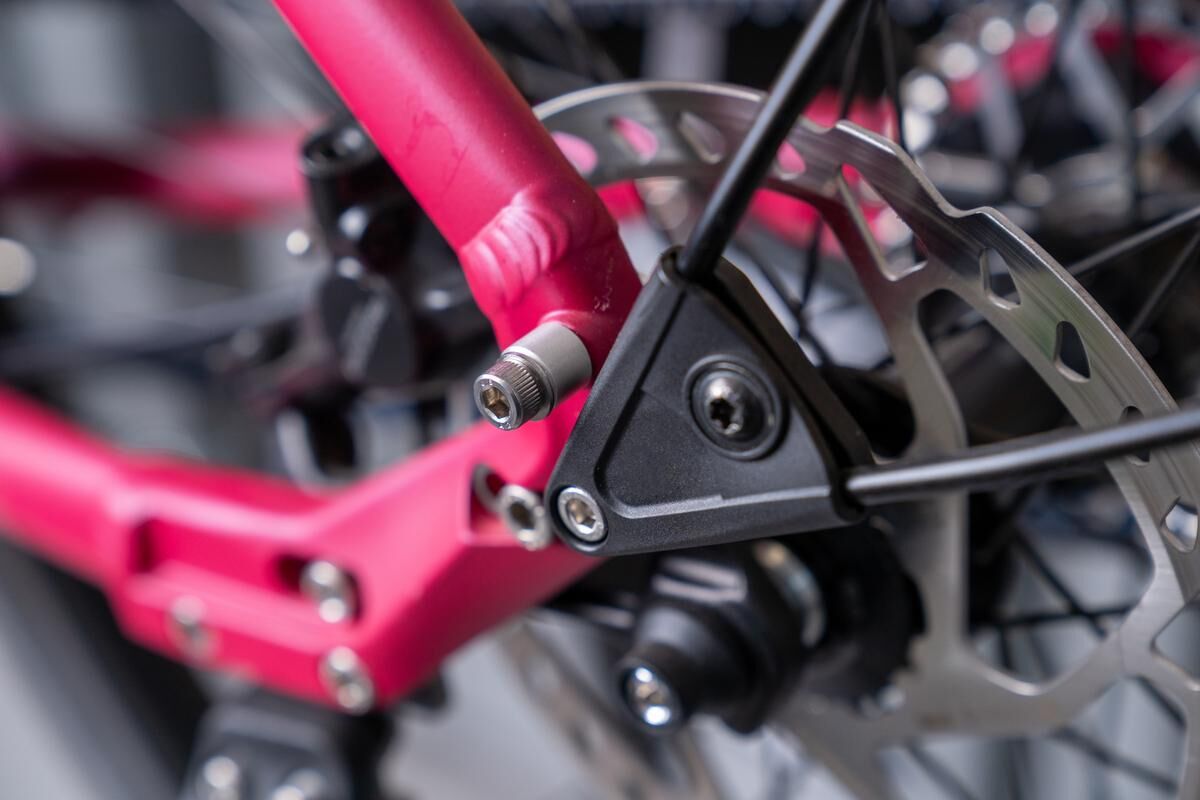
Now you can mount the struts at the rear in the bolts and screw the struts at the front to the seat struts using the hexagon socket screws - don't forget the washers under the screws! - to the seat stays. After you have finally checked with a spirit level whether the loading area is horizontally aligned, tighten the bolts on the seat struts, dropouts and the strut bolts (side/top!) to the specified torque. Now press the protective caps onto the struts - and you're done!
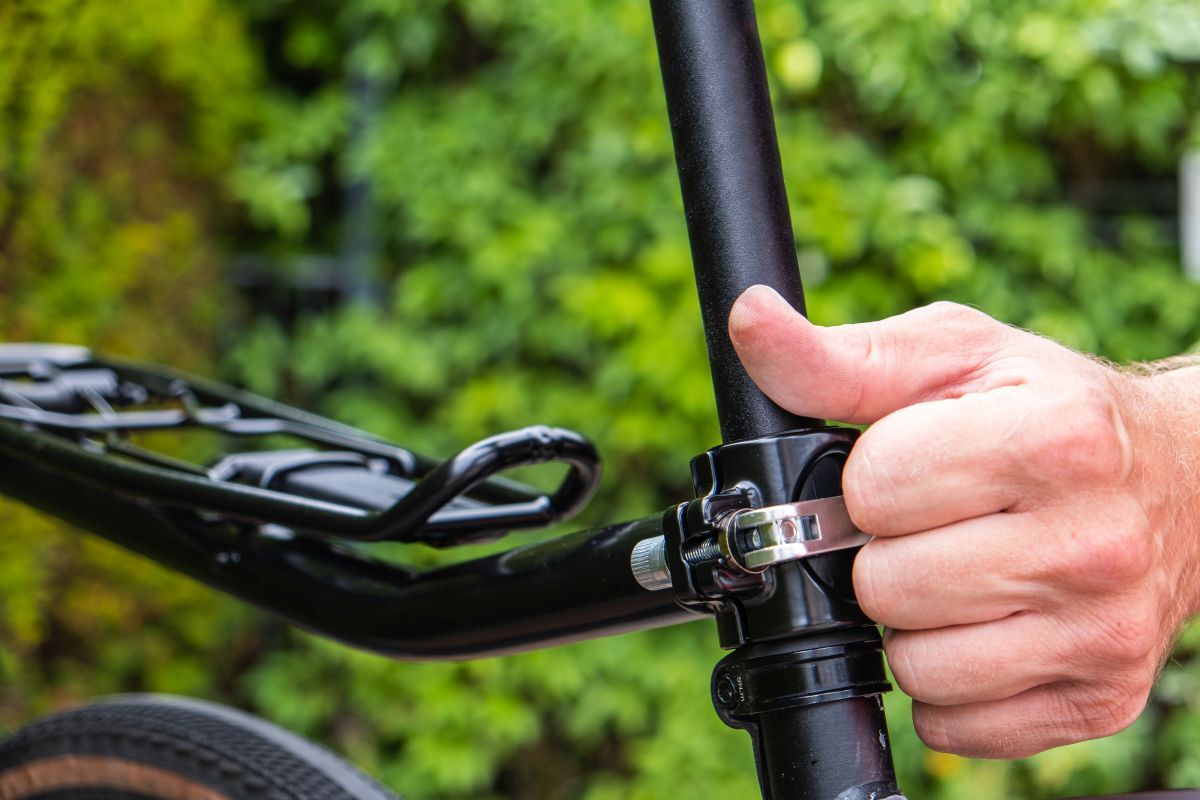
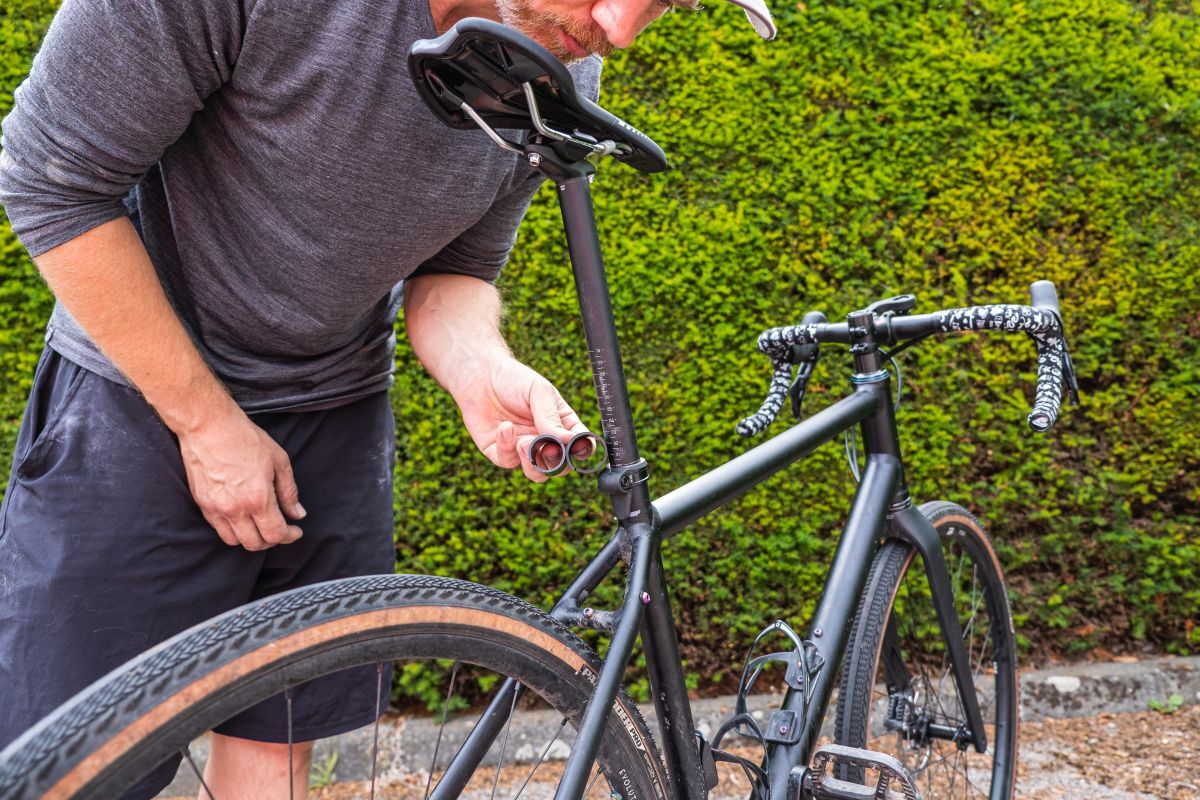
First, check whether there is a suitable rubber ring for the diameter of your seat post (usually noted at the bottom end of the seat post) inserted in the seat post clamp. If not, insert a thicker or thinner one in place of the current one. In this case, we need both rings.
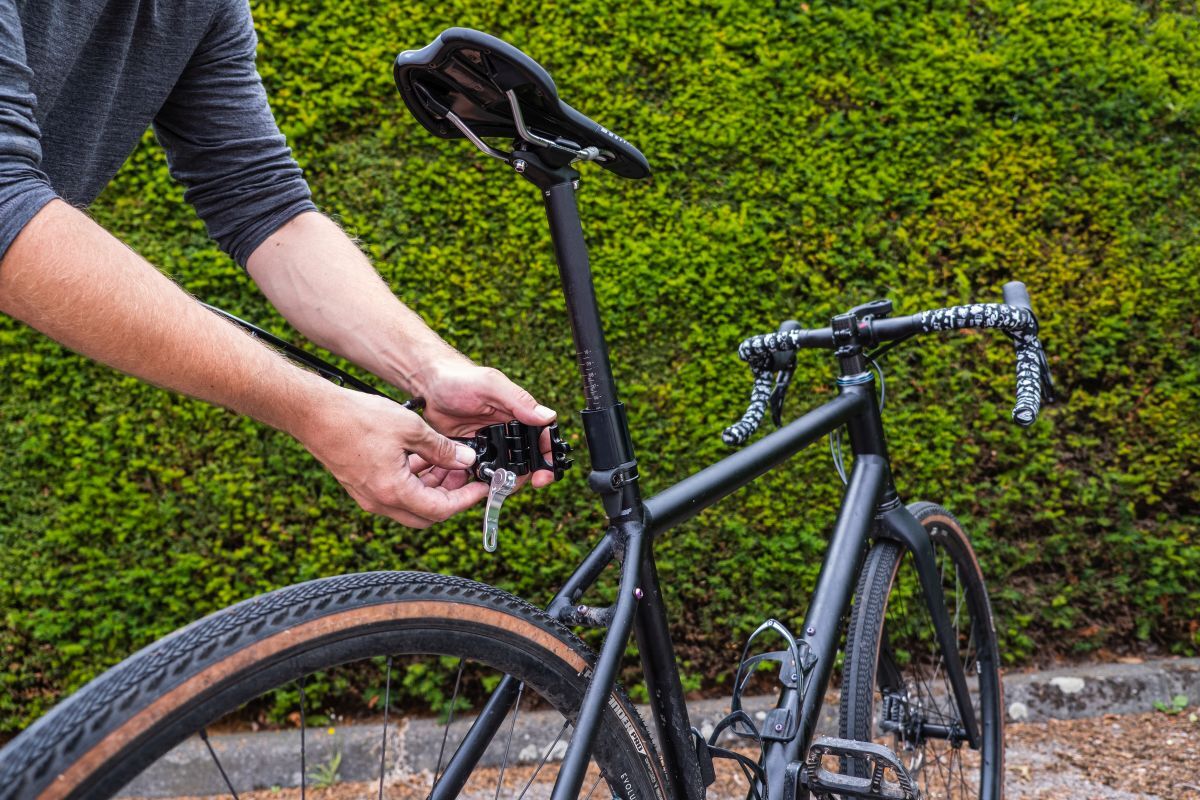
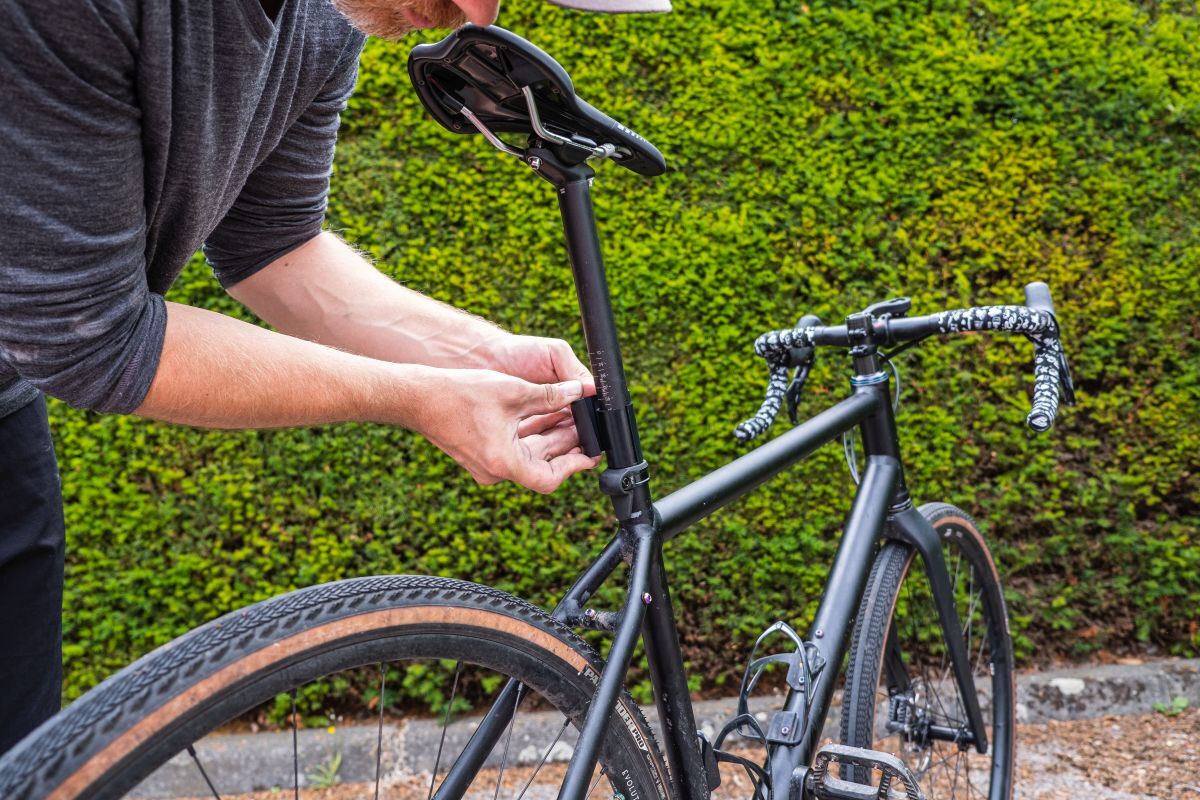
Step 2: Attach the seat-post pannier rack using a quick-release
Now, unscrew the counter nut of the quick-release, remove it and open the clamp at the hinge to attach the clamp, including the rubber ring, to the seat post. Next, insert the quick-release at the clamp, screw the counter nut onto the quick-release axle and lock the rack onto the seat post by closing the quick-release lever.
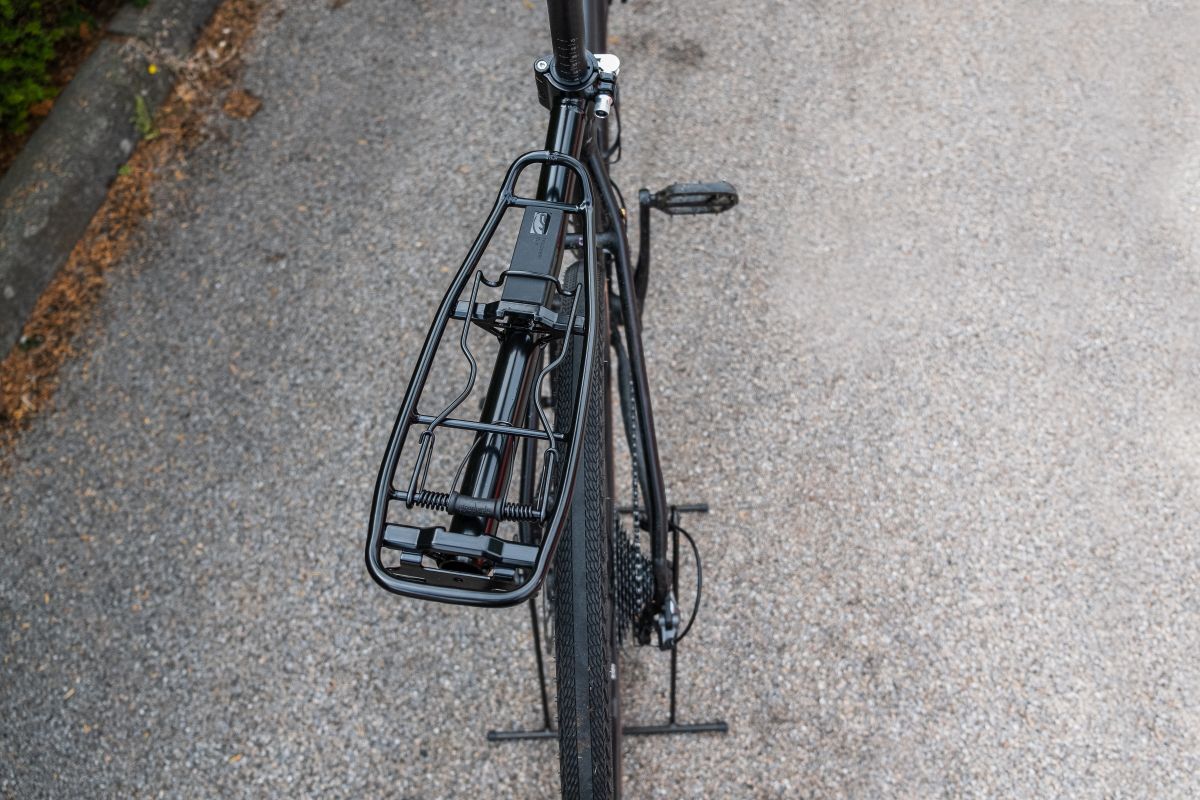
Step 3: Aligning the rack on the seat post
Before fully tightening the quick-release clamp, check that the rack is aligned with the bike, standing behind the bike. It should be positioned so that there is enough space for luggage on the loading surface, and sufficient clearance between the rack and the rear wheel. For a fully suspended bike, compress the rear wheel suspension by forcefully pushing on the saddle with your body weight (standing next to the bike) to ensure that the rear wheel does not touch the rack. If it does, the rack must be positioned higher. Finally, tighten the quick-release until the impression of the lever is briefly visible on the palm of your hand. Finished!


More about luggage carriers and bags
You want to know more about bags and carrier systems? Here you can choose different rack systems and matching bags