
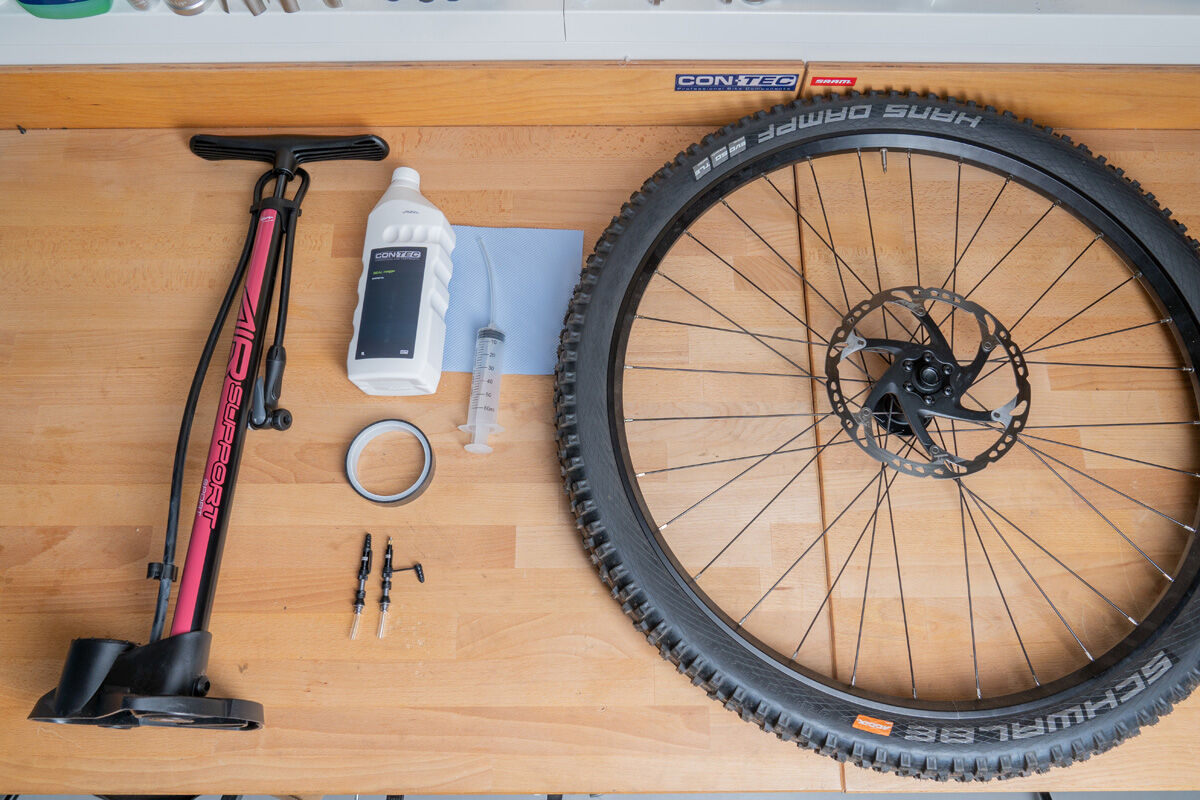
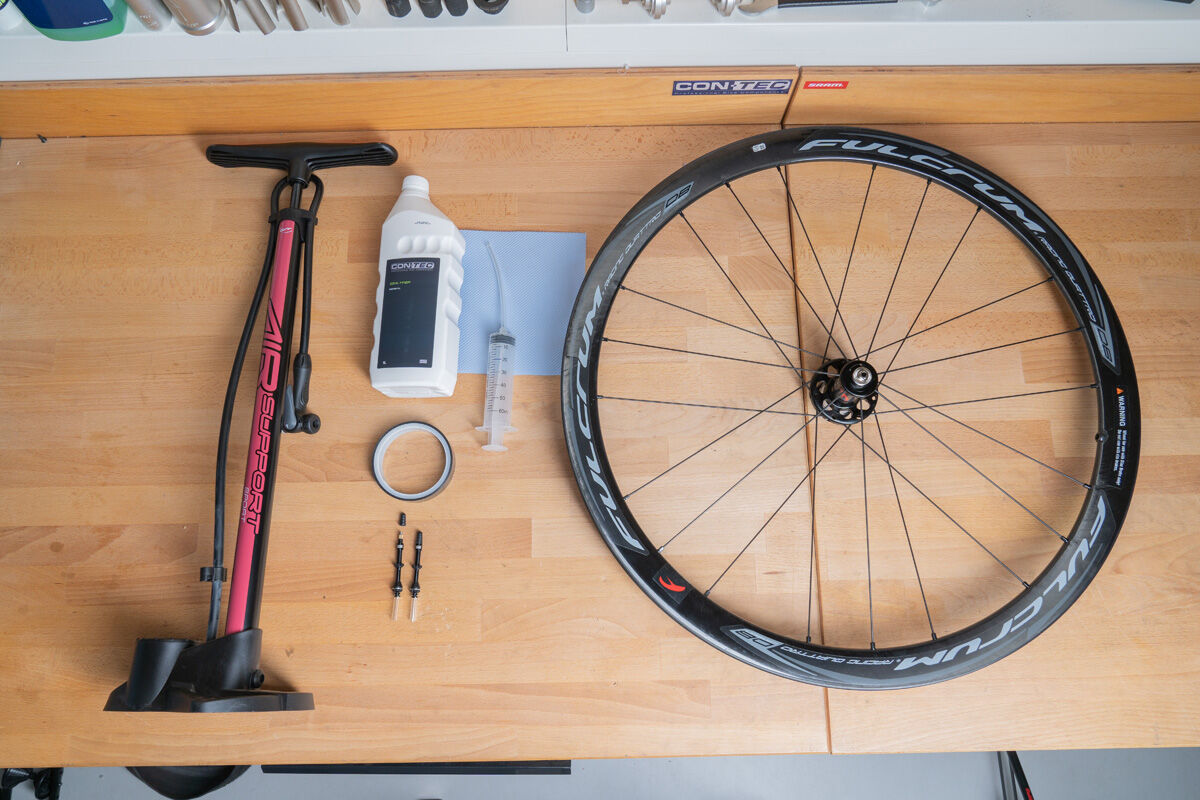
WAS BRAUCHE ICH FÜR DIE MONTAGE VON TUBELESS-REIFEN?
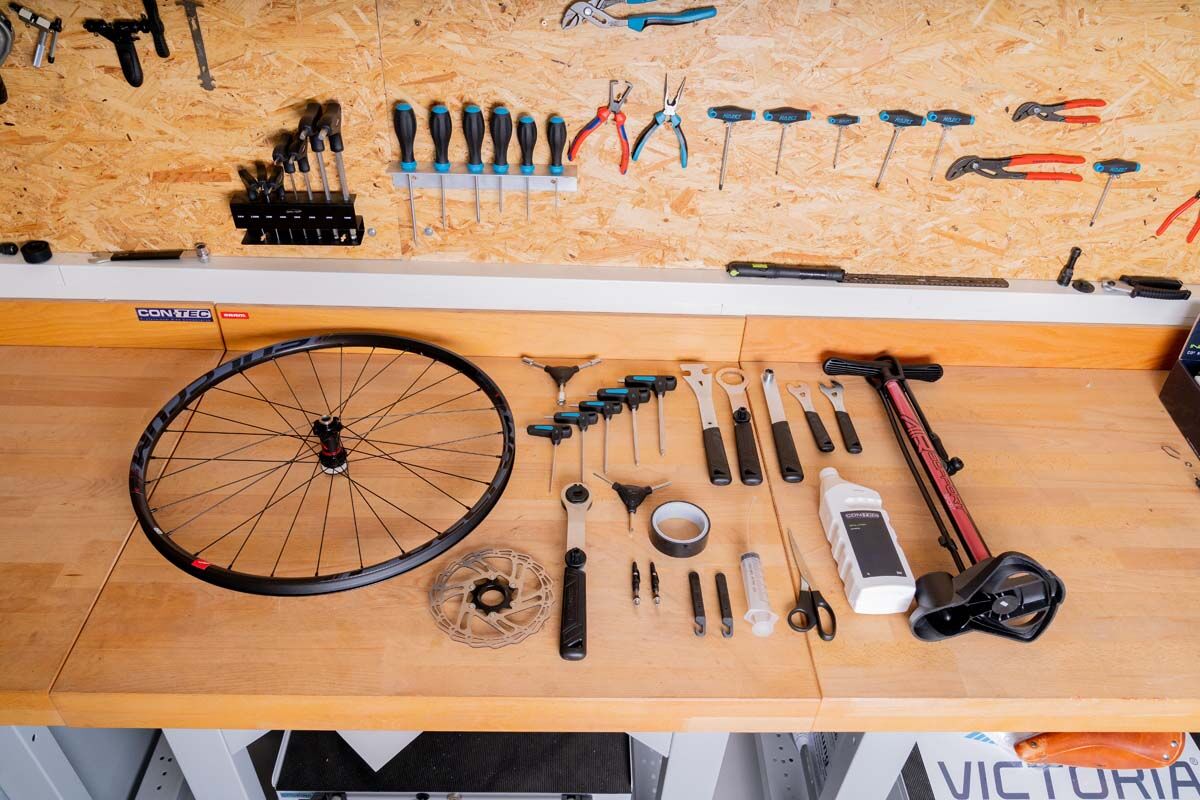
- Tubeless-Reifen
- Tubeless-Felgenband in richtiger Breite
- Tubeless-Ventile
- Dichtmilch
- Bremsenreiniger bzw. Entfetter
- Standpumpe (für CONTEC „FastAir TL“ Ventile ausreichend; für herkömmliche Tubeless-Ventile benötigst du einen Kompressor, Druckbehälter oder eine spezielle Standpumpe für Tubeless-Reifen)


Step 3: Inserting the tubeless valve
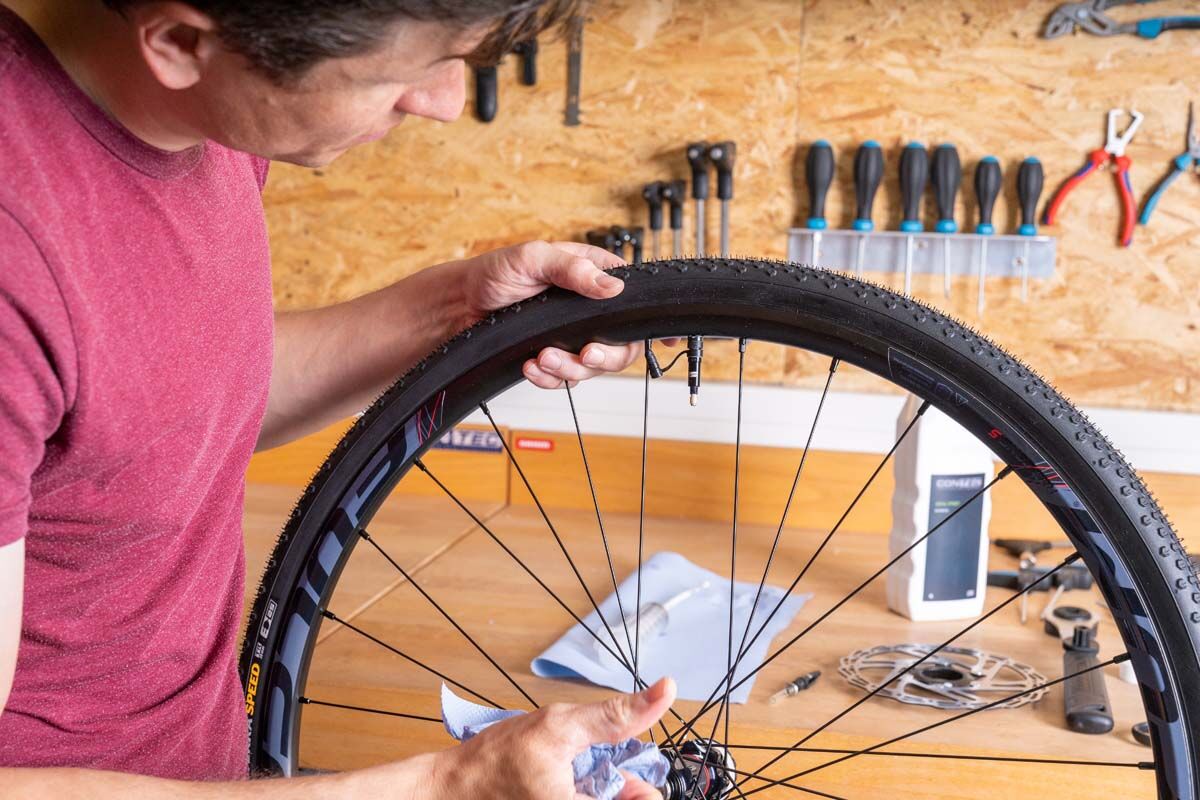
Step 4: Mounting the tyre
Step 5: Inflating tubeless tyres
The inflation of a tubeless tyre is more demanding than tyres with tubes. In order for the bead of the tyre to seal with the rim edge, the bead must be pressed into it within seconds. To do this, you need a lot of air in a very short time. A normal bicycle pump usually cannot do this. However, with the CONTEC "FastAir TL" valves and the "FastAir TL Convertor Kits" you can get it done with a normal floor pump. A special pump is not necessary for this.
Step 6: Filling the tyre with sealant
Mounting tubeless tyres – this is how it works
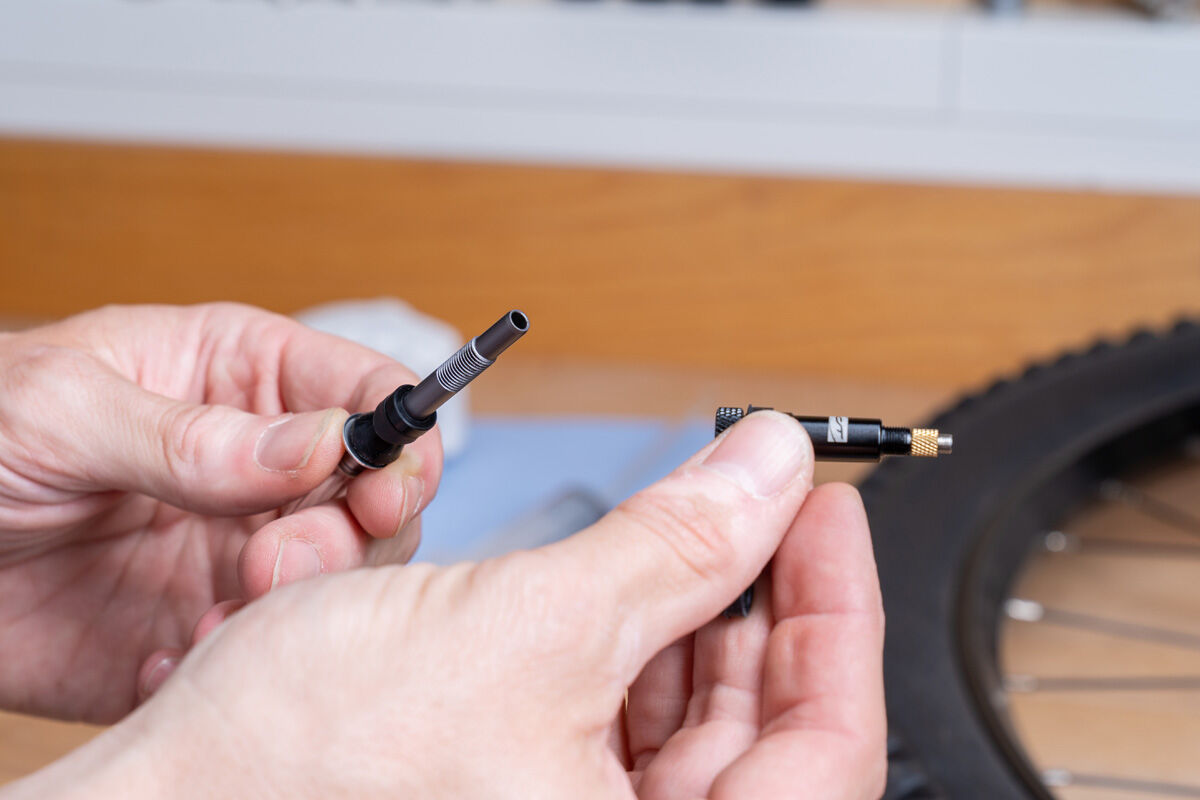
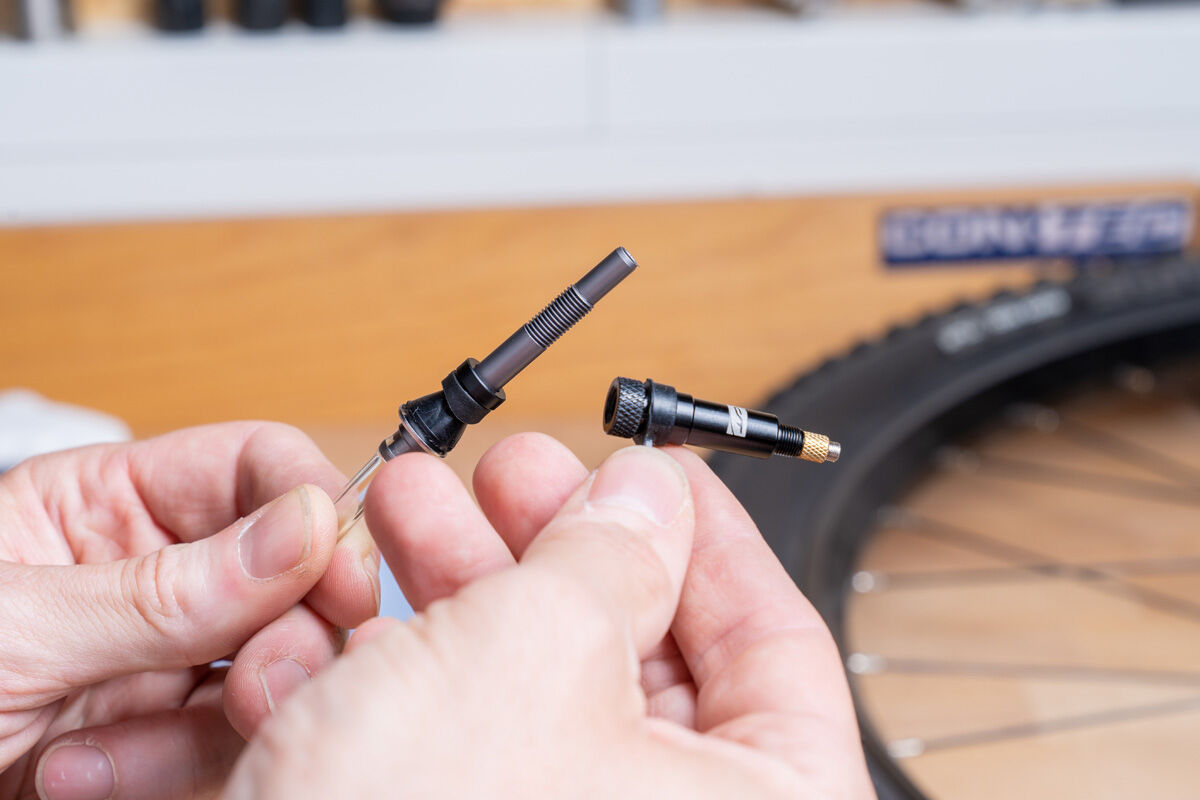
Our "FastAir TL" valve is available in "MTB" and "Road” versions. However, inserting the tubeless valve is different for each of them. That’s why we will explain both.
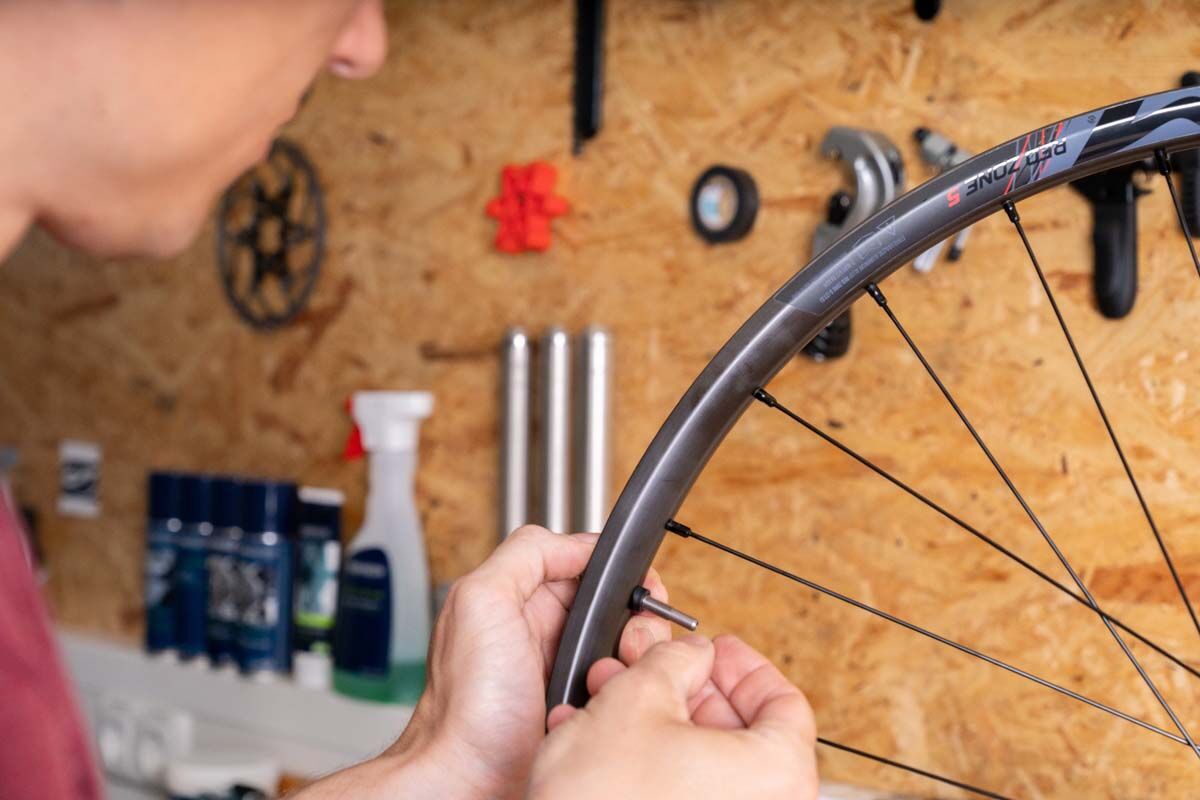
CONTEC "FastAir TL MTB” valve for Schrader valve holes
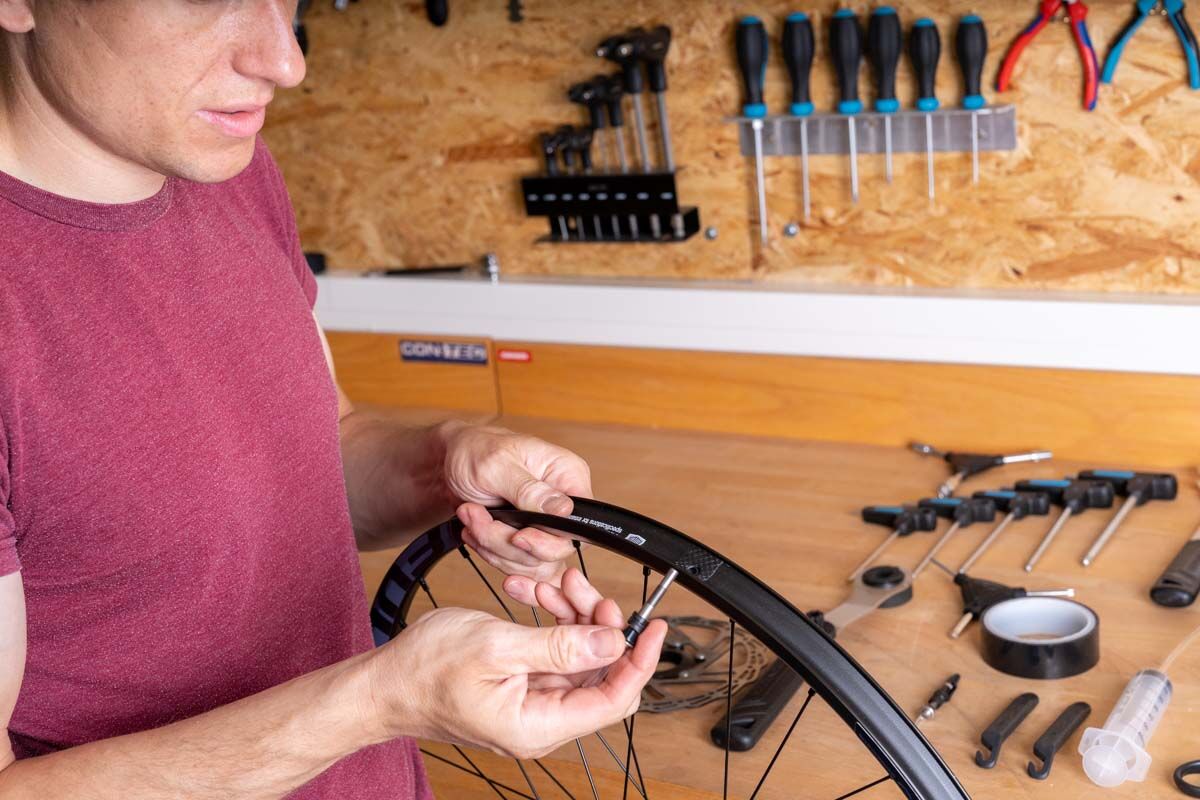
Unscrew the top of the valve so that you can slide the valve body with the rubber seal starting from the rim bed through the valve hole. Now screw the top part onto the valve body, but only so far that the valve can still be moved up and down in the valve hole.
Time needed: About one hour
Step 1: Removing old components
To remove the tube, first let the air out of the tyre. Now you can take off one side of the tyre. After the knurled nut has been removed from the valve, the tube can be removed. Now the tyre can also be completely removed.
If the old rim tape does not seal rim spoke holes, it needs to be removed and replaced with a special tubeless rim tape, more on this in step 2.
Step 2: Attaching new tubeless rim tape
In order to keep the air between tyre and rim, the spoke holes of the rim must be airtight. Therefore, a special tubeless rim tape is needed. To ensure optimum grip of the rim tape, the rim should be degreased beforehand. To do this, clean the rim bed thoroughly with brake cleaner. Start by attaching about 2 cm in front of the valve hole and stop about 2 cm after it, so that at the ends of the rim tape overlap at the valve hole.
When attaching rim tape, make sure that no air pockets are trapped under the it or that it creases. It needs to be air tight to ride tubeless. Therefore, press the rim tape carefully and pull on the tape to ensure a smooth fit. The rim tape is strong enough to pulled on hard. When finished taping, use a cutter to make a small cross in the rim tape over the valve hole, here the tubeless valve is pushed through in the next step.

A conversion to tubeless tyres has many advantages and is not difficult. Many wheels and tyres are already "Tubeless Ready", i.e. prepared for tubeless assembly, which means saying goodbye to tubes without too much hassle.
The advantages of tubeless tyres at a glance:
- No tube that can go flat
- Small holes do not cause flats, but are immediately sealed
- Tubeless tyres can be ridden with lower pressure
- The tyre moulds better to the ground
- Reduced rolling resistance


Now you can mount the tyre directly with both beads. Pay attention to the indicated direction of rotation. When the tyre is completely on the rim, push the tubeless valve down and up from above to make sure it is not stuck to the tyre beads and is straight. Now tighten the knurled nut or the upper part of the valve so that the valve hole is sealed with by rubber seal on the valve.
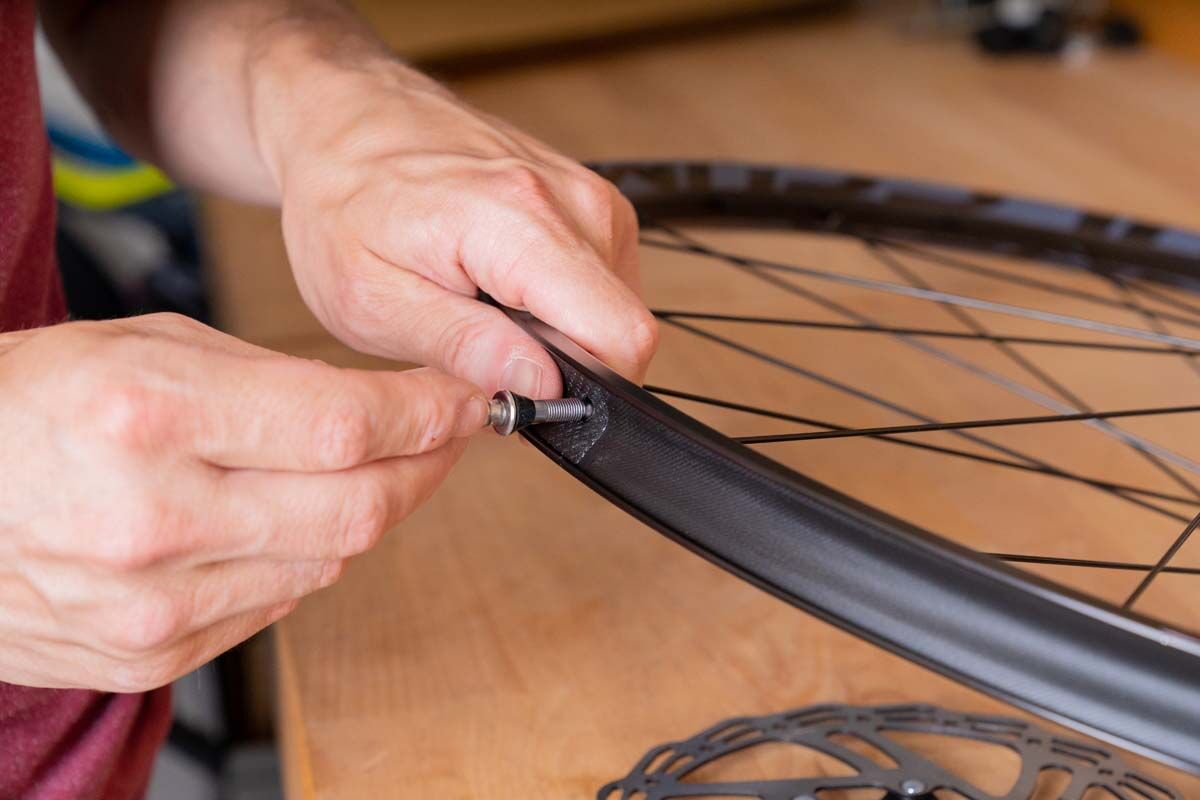
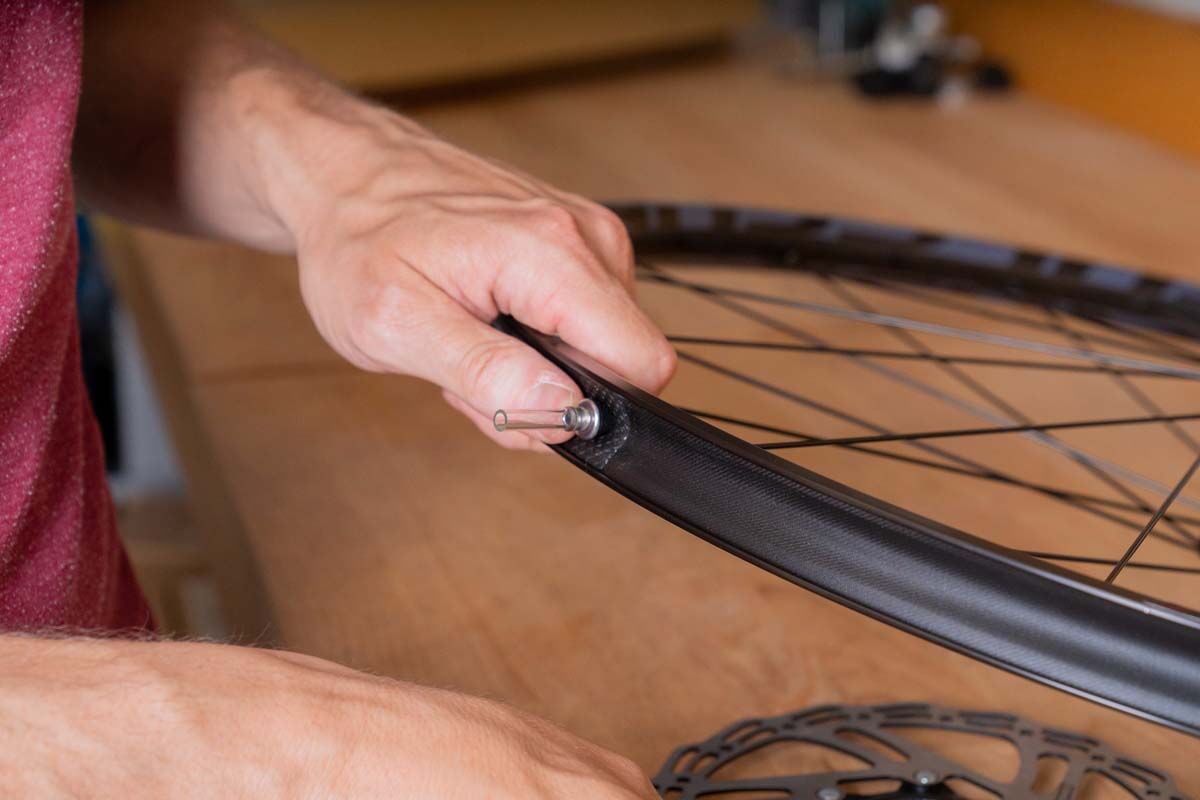
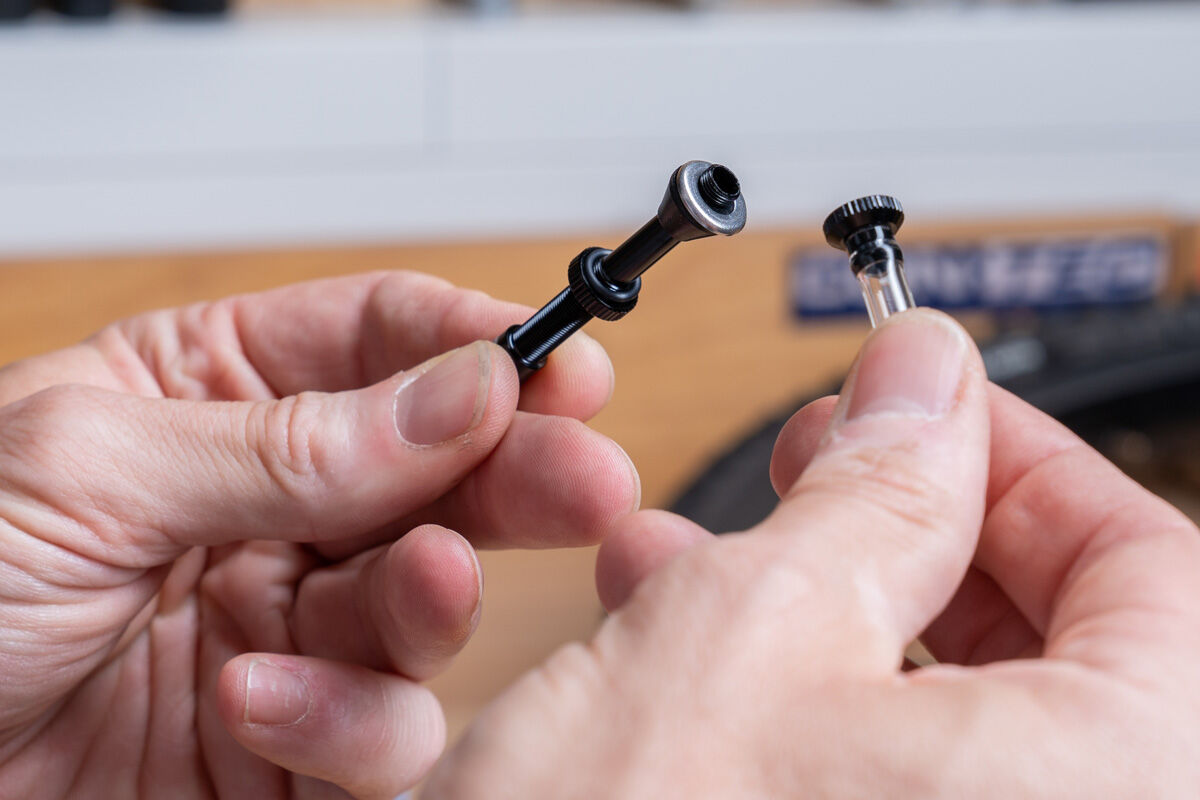
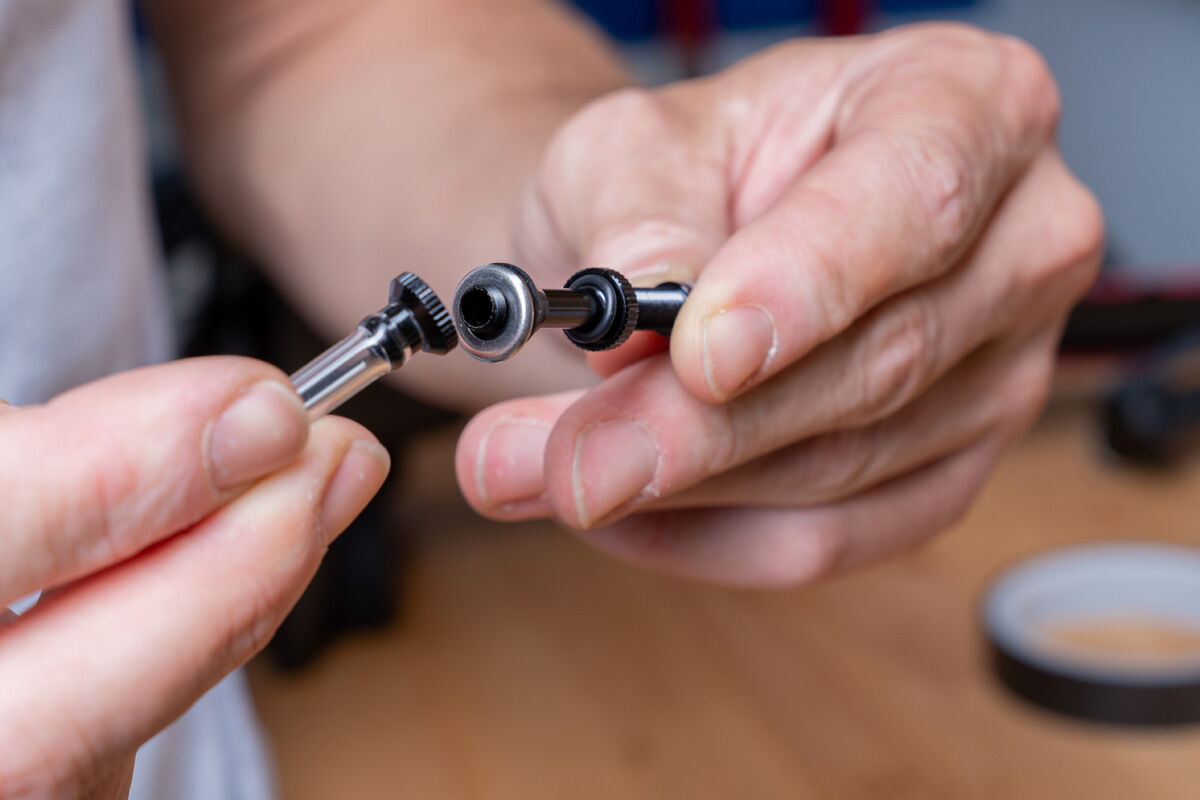
Additional step for our CONTEC tubeless valves


If you are using our tubeless valve "Fast Air", you need to shorten the extraction tube of the valve with a pair of scissors before the final tyre assembly, so that it is suitable for the tyre height and you can later check the level of the sealant.
Pumping with "FastAir TL" valves


Unscrew the valve core, attach the pump valve head and start pumping until you hear the tyre seat itself. Depending on the capacity of the pump, you will need to pump a little faster so that there is enough pressure in the tyre to allow the beads to jump into the rim. Continue pumping until you reach the desired tyre pressure. The next step is adding sealant because the tyre pressure won’t last long without it.
Pumping using conventional tubeless valves
With conventional tubeless valves, you have to use a compressor, pressure tank (also called a tyre booster or air tank) or a special tubeless pump. All of these allow you to build up the necessary pressure to seat the beads of a tubeless tyre.
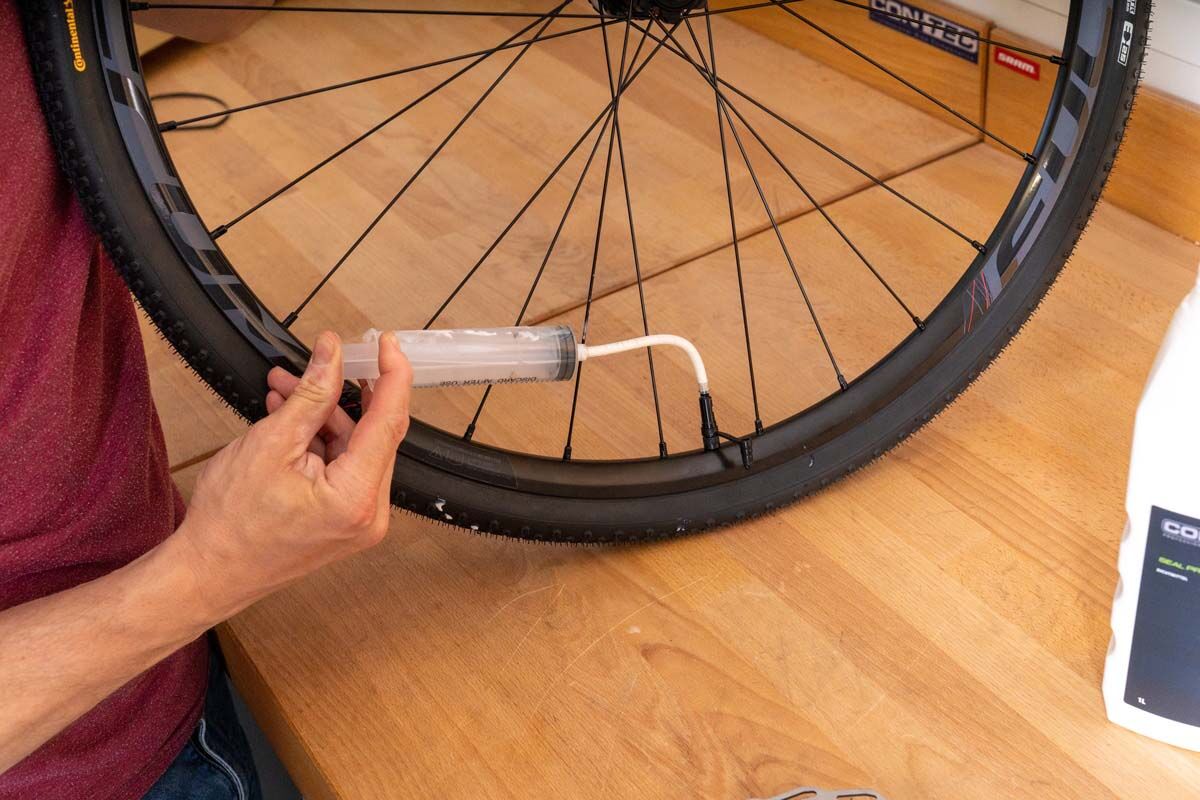
Bei „FastAir TL“ Ventilen:For "FastAir TL" valves: The sealant can be filled directly through the valve. The easiest way to do this is with our “Seal Prep Injector Kit”. Screw the valve core to open and let the air out of the tyre.
Shake the sealant well so that the ingredients that are supposed to seal the tyres are evenly distributed. Fill the "Injector Kit" with the sealant.
Turn the wheel so that the valve is at the lowest point. Place the filler tube on the open valve and push the sealant through the valve into the tyre.
For conventional tubeless valves: The sealant is filled via the valve. To do this, the valve core is screwed out. A tool for this is included in most tubeless kits. A funnel, a special bottle or a syringe can be used to fill the tyre with sealant. The amount of sealant in a tyre depends on the tyre size and width.
Guidelines for filling a tyre:
28-40 mm: 30-45 ml
2.0-2.5 inches: 60-90 ml
Step 7: Distributing sealant in the tyre
Once everything is filled, wipe off excess sealant with a cloth and close the valve.
Now turn the wheel a few times so that the sealant can spread well throughout the tyre.
Step 8: Inflating the tyre
Now you can fill the tyre with the desired pressure. To do this, turn the wheel so that the valve is at the top. Open the valve core and pump the desired pressure into your tyre. Then turn the wheel a few turns again so that the sealant can spread around.
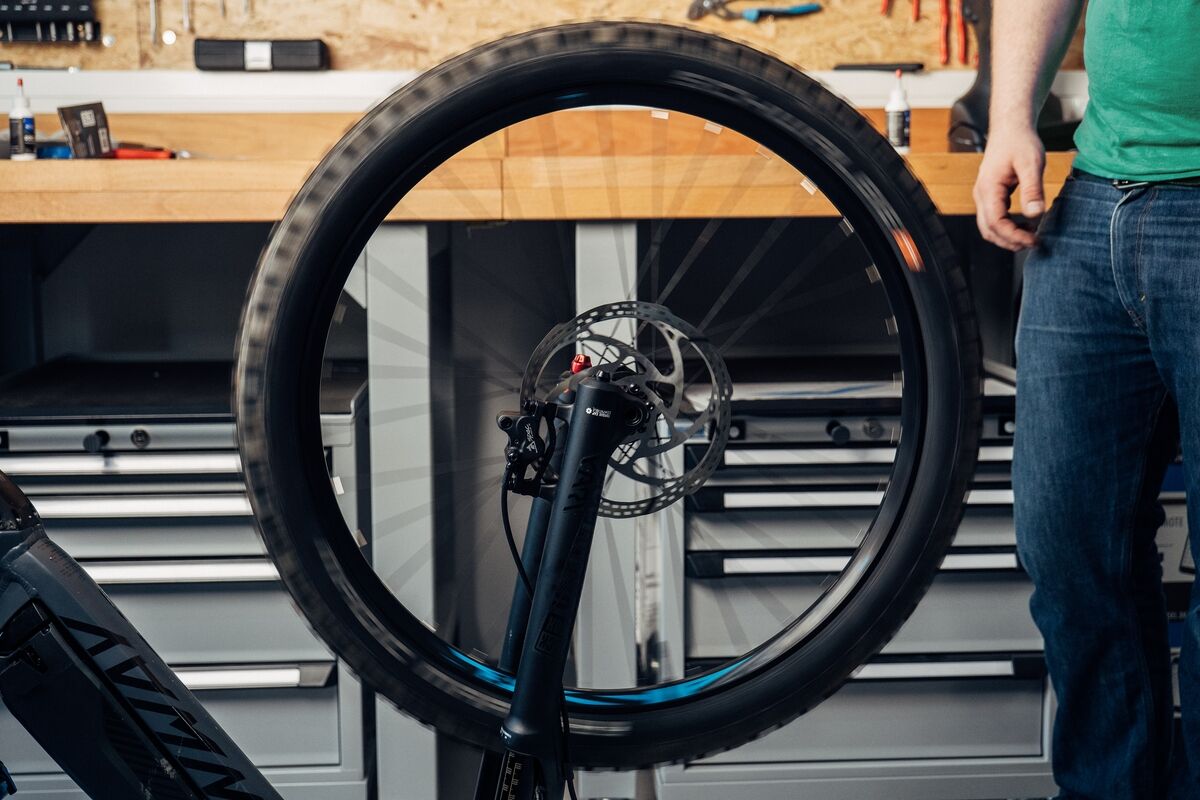
Now your wheels with tubeless tyres are ready to be mounted on the bike for your next ride.
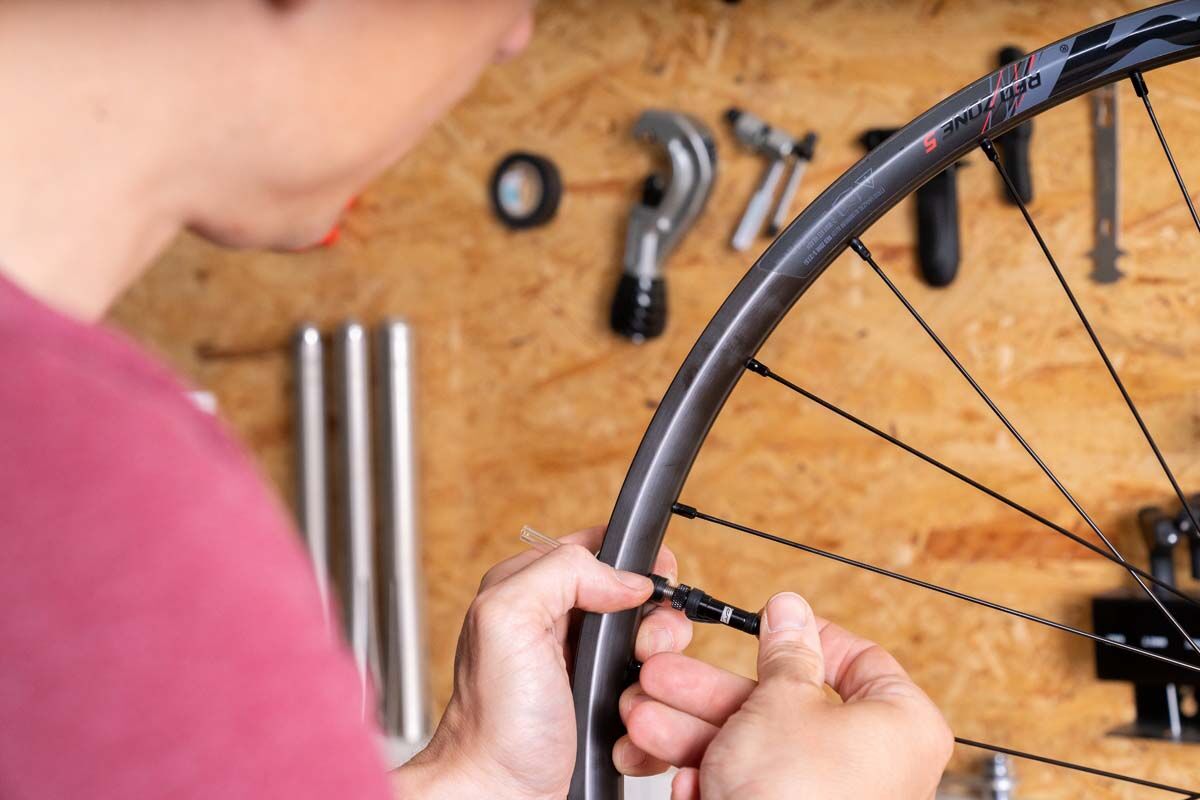
CONTEC "FastAir TL Road" for Presta rim holes
Unlike conventional tubeless valves, the "FastAir TL Road" has to be inserted from above into the valve hole. To do this, remove the lower part of the valve with the extraction tube at the screw below the large rubber seal and remove the washer and seal. Now you can insert the valve through the valve hole from above. Then put the seal and the washer on the valve body from below and finally screw the lower part back on completely. Make sure you do not tighten the knurled nut until you have completely mounted the tyre.
- Tubeless tyres
- Tubeless rim tape in the correct width
- Tubeless valves
- Brake cleaner
- Sealant
- Floor pump (sufficient for CONTEC "FastAir TL" valves; for conventional tubeless valves you need a compressor, pressure tank or a special floor pump for tubeless tyres)
What do I need for tubeless installation?
The YouTube video was blocked due to your cookie settings.